<?xml version="1.0" encoding="utf-8"?><feed xmlns="http://www.w3.org/2005/Atom" ><generator uri="https://jekyllrb.com/" version="4.4.1">Jekyll</generator><link href="https://packpedalplate.com/feed.xml" rel="self" type="application/atom+xml" /><link href="https://packpedalplate.com/" rel="alternate" type="text/html" /><updated>2025-09-04T00:38:16-04:00</updated><id>https://packpedalplate.com/feed.xml</id><title type="html">Pack Pedal Plate</title><subtitle>Packing smart. Going far. Eating well.</subtitle><entry><title type="html">Nemo Dragonfly OSMO 3P</title><link href="https://packpedalplate.com/gear/backcountry/nemo-dragonfly/" rel="alternate" type="text/html" title="Nemo Dragonfly OSMO 3P" /><published>2025-09-03T17:00:00-04:00</published><updated>2025-09-03T17:00:00-04:00</updated><id>https://packpedalplate.com/gear/backcountry/nemo-dragonfly</id><content type="html" xml:base="https://packpedalplate.com/gear/backcountry/nemo-dragonfly/"><![CDATA[<h1 id="field-tested-why-we-chose-the-nemo-dragonfly-osmo-3p-tent-for-bikepacking-and-backcountry-camping">Field-Tested: Why We Chose the NEMO Dragonfly OSMO 3P Tent for Bikepacking and Backcountry Camping</h1>

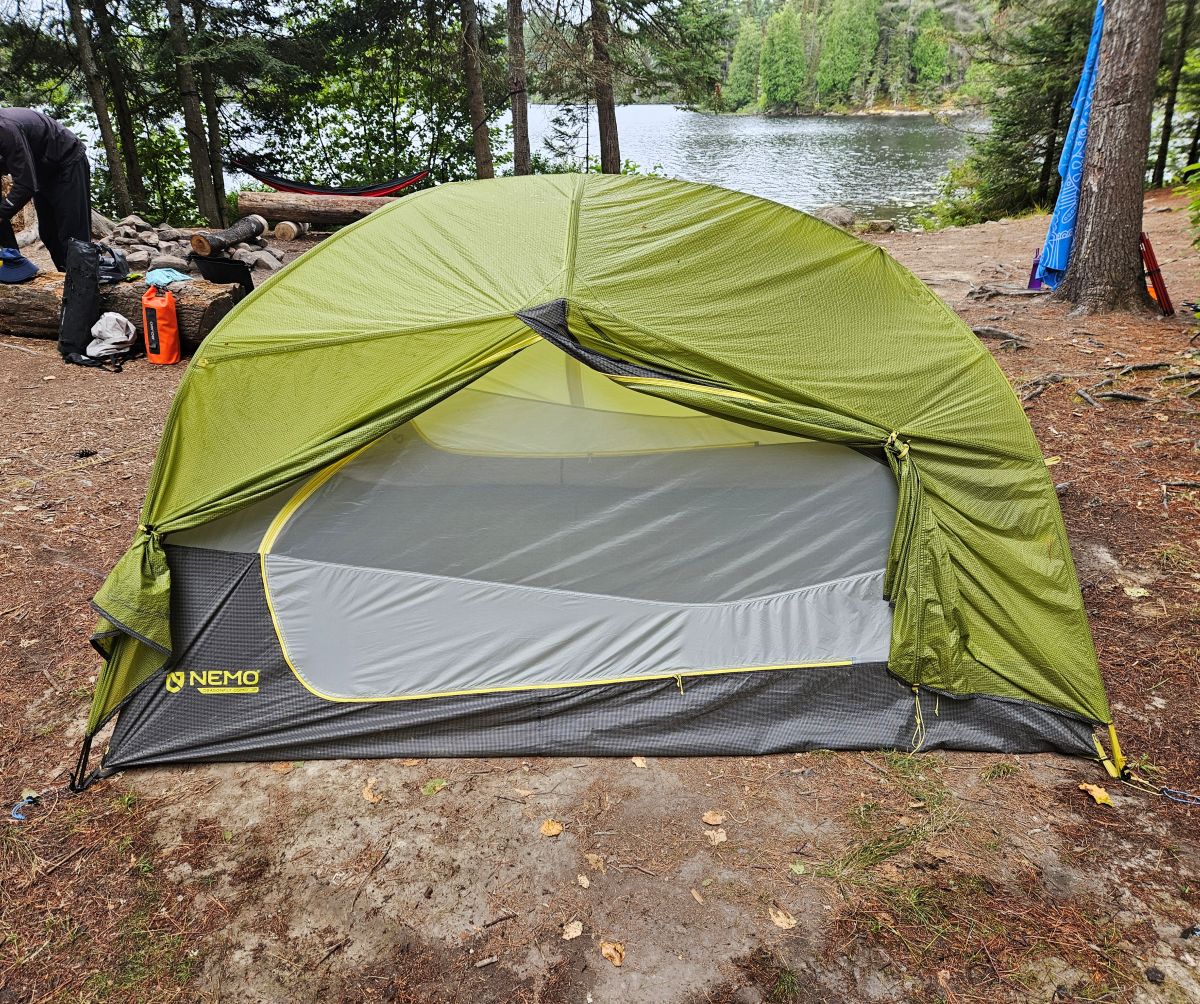
<div style="display: flex; flex-wrap: wrap; gap: 1rem; justify-content: center;">
  <div style="flex: 1 1 30%; text-align: center;">
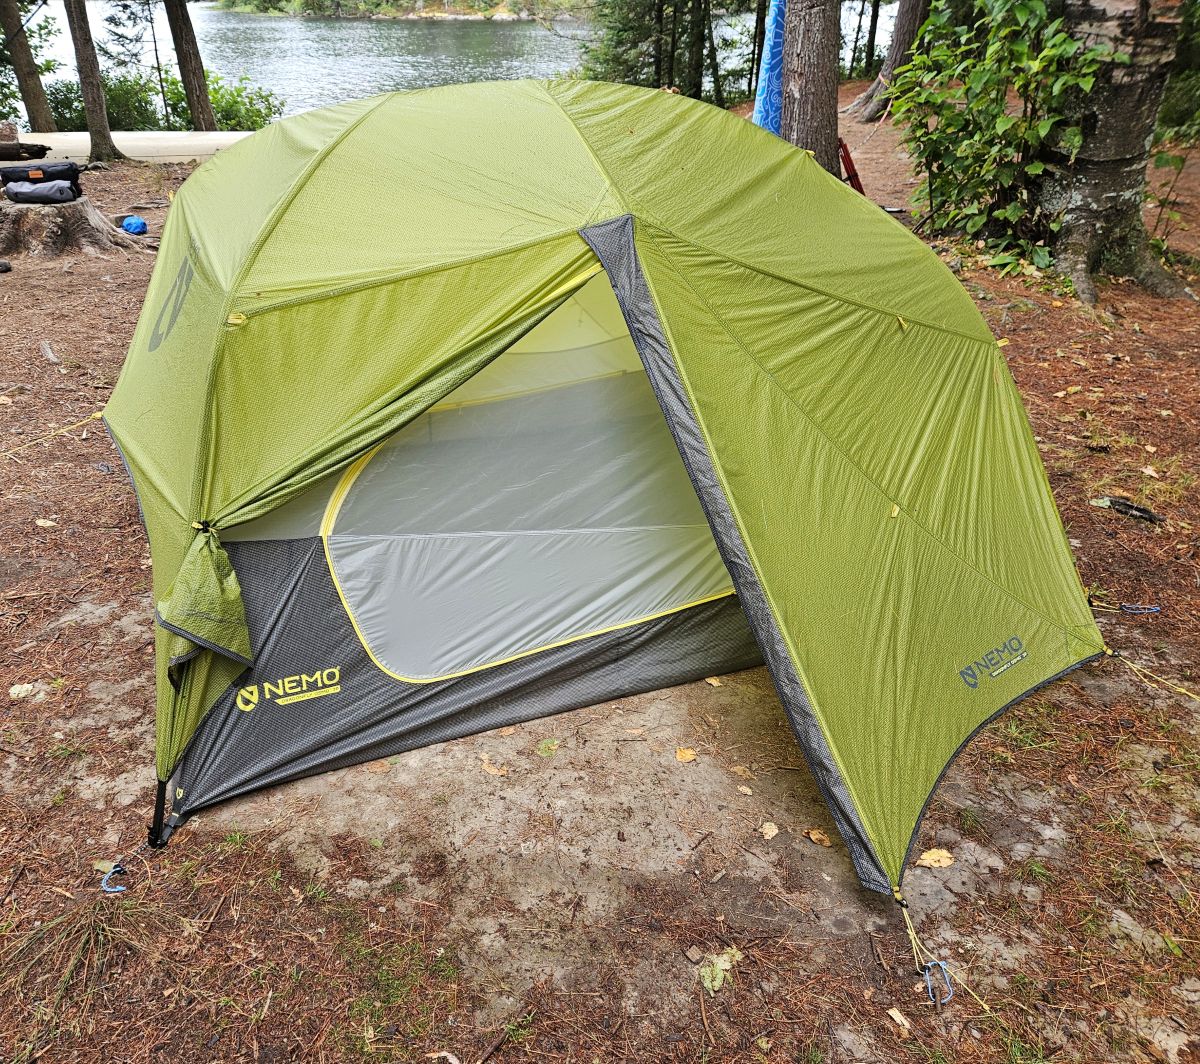
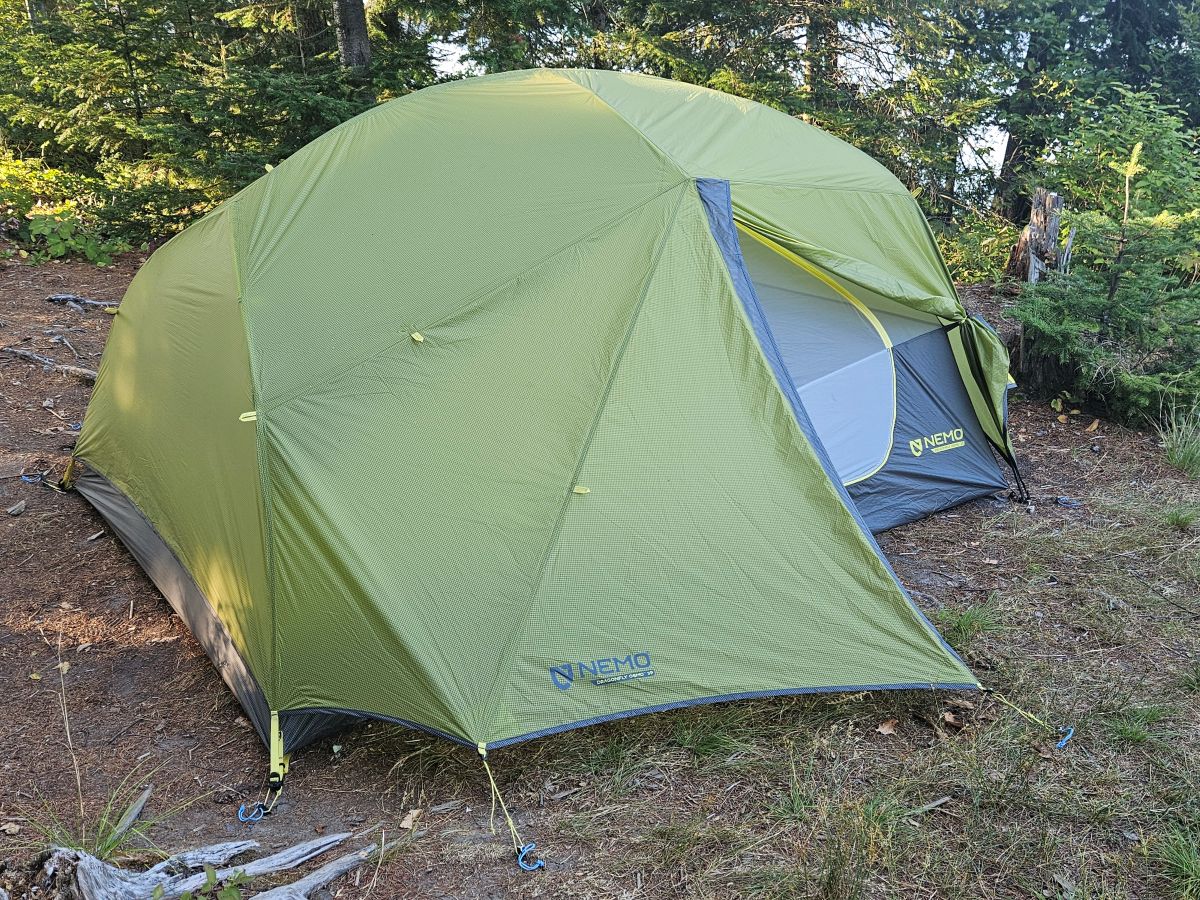
    <img src="/assets/images/posts/2025-09-03-nemo-dragonfly/NT_4.jpg" alt="Nemo Dragonfly 3P set up" style="width: 100%; height: auto; border-radius: 8px;" />
  </div>
</div>
<p><br /></p>

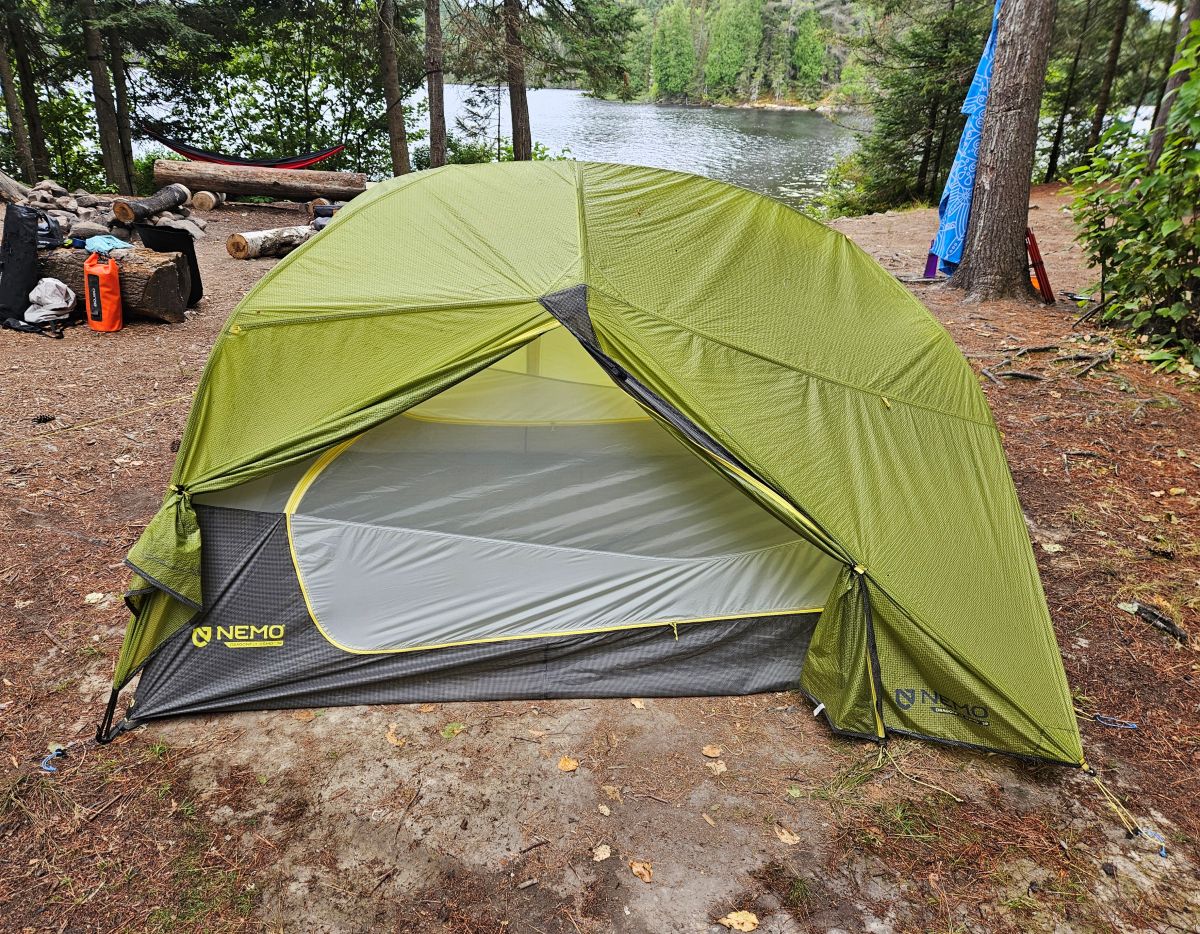
<p>When it came time to upgrade our shelter system for multi-day backcountry trips, we spent a good chunk of time researching ultralight tents that could check all the right boxes: small pack size, weather protection, ease of setup, and the ability to comfortably fit two people and a medium sized dog. After comparing specs and reading way too many reviews, we landed on the <a href="https://www.nemoequipment.com/en-ca/products/dragonfly-osmo?srsltid=AfmBOoprmAT2X33lk-OmFJ7KYXpMFHl4QQ9bbOE0J43OA8XEediSnSOJ&amp;variant=42025834545325">NEMO Dragonfly OSMO 3P</a>. We’ve now used it for bikepacking, interior backcountry trips, and some fair-weather overnighters. It’s held up well and we’re excited to tell you about it.</p>

<p>It’s not the cheapest tent on the market, and it’s definitely not the roomiest, but for our backcountry needs of being lightweight, compact, and quick to pitch, it’s perfect.</p>

<hr />

<h2 id="technical-specifications">Technical Specifications</h2>

<table>
  <thead>
    <tr>
      <th>Spec</th>
      <th>Detail</th>
    </tr>
  </thead>
  <tbody>
    <tr>
      <td><strong>Capacity</strong></td>
      <td>3-Person</td>
    </tr>
    <tr>
      <td><strong>Minimum Trail Weight</strong></td>
      <td>3 lb 6 oz (1.53 kg)</td>
    </tr>
    <tr>
      <td><strong>Packed Weight</strong></td>
      <td>3 lb 14 oz (1.76 kg)</td>
    </tr>
    <tr>
      <td><strong>Packed Size</strong></td>
      <td>16 x 4 x 4 in (40 x 10 x 10 cm)</td>
    </tr>
    <tr>
      <td><strong>Floor Dimensions</strong></td>
      <td>88 x 70/65 in (224 x 178/165 cm)</td>
    </tr>
    <tr>
      <td><strong>Floor Area</strong></td>
      <td>41.2 sq ft (3.83 sq m)</td>
    </tr>
    <tr>
      <td><strong>Vestibule Area</strong></td>
      <td>20 sq ft (1.86 sq m) total</td>
    </tr>
    <tr>
      <td><strong>Peak Height</strong></td>
      <td>44 in (111 cm)</td>
    </tr>
    <tr>
      <td><strong>Poles</strong></td>
      <td>DAC Featherlite NFL</td>
    </tr>
    <tr>
      <td><strong>Canopy Fabric</strong></td>
      <td>OSMO™ Ripstop (poly/nylon blend)</td>
    </tr>
    <tr>
      <td><strong>Fly Fabric</strong></td>
      <td>OSMO™ Ripstop</td>
    </tr>
    <tr>
      <td><strong>Floor Fabric</strong></td>
      <td>OSMO™ Ripstop, 1200 mm waterproof rating</td>
    </tr>
  </tbody>
</table>

<hr />

<div style="display: flex; flex-wrap: wrap; gap: 1rem; justify-content: center;">
  <div style="flex: 1 1 30%; text-align: center;">
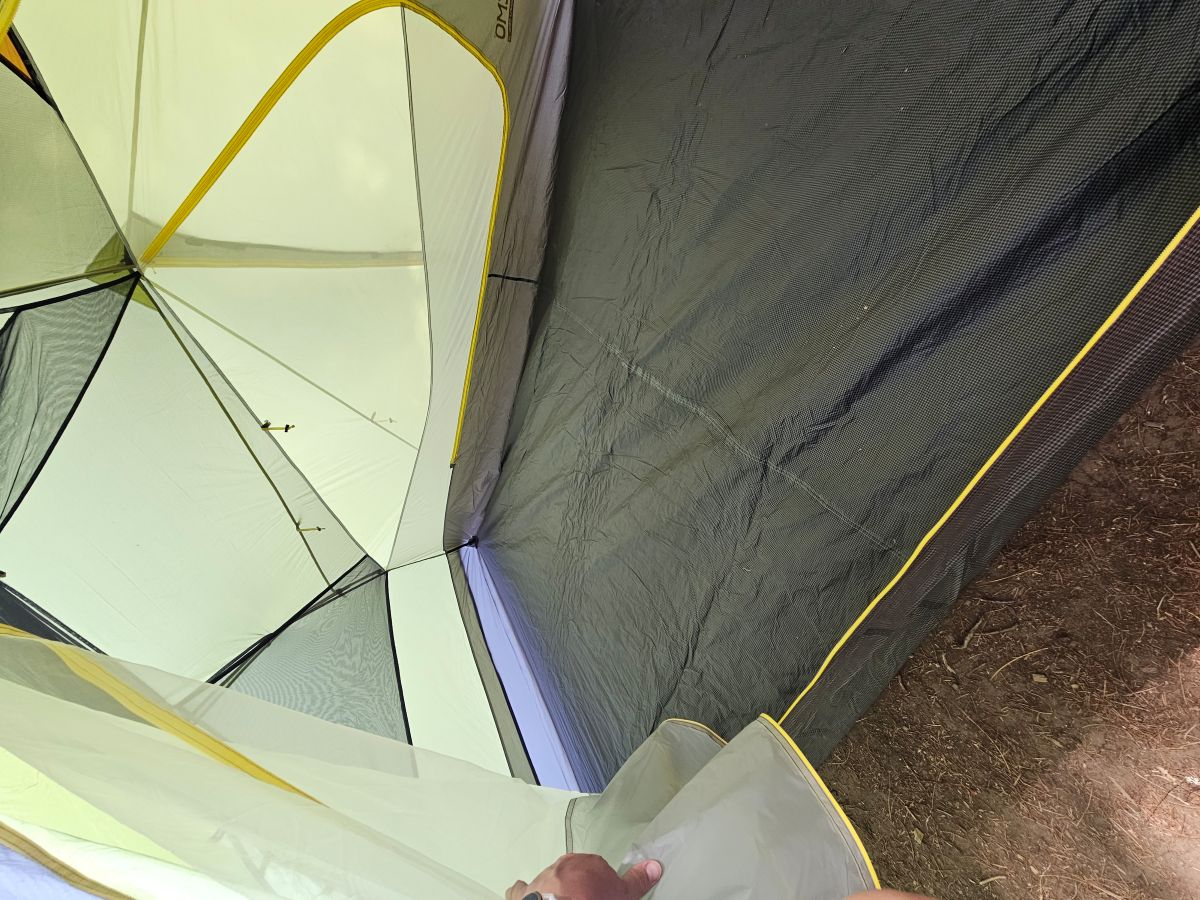
    <img src="/assets/images/posts/2025-09-03-nemo-dragonfly/NT_1.jpg" alt="dragonfly from the foot end" style="width: 100%; height: auto; border-radius: 8px;" />
  </div>

  <div style="flex: 1 1 30%; text-align: center;">
    <img src="/assets/images/posts/2025-09-03-nemo-dragonfly/NT_2.jpg" alt="dragonfly from the head end" style="width: 100%; height: auto; border-radius: 8px;" />
  </div>

  <div style="flex: 1 1 30%; text-align: center;">
    <img src="/assets/images/posts/2025-09-03-nemo-dragonfly/NT_3.jpg" alt="another view of the dragonfly from the end" style="width: 100%; height: auto; border-radius: 8px;" />
  </div>
</div>
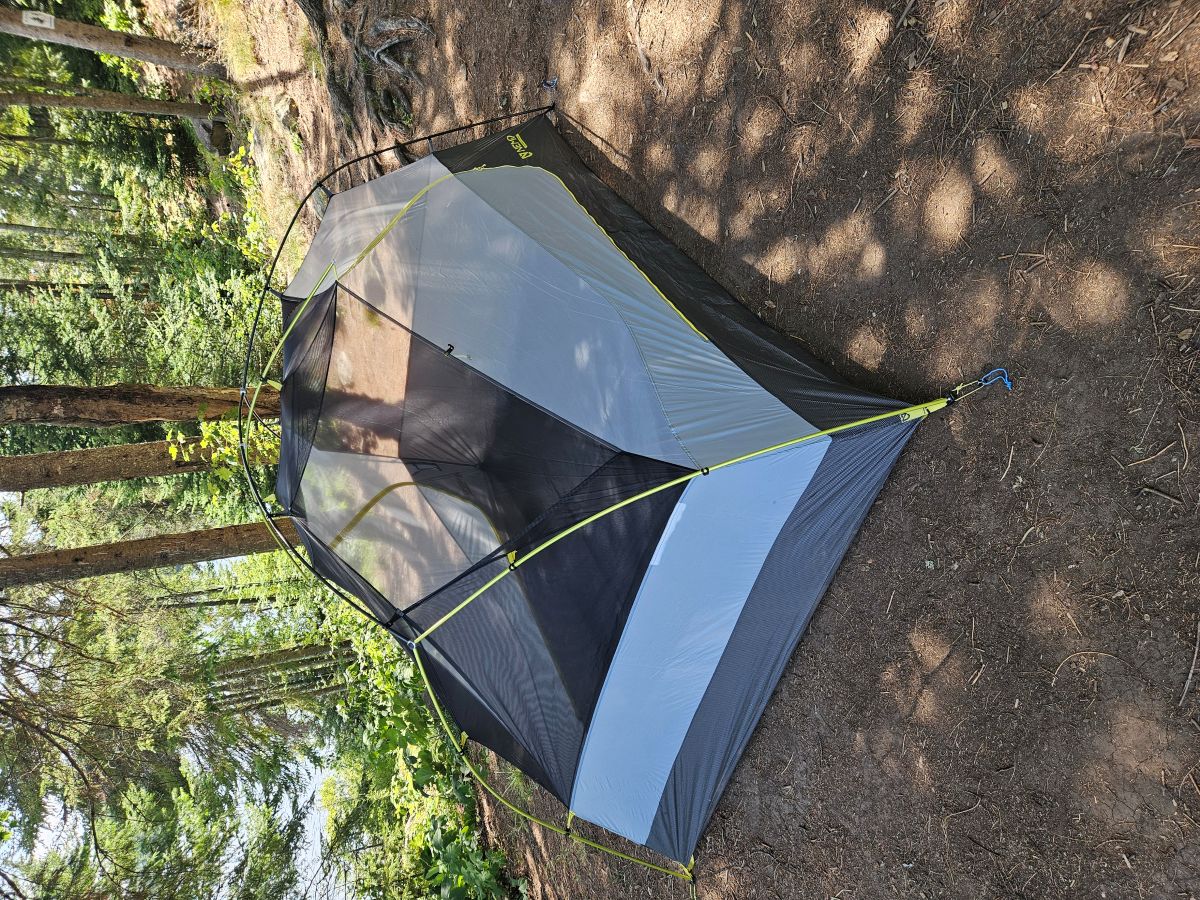
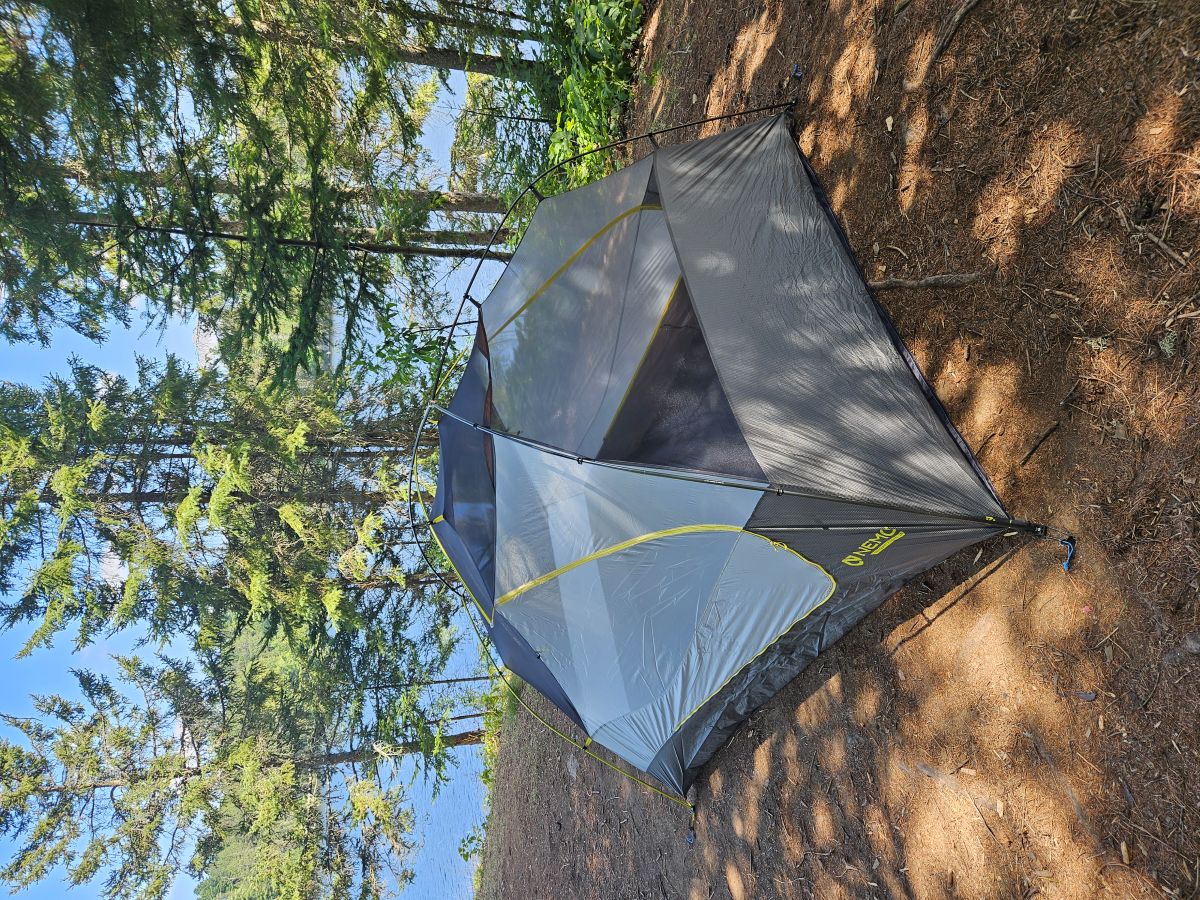
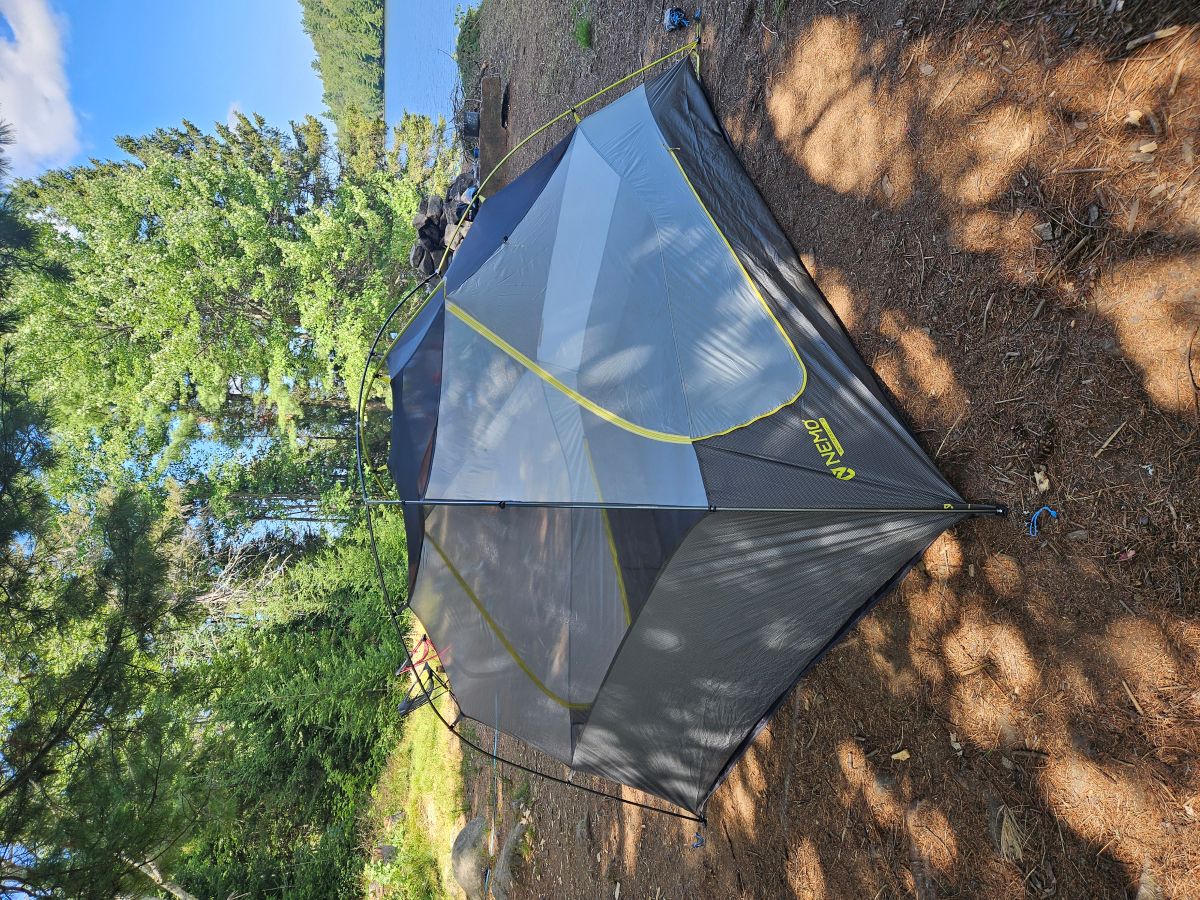
<p style="font-size: 0.9em; color: #666; text-align: center;">The Nemo Dragonfly without the fly.</p>

<h2 id="what-is-osmo-ripstop">What is OSMO™ Ripstop?</h2>

<p>OSMO™ is NEMO’s proprietary fabric, designed to improve on common ultralight tent materials. It’s a polyester-nylon composite ripstop with a few standout traits:</p>

<ul>
  <li>
    <p><strong>Water resistance without PU or Sil coatings</strong><br />
Coatings like polyurethane or silicone degrade over time, especially with UV exposure. OSMO avoids them, which means it absorbs less water, doesn’t sag when wet, and maintains waterproofing longer.</p>
  </li>
  <li>
    <p><strong>Stretch resistance</strong><br />
OSMO holds its shape in damp or humid conditions, keeping your pitch taut.</p>
  </li>
  <li>
    <p><strong>Sustainability</strong><br />
Made with recycled, solution-dyed yarns, reducing water use and emissions.</p>
  </li>
  <li>
    <p><strong>Durability</strong><br />
Balances nylon’s abrasion resistance with polyester’s UV stability, plus the ripstop weave helps prevent tears.</p>
  </li>
</ul>

<hr />

<h2 id="features-we-actually-use">Features We Actually Use</h2>

<p>The Dragonfly OSMO comes loaded with features, but here’s what makes a real difference in the field:</p>

<ul>
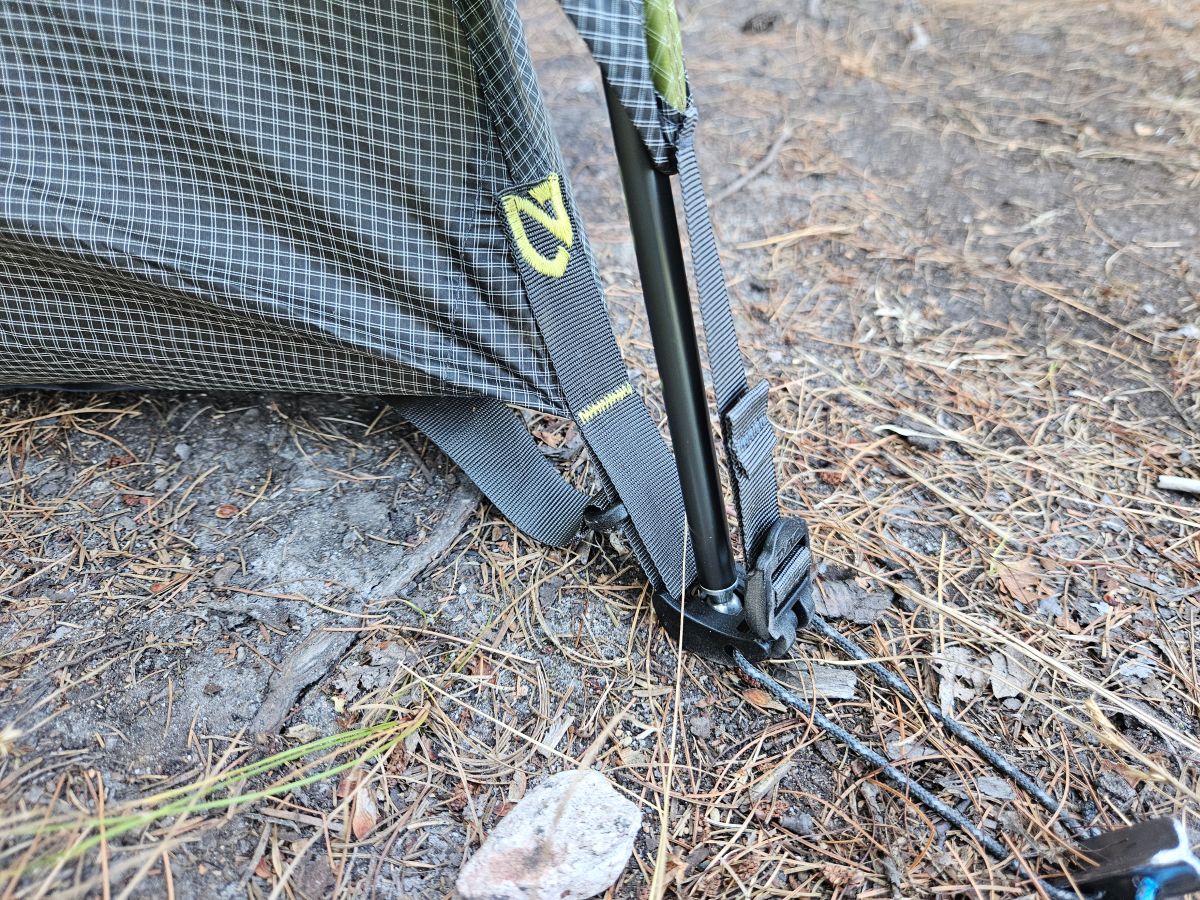
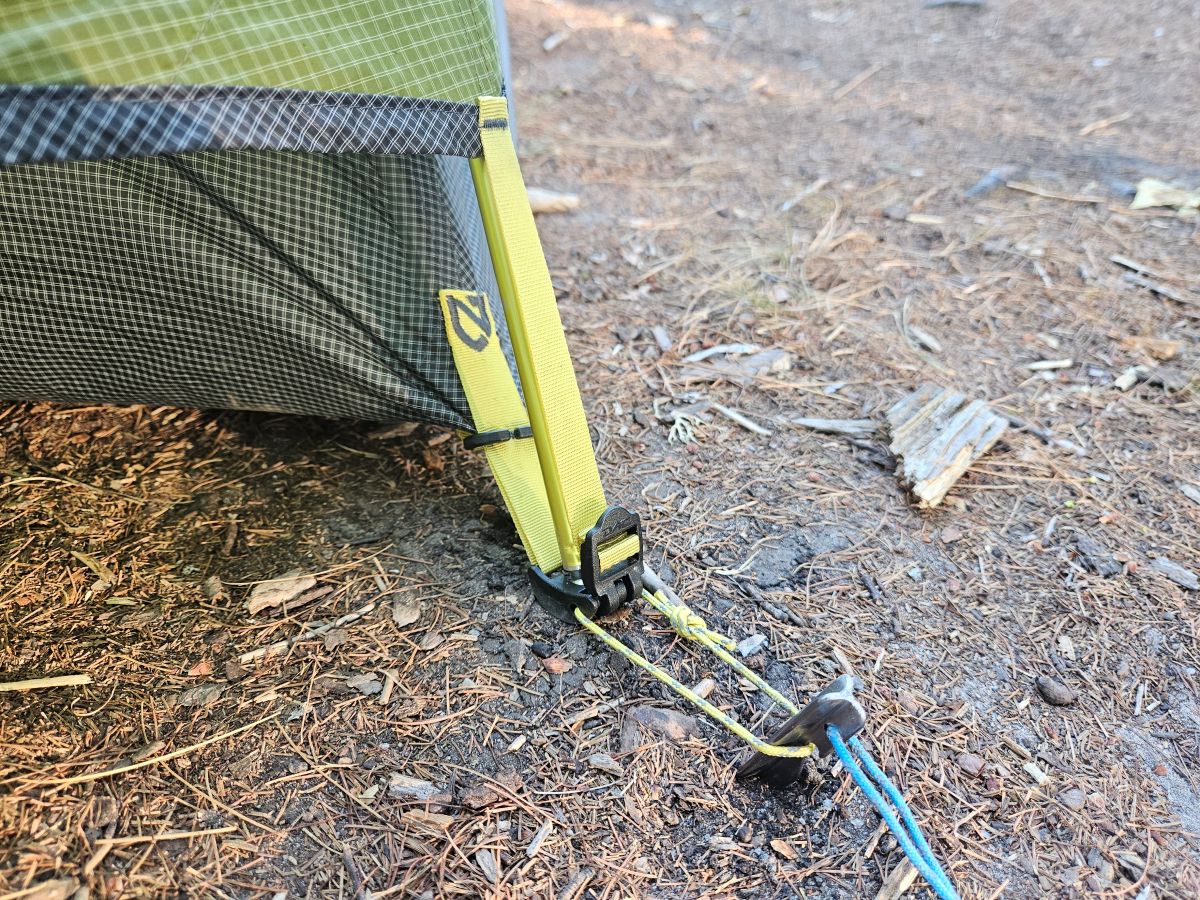
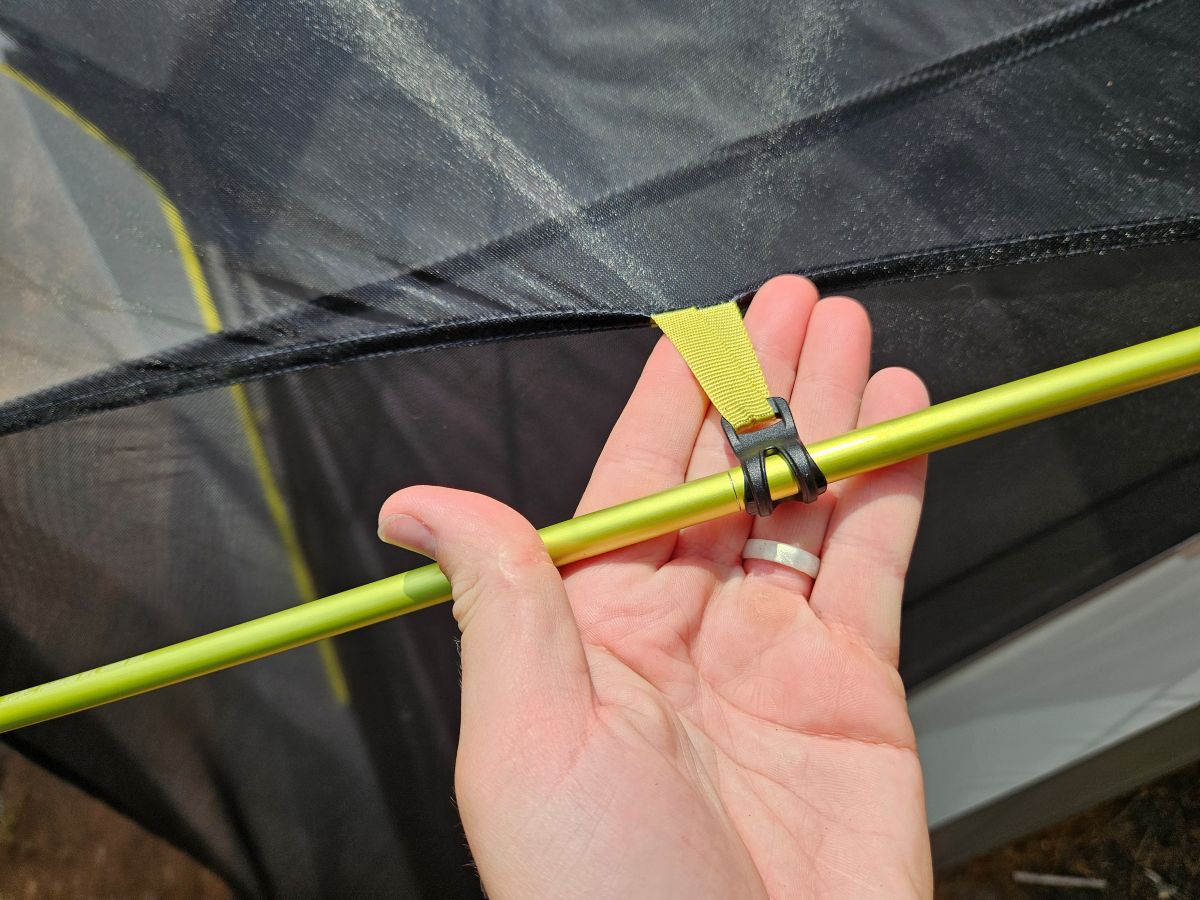
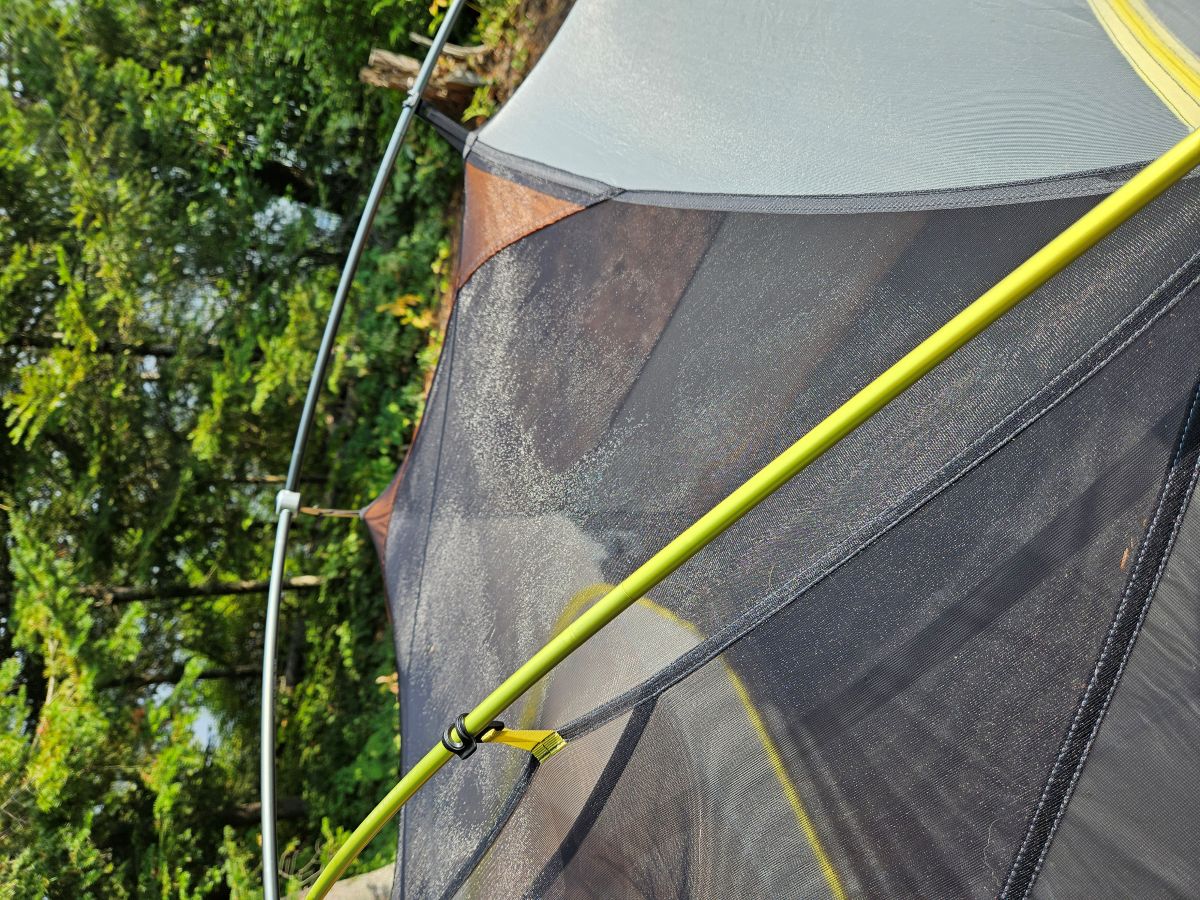
  <li><strong>Colour-coded poles and corner hardware</strong> – Quick, intuitive setup even when you’re exhausted.</li>
</ul>

<div style="display: flex; flex-wrap: wrap; gap: 1rem; justify-content: center;">
  <div style="flex: 1 1 40%; text-align: center;">
    <img src="/assets/images/posts/2025-09-03-nemo-dragonfly/NT_8.jpg" alt="poles and tent connections are black on the head side" style="width: 100%; height: auto; border-radius: 8px;" />
  </div>

  <div style="flex: 1 1 40%; text-align: center;">
    <img src="/assets/images/posts/2025-09-03-nemo-dragonfly/NT_9.jpg" alt="poles and tent connections are green on the foot side" style="width: 100%; height: auto; border-radius: 8px;" />
  </div>

  <div style="flex: 1 1 40%; text-align: center;">
    <img src="/assets/images/posts/2025-09-03-nemo-dragonfly/NT_9.1.jpg" alt="green tie snaps to green pole" style="width: 100%; height: auto; border-radius: 8px;" />
  </div>

  <div style="flex: 1 1 40%; text-align: center;">
    <img src="/assets/images/posts/2025-09-03-nemo-dragonfly/NT_10.jpg" alt="both pole colors" style="width: 100%; height: auto; border-radius: 8px;" />
  </div>
</div>
<p style="font-size: 0.9em; color: #666; text-align: center;">Colour coded hardware on the tent  helps you quickly see what poles go where and on the fly to see where each corner goes.</p>

<ul>
  <li><strong>Two large vestibules</strong> – Great for keeping packs and boots dry. Okay, not that large, but a great size for 2 people backpacking - large enough for an 80L pack on each side!</li>
</ul>
<div style="display: flex; flex-wrap: wrap; gap: 1rem; justify-content: center;">
  <div style="flex: 1 1 40%; text-align: center;">
    <img src="/assets/images/posts/2025-09-03-nemo-dragonfly/NT_12.jpg" alt="vestible of the tent" style="width: 100%; height: auto; border-radius: 8px;" />
  </div>
</div>
<p><br /></p>

<ul>
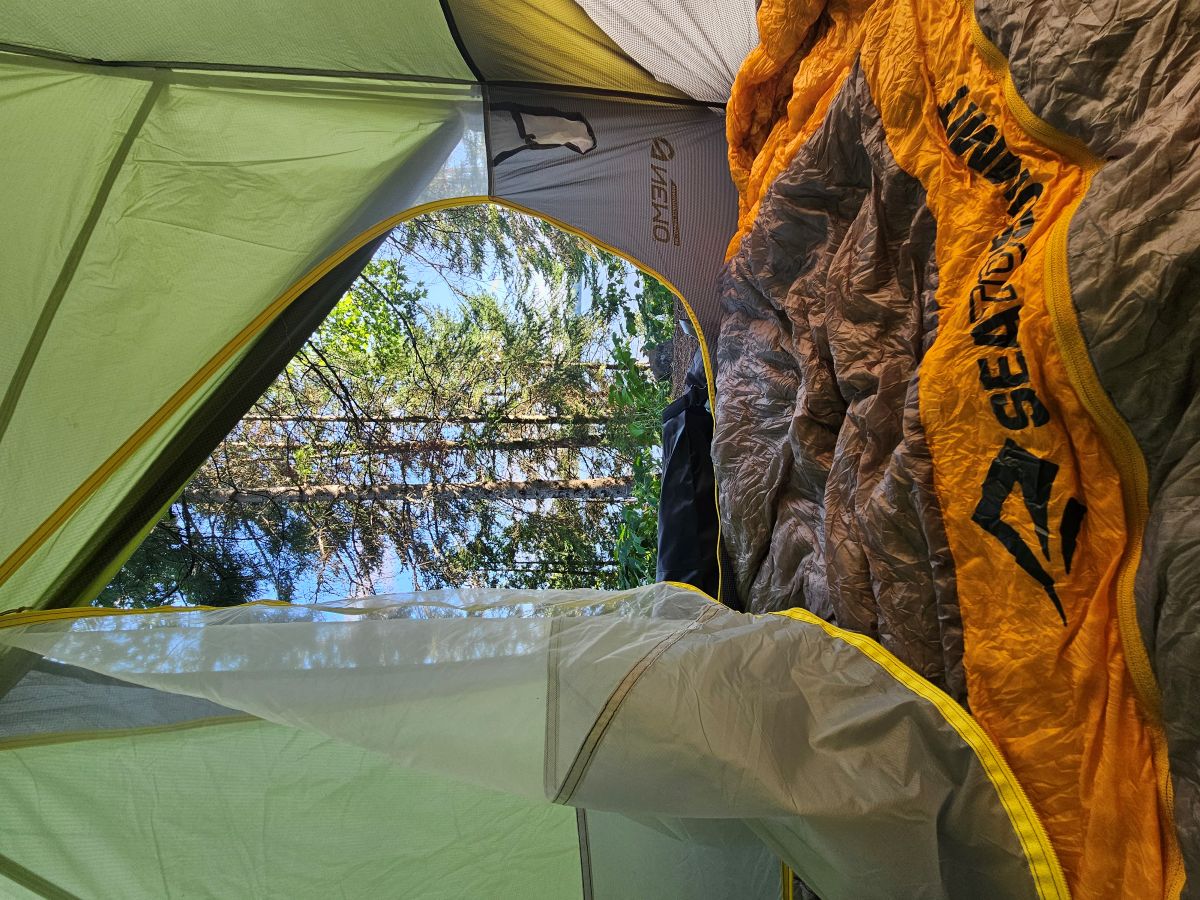
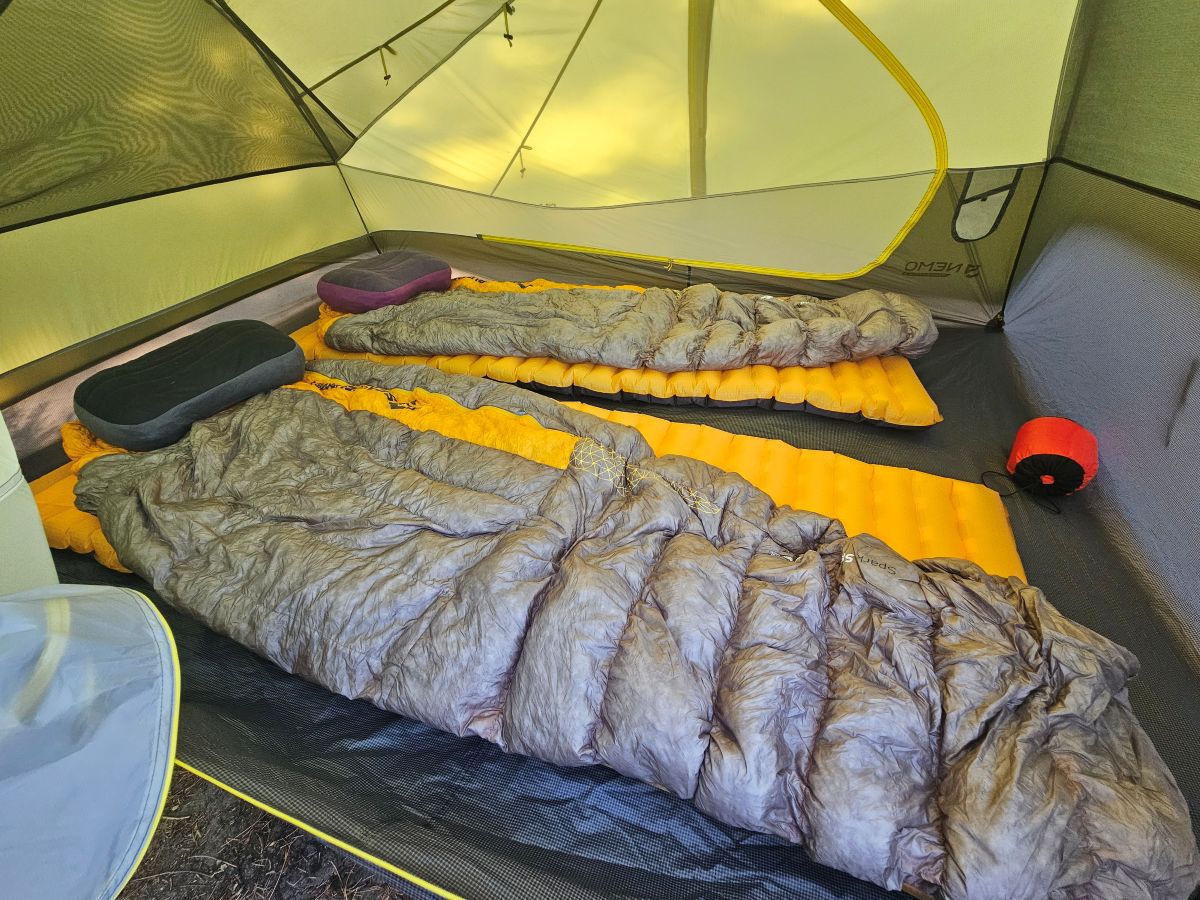
  <li><strong>Vertical side walls</strong> – Makes the interior feel roomier than the footprint suggests.</li>
</ul>

<div style="display: flex; flex-wrap: wrap; gap: 1rem; justify-content: center;">
  <div style="flex: 1 1 40%; text-align: center;">
    <img src="/assets/images/posts/2025-09-03-nemo-dragonfly/NT_5.jpg" alt="view of the inside of the tent from outside, empty" style="width: 100%; height: auto; border-radius: 8px;" />
  </div>

  <div style="flex: 1 1 40%; text-align: center;">
    <img src="/assets/images/posts/2025-09-03-nemo-dragonfly/NT_6.jpg" alt="looking out, with sleeping bags" style="width: 100%; height: auto; border-radius: 8px;" />
  </div>

  <div style="flex: 1 1 30%; text-align: center;">
    <img src="/assets/images/posts/2025-09-03-nemo-dragonfly/NT_7.jpg" alt="looking in, with full sleep setup" style="width: 100%; height: auto; border-radius: 8px;" />
  </div>
</div>
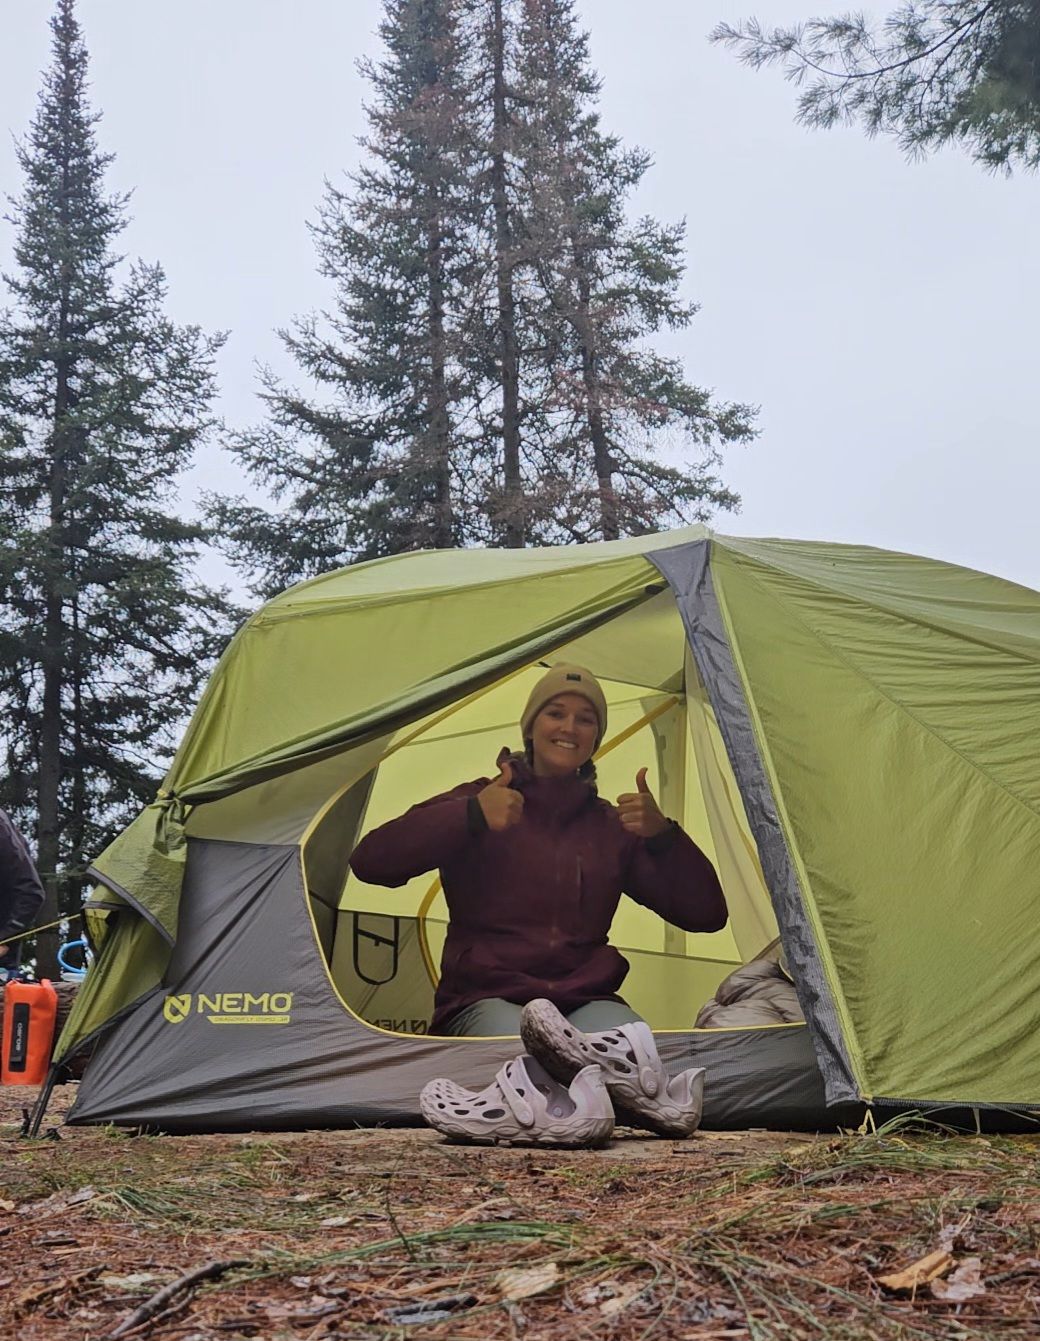
<p style="font-size: 0.9em; color: #666; text-align: center;">Internal views from the tent. I believe your feet are supposed to go at the more narrow end but we actually do the opposite because our dog sleeps at our feet. Having her at the wider end gives her more room to sleep.</p>

<ul>
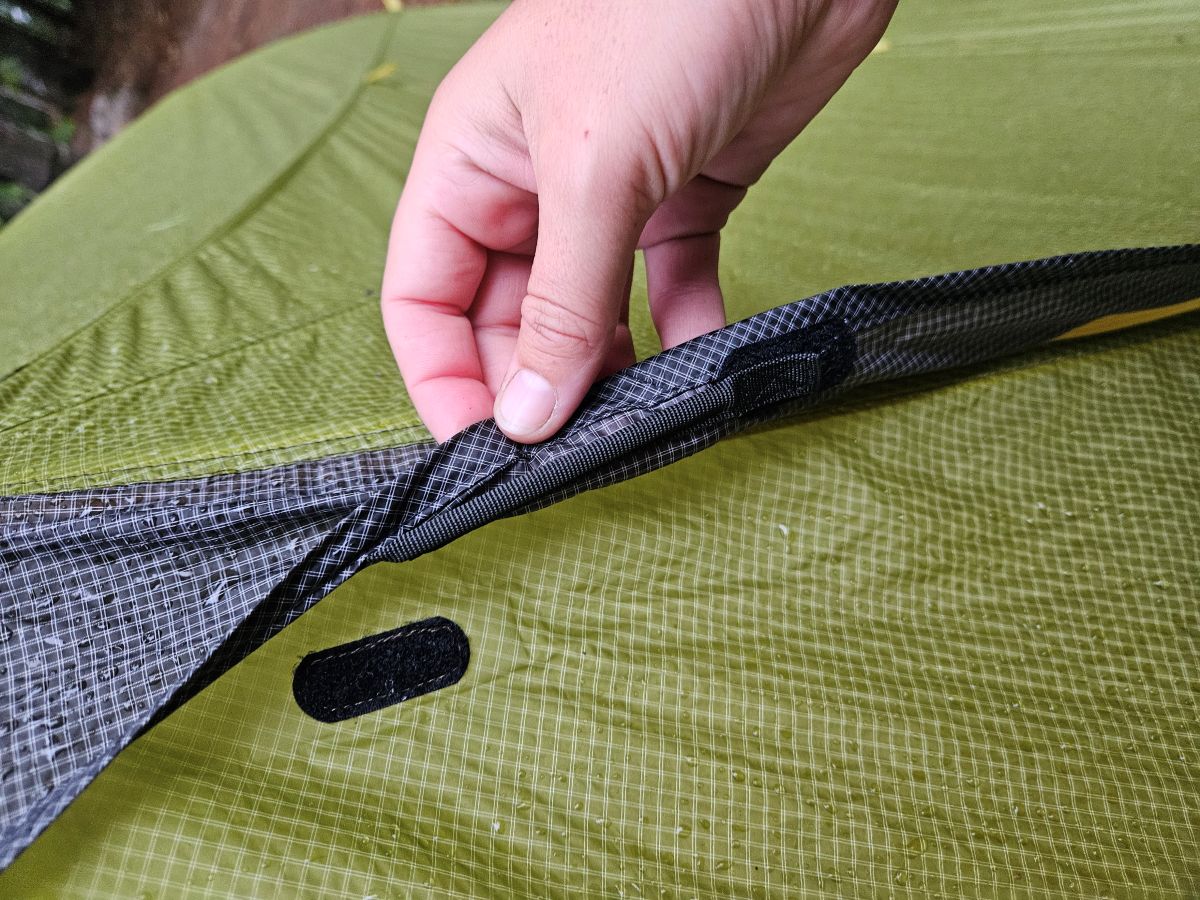
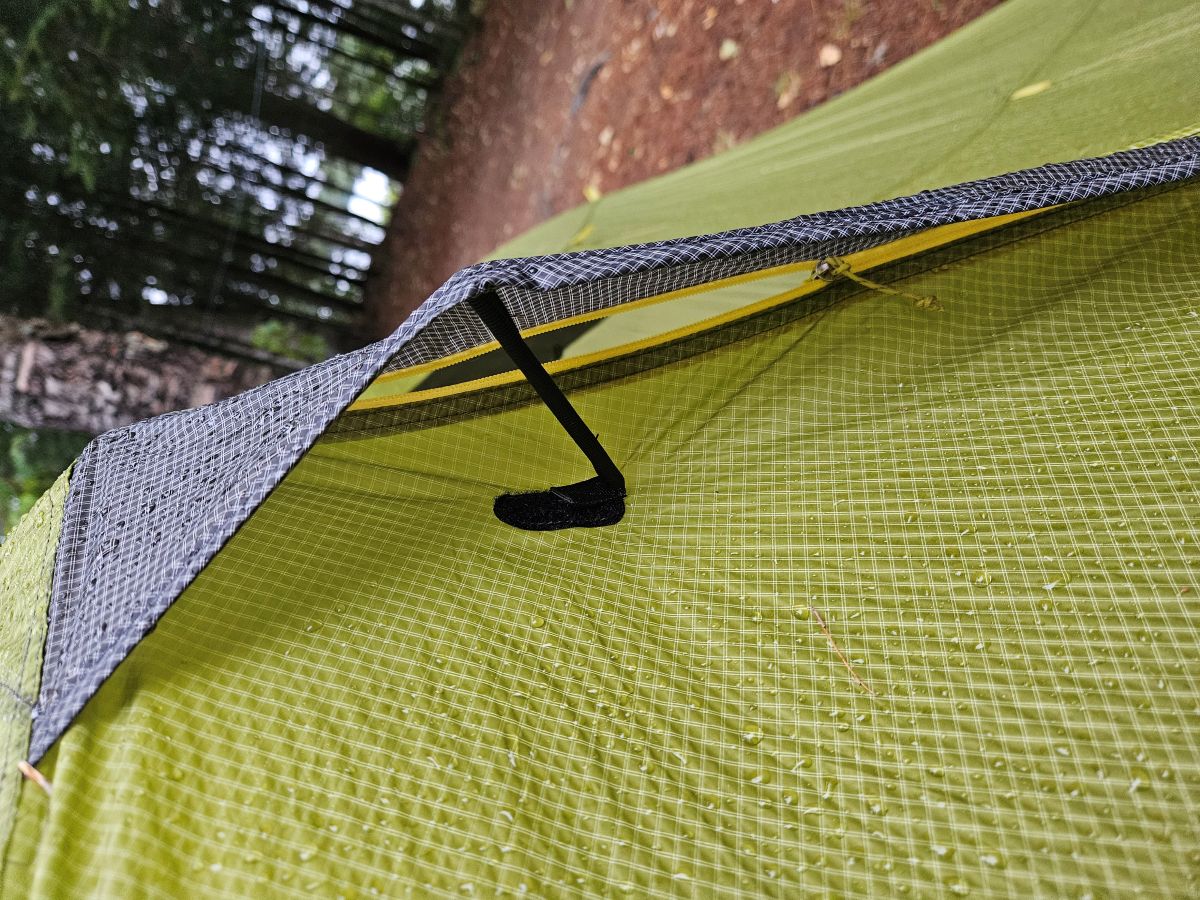
  <li><strong>Ventilation</strong> – Mesh upper and smart fly design cut down on condensation.</li>
</ul>

<div style="display: flex; flex-wrap: wrap; gap: 1rem; justify-content: center;">
  <div style="flex: 1 1 30%; text-align: center;">
    <img src="/assets/images/posts/2025-09-03-nemo-dragonfly/NT_11.jpg" alt="vent for condensation, closed" style="width: 100%; height: auto; border-radius: 8px;" />
  </div>

  <div style="flex: 1 1 30%; text-align: center;">
    <img src="/assets/images/posts/2025-09-03-nemo-dragonfly/NT_11.1.jpg" alt="vent for condensation, open" style="width: 100%; height: auto; border-radius: 8px;" />
  </div>
</div>
<p style="font-size: 0.9em; color: #666; text-align: center;">In addition to the mesh top, there are also small ventilation sticks on the vestibule that you can use to help prop open the tent.</p>

<ul>
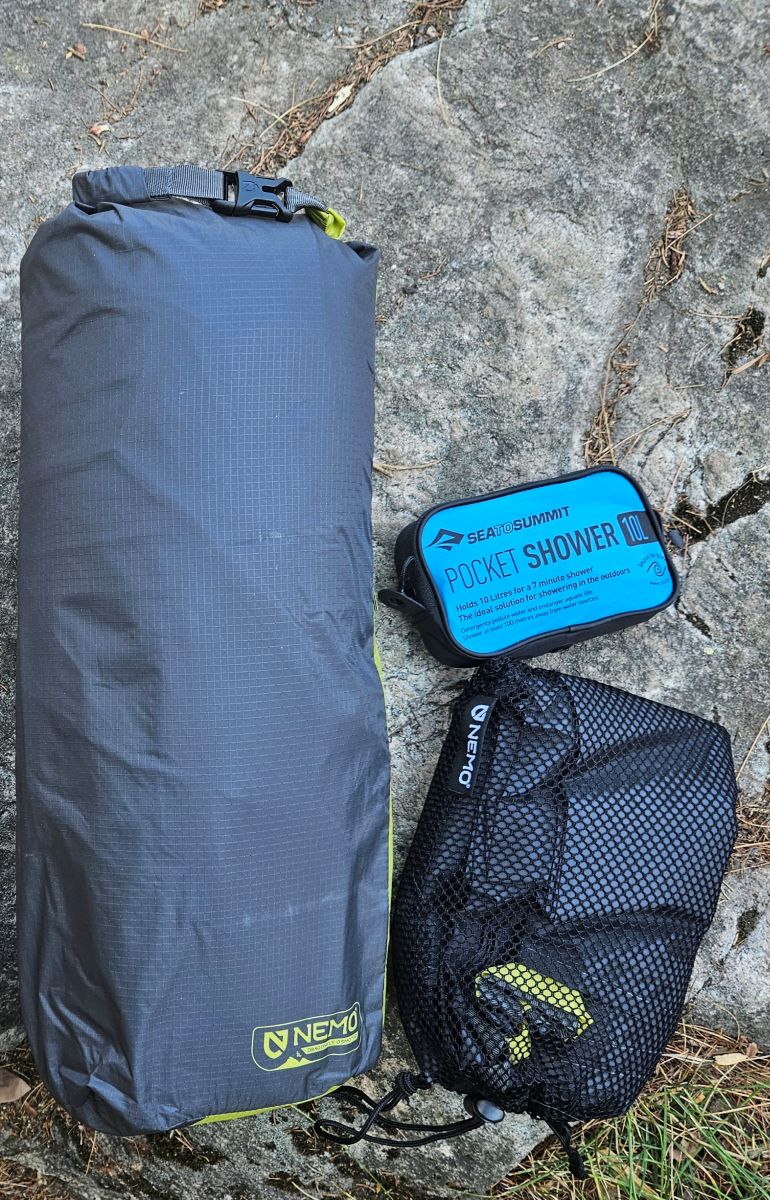
  <li><strong>Packability</strong> – Packs down small and fits cleanly on bikes or in backpacks. The tent bag is also a divy cube if you need to split up your weight.</li>
</ul>

<div style="display: flex; flex-wrap: wrap; gap: 1rem; justify-content: center;">
  <div style="flex: 1 1 30%; text-align: center;">
    <img src="/assets/images/posts/2025-09-03-nemo-dragonfly/NT_13.jpg" alt="Nemo Dragonfly in stuff sack" style="width: 100%; height: auto; border-radius: 8px;" />
  </div>
</div>
<p style="font-size: 0.9em; color: #666; text-align: center;">Nemo Dragonfly packed up, beside the footprint. Pocket shower for scale.</p>

<hr />

<h2 id="durability--field-use">Durability &amp; Field Use</h2>

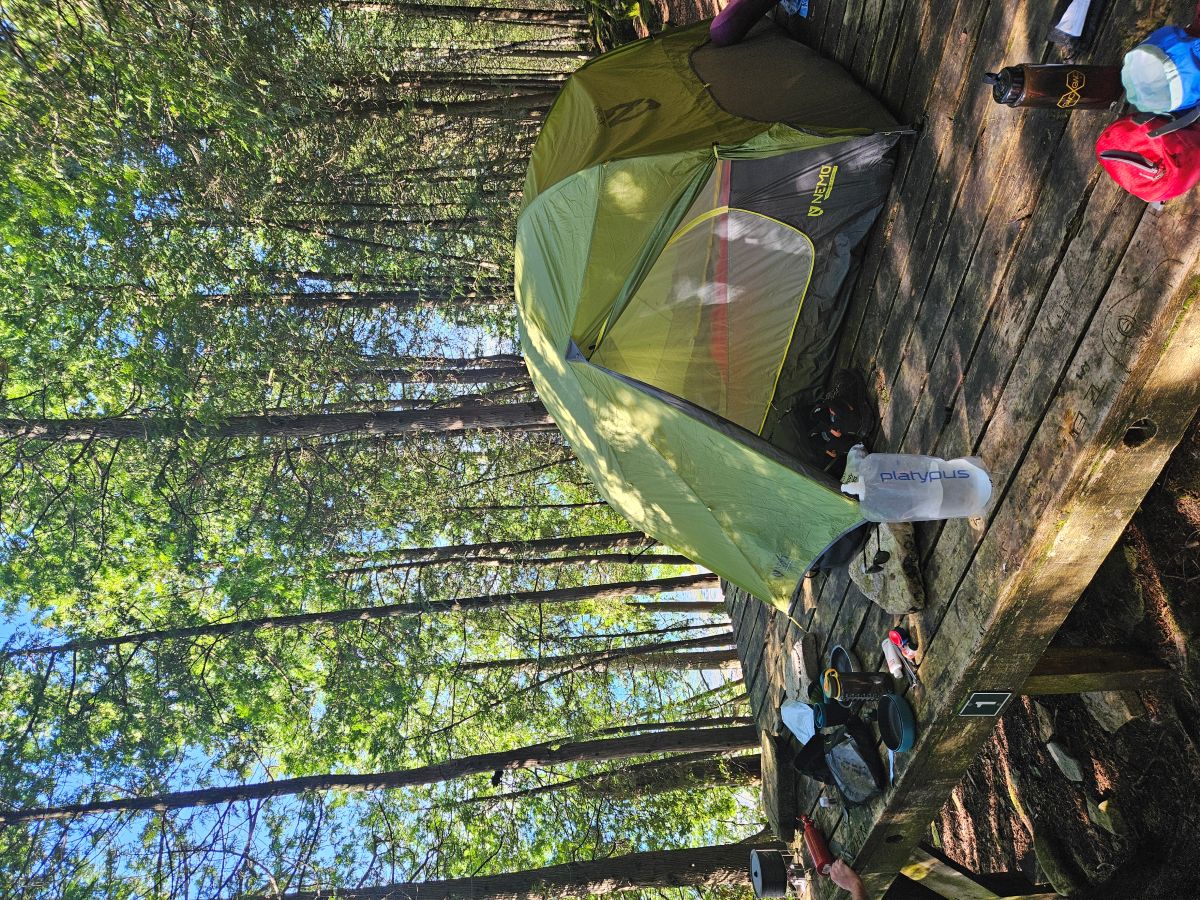
<p>We’ve used this tent in a range of conditions, from warm, buggy summer nights to rainy shoulder-season trips. It has stood up to steady rain in Algonquin and breezy lakeshores on Bruce Peninsula.</p>

<div style="display: flex; flex-wrap: wrap; gap: 1rem; justify-content: center;">
  <div style="flex: 1 1 30%; text-align: center;">
    <img src="/assets/images/posts/2025-09-03-nemo-dragonfly/NT_15.jpg" alt="Nemo Dragonfly on wood platform" style="width: 100%; height: auto; border-radius: 8px;" />
  </div>
</div>
<p style="font-size: 0.9em; color: #666; text-align: center;">The Nemo tent set up at the High Dump campground at Bruce Peninsula National Park in Ontario. The campsite is right on Georgian Bay and got quite windy during a storm. Make sure you use heavy rocks to tie down your tent since the campsites only have wooden pads to pitch your tent.</p>

<p>That said, it’s still an ultralight tent. The fabric is thin and benefits from care. We always clear sharp twigs or rocks and usually bring a groundsheet to protect the floor.</p>

<p>Zippers, poles, and fabric have all held up well to repeated use. The pitch stays taut even when damp, which we appreciate after some long, wet days.</p>

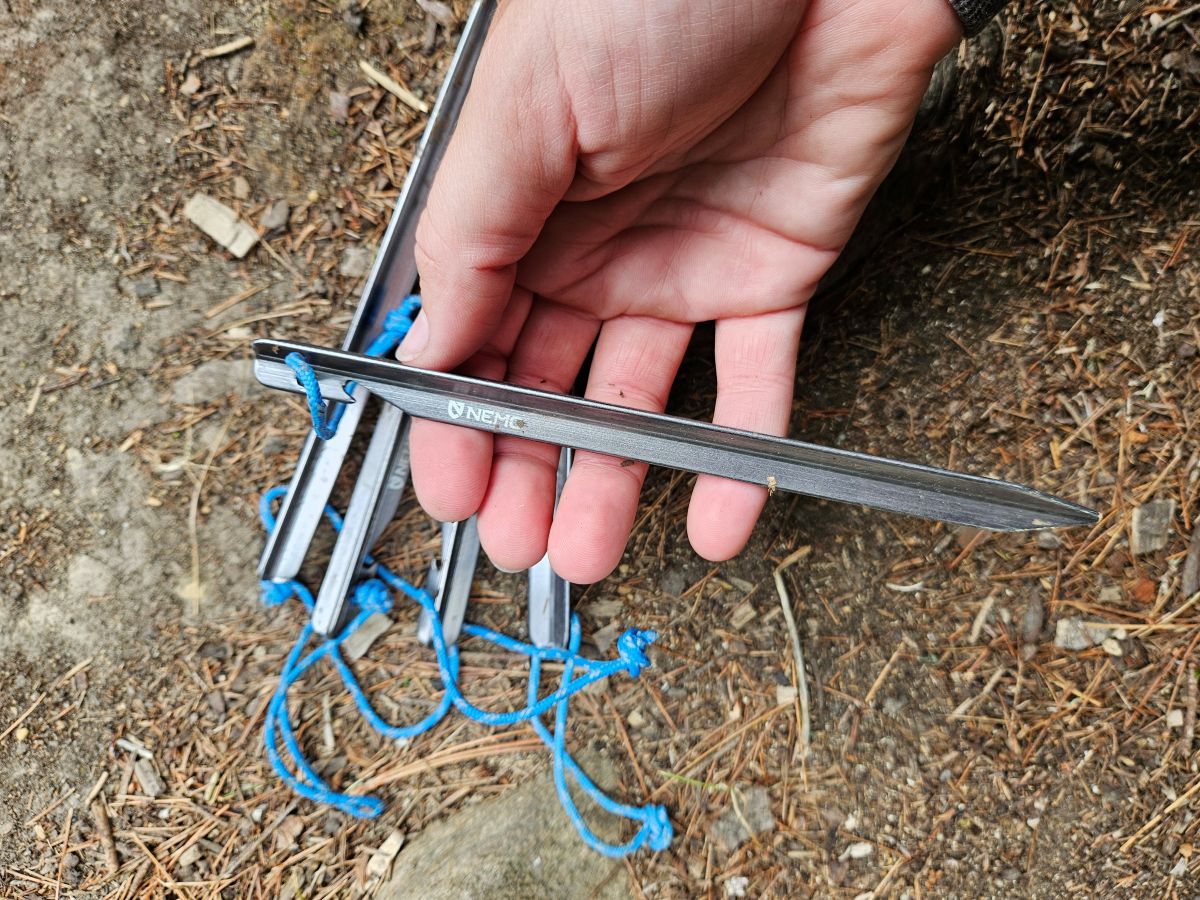
<p>The stakes that come with the tent are quite good, similar to MSR groundhog. They’ve stood up to our hammering them in with rocks when we haven’t brought a mallet, so no complaints!</p>

<div style="display: flex; flex-wrap: wrap; gap: 1rem; justify-content: center;">
  <div style="flex: 1 1 30%; text-align: center;">
    <img src="/assets/images/posts/2025-09-03-nemo-dragonfly/NT_14.jpg" alt="included stakes" style="width: 100%; height: auto; border-radius: 8px;" />
  </div>
</div>
<p style="font-size: 0.9em; color: #666; text-align: center;">Stakes that come with the NEMO Dragonfly OSMO 3-person.</p>

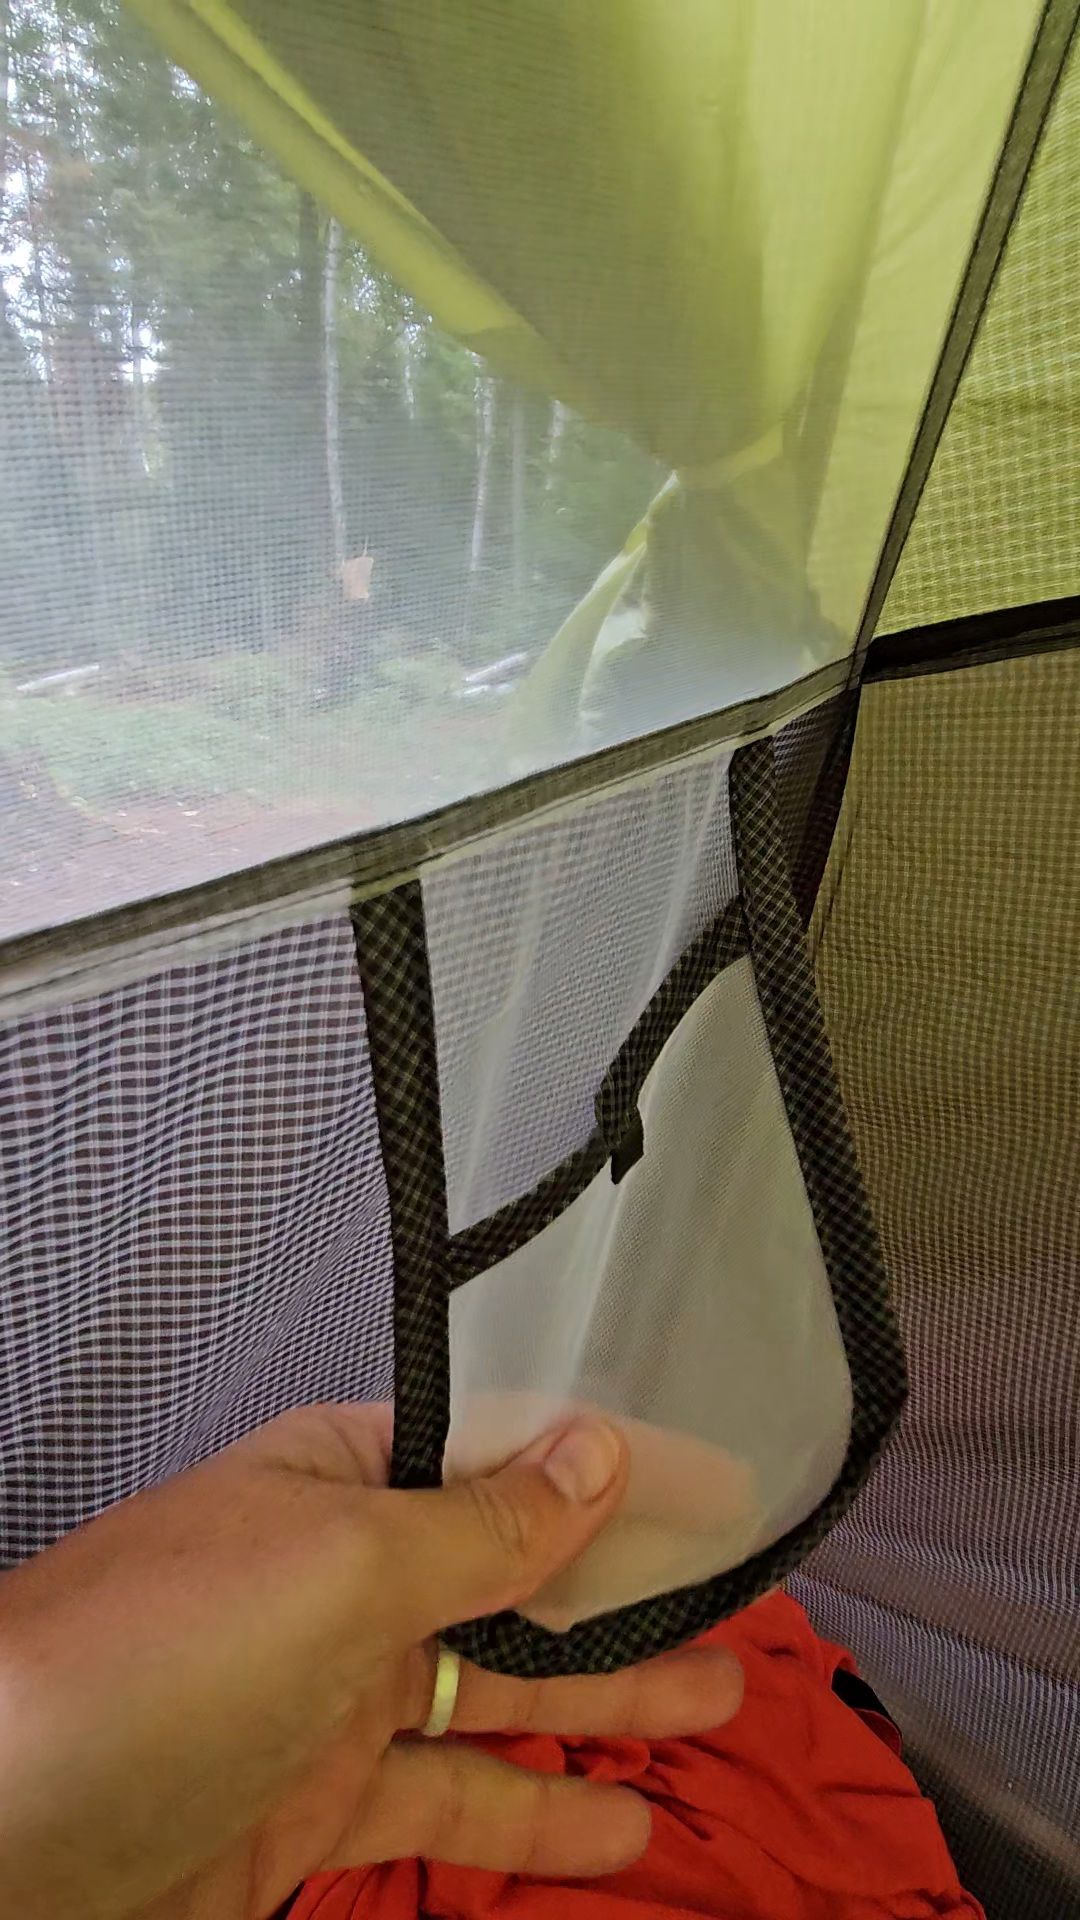
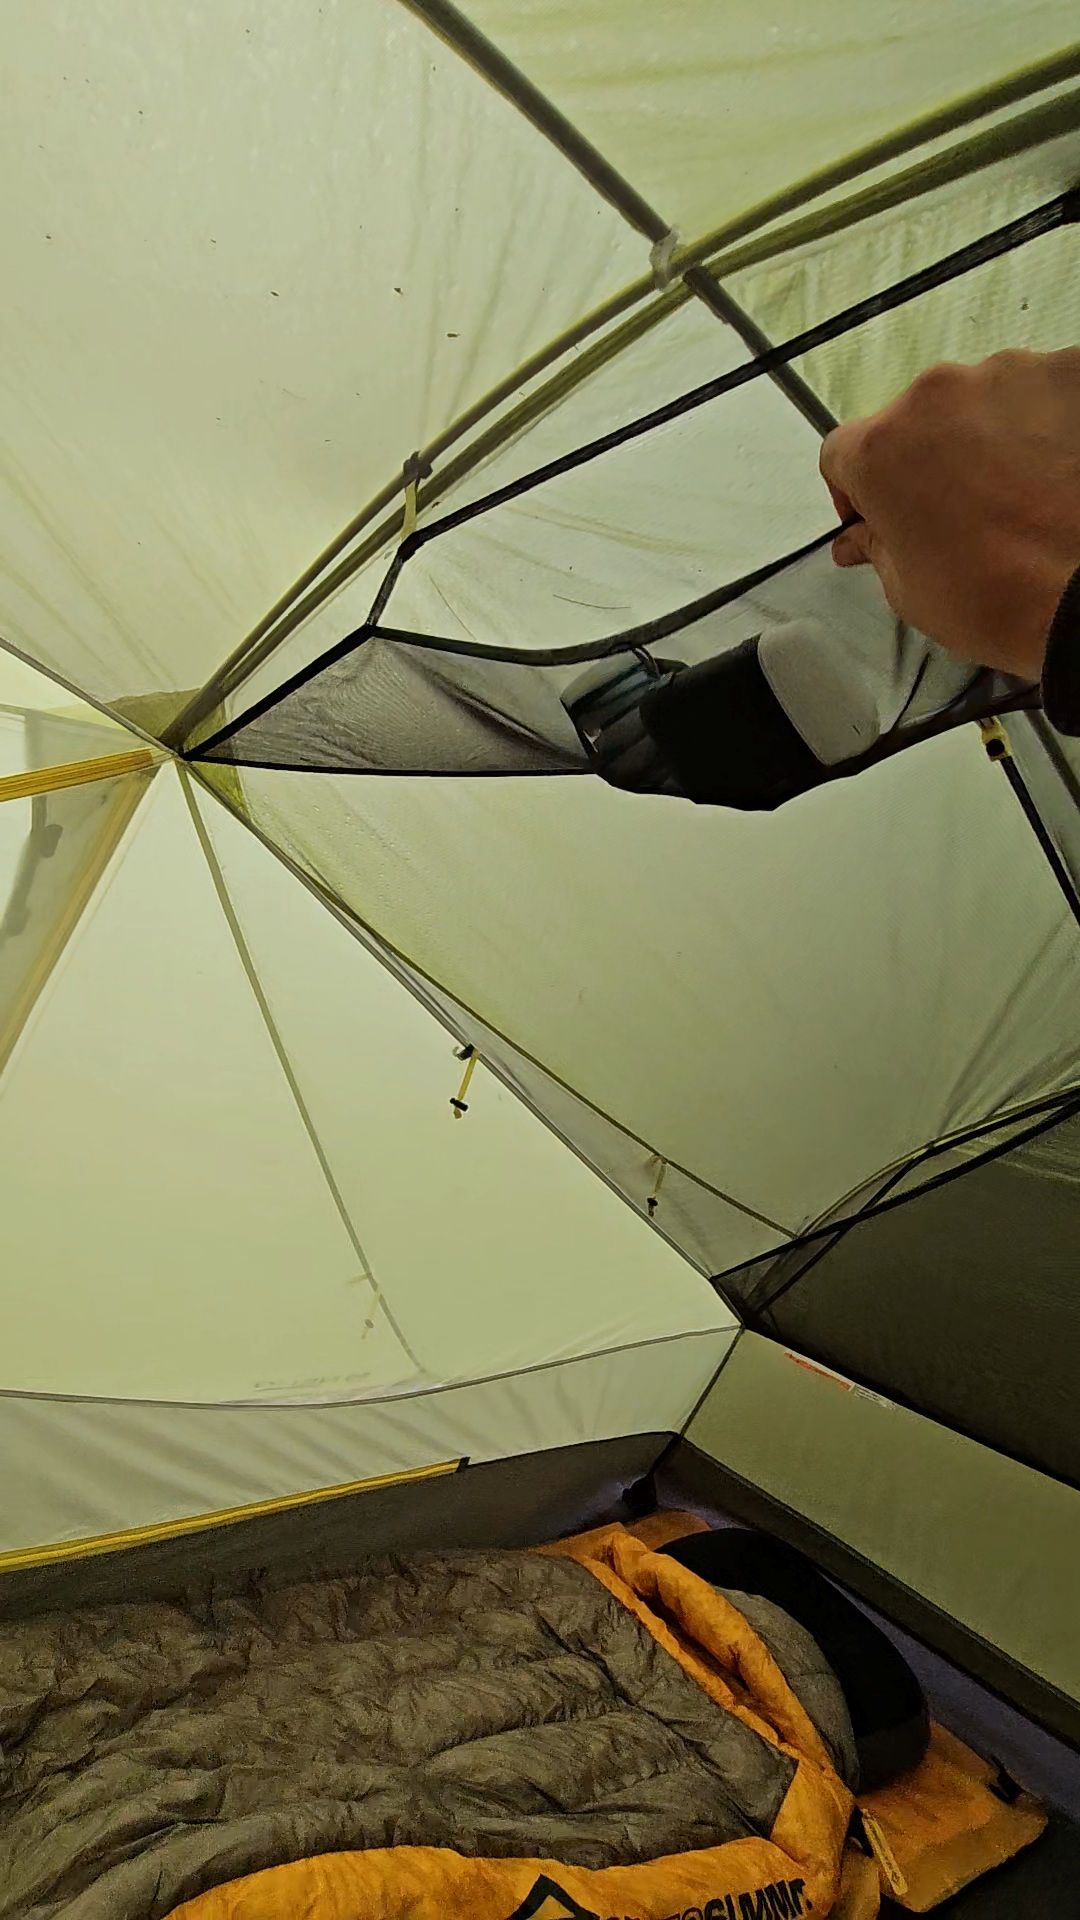
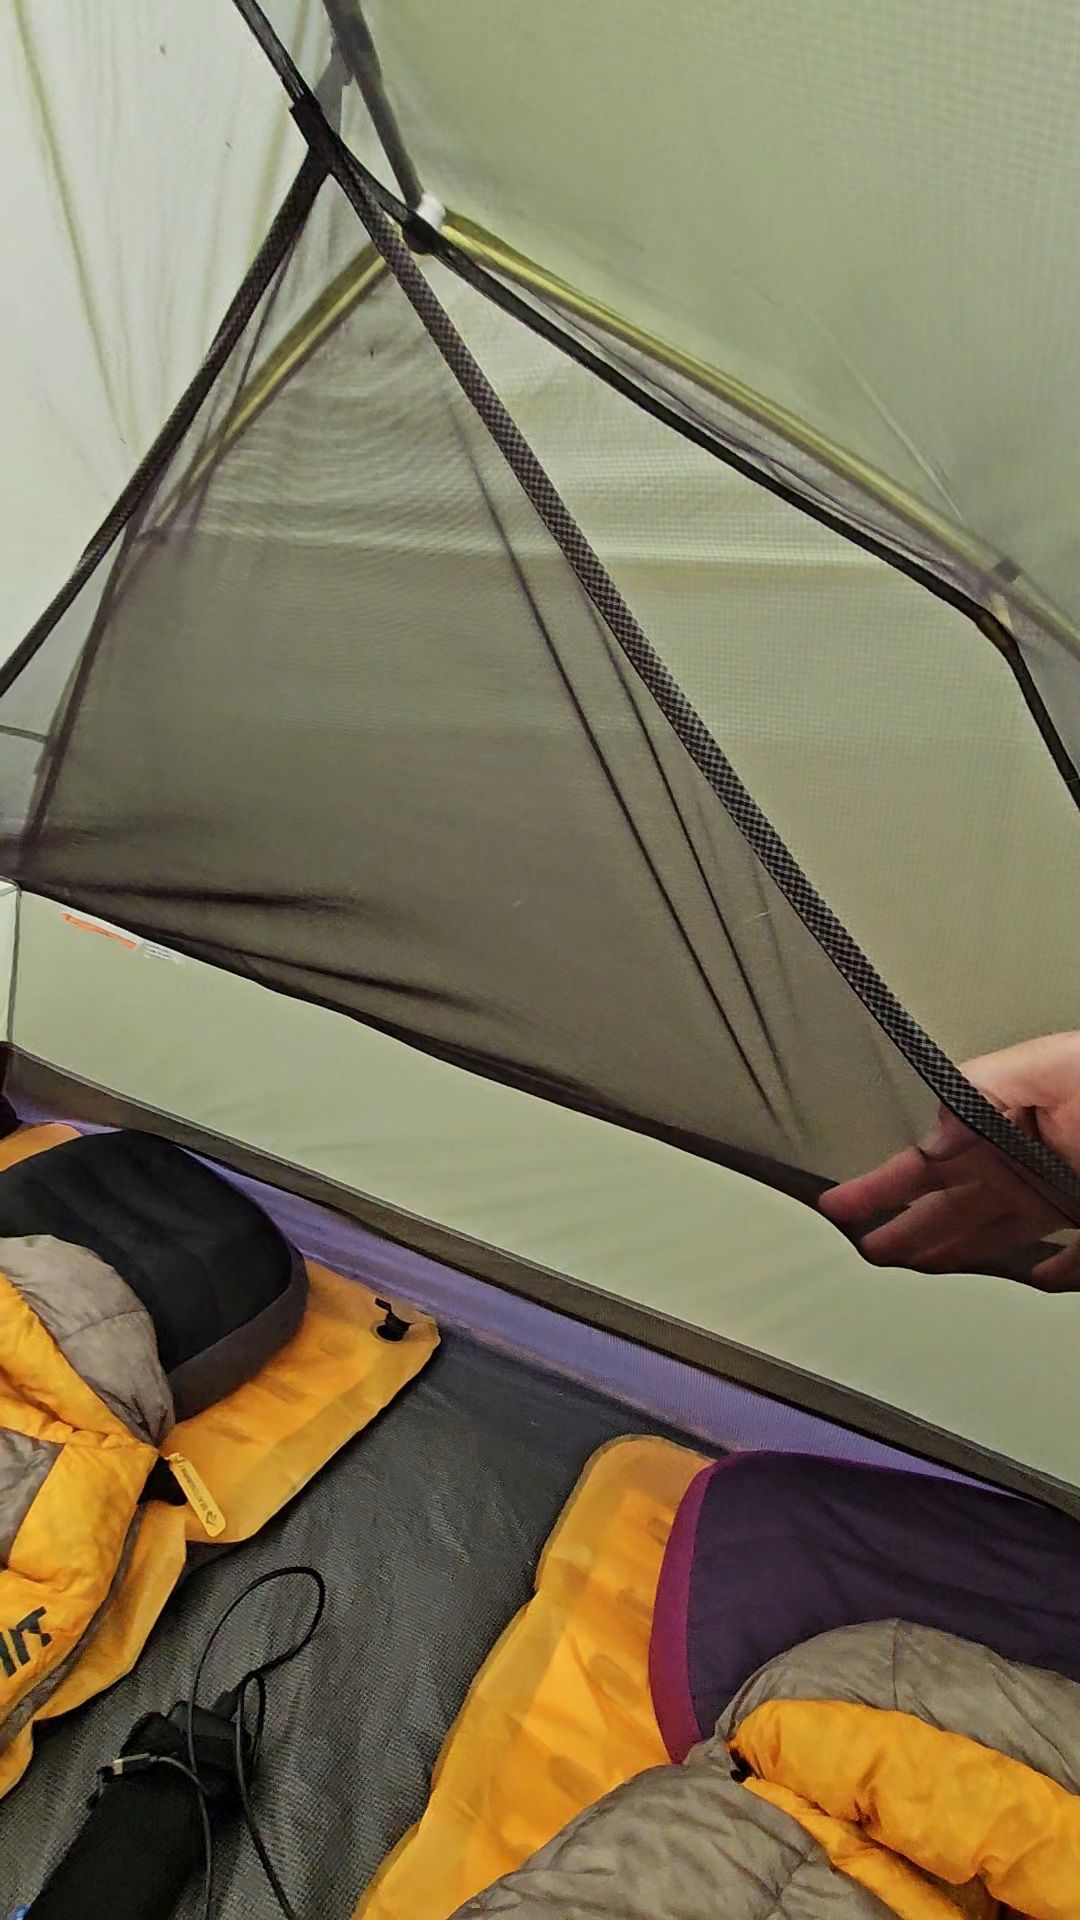
<p>Inside the tent, you have two phone pockets, a ceiling mesh pocket, and a larger pocket that goes along the slope.</p>

<div style="display: flex; flex-wrap: wrap; gap: 1rem; justify-content: center;">
  <div style="flex: 1 1 30%; text-align: center;">
    <img src="/assets/images/posts/2025-09-03-nemo-dragonfly/NT_16.jpg" alt="one of the two cell phone pockets" style="width: 100%; height: auto; border-radius: 8px;" />
  </div>
  <div style="flex: 1 1 30%; text-align: center;">
    <img src="/assets/images/posts/2025-09-03-nemo-dragonfly/NT_17.jpg" alt="cieling pocket" style="width: 100%; height: auto; border-radius: 8px;" />
  </div>
  <div style="flex: 1 1 30%; text-align: center;">
    <img src="/assets/images/posts/2025-09-03-nemo-dragonfly/NT_18.jpg" alt="footside pocket" style="width: 100%; height: auto; border-radius: 8px;" />
  </div>
</div>
<p><br /></p>

<hr />

<h2 id="pros--cons">Pros &amp; Cons</h2>

<h3 id="pros">Pros</h3>
<ul>
  <li>Lightweight and compact – ideal for bikepacking and ultralight backpacking</li>
  <li>Quick, intuitive setup</li>
  <li>Two doors and vestibules – no crawling over your tentmate</li>
  <li>Packs smaller than most comparable 3P tents</li>
  <li>Solid weather resistance for three-season use</li>
</ul>

<h3 id="cons">Cons</h3>
<ul>
  <li>Fabric is delicate – requires mindful handling</li>
  <li>Pricey for casual or occasional campers</li>
</ul>

<hr />

<h2 id="conclusion-who-this-tent-is-for">Conclusion: Who This Tent is For</h2>

<p>The NEMO Dragonfly OSMO 3P is a great choice for people who prioritize weight and packability without giving up core comfort. If you’re into bikepacking, multi-day hikes, or interior canoe tripping, it’s a dependable, versatile option.</p>

<div style="display: flex; flex-wrap: wrap; gap: 1rem; justify-content: center;">
  <div style="flex: 1 1 30%; text-align: center;">
    <img src="/assets/images/posts/2025-09-03-nemo-dragonfly/NT_12.jpg" alt="fly open for access only" style="width: 100%; height: auto; border-radius: 8px;" />
  </div>
  <div style="flex: 1 1 30%; text-align: center;">
    <img src="/assets/images/posts/2025-09-03-nemo-dragonfly/NT_12.1.jpg" alt="fly partially open" style="width: 100%; height: auto; border-radius: 8px;" />
  </div>
  <div style="flex: 1 1 30%; text-align: center;">
    <img src="/assets/images/posts/2025-09-03-nemo-dragonfly/NT_12.2.jpg" alt="fly fully open" style="width: 100%; height: auto; border-radius: 8px;" />
  </div>
</div>
<p style="font-size: 0.9em; color: #666; text-align: center;">Versatile Fly configurations to suit any weather conditions.</p>

<p>It’s best for campers who take care of their gear and don’t mind sacrificing a bit of space for lighter weight. If you’re hard on equipment or want a roomier basecamp tent, look elsewhere. But if you’re counting ounces and need a shelter that won’t slow you down, or take up half your pannier, the Dragonfly OSMO is a solid bet.</p>

<div style="display: flex; flex-wrap: wrap; gap: 1rem; justify-content: center;">
  <div style="flex: 1 1 30%; text-align: center;">
    <img src="/assets/images/posts/2025-09-03-nemo-dragonfly/NT_19.jpg" alt="lumberjack omlette before cooking" style="width: 100%; height: auto; border-radius: 8px;" />
  </div>
</div>
<p style="font-size: 0.9em; color: #666; text-align: center;">A happy camper :)</p>]]></content><author><name></name></author><category term="gear" /><category term="backcountry" /><summary type="html"><![CDATA[Field-Tested: Why We Chose the NEMO Dragonfly OSMO 3P Tent for Bikepacking and Backcountry Camping]]></summary></entry><entry><title type="html">Camping &amp;amp; Mountain Biking Quebec</title><link href="https://packpedalplate.com/travel/itineraries/quebec-itinerary/" rel="alternate" type="text/html" title="Camping &amp;amp; Mountain Biking Quebec" /><published>2025-09-01T17:00:00-04:00</published><updated>2025-09-01T17:00:00-04:00</updated><id>https://packpedalplate.com/travel/itineraries/quebec-itinerary</id><content type="html" xml:base="https://packpedalplate.com/travel/itineraries/quebec-itinerary/"><![CDATA[<div style="display: flex; flex-wrap: wrap; gap: 1rem; justify-content: center;">
  <div style="flex: 1 1 30%; text-align: center;">
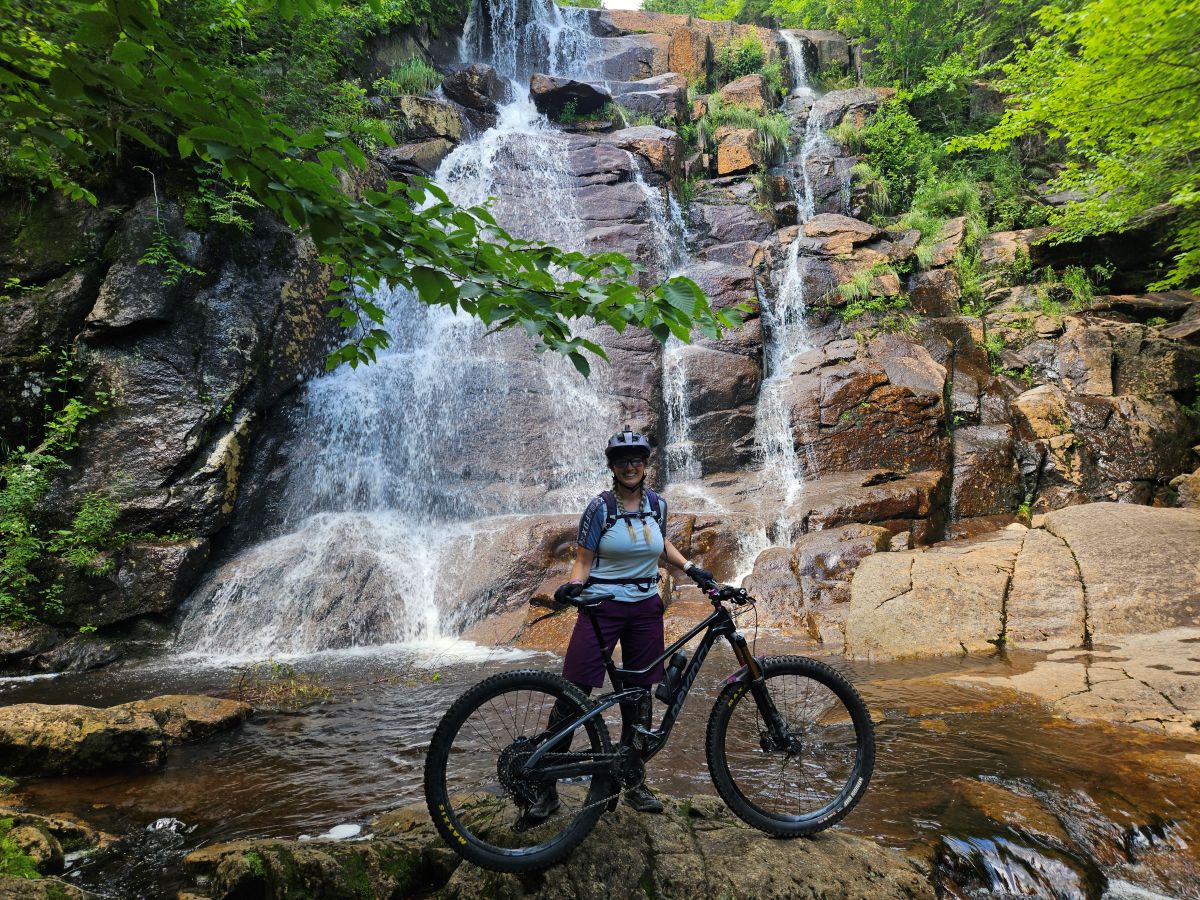
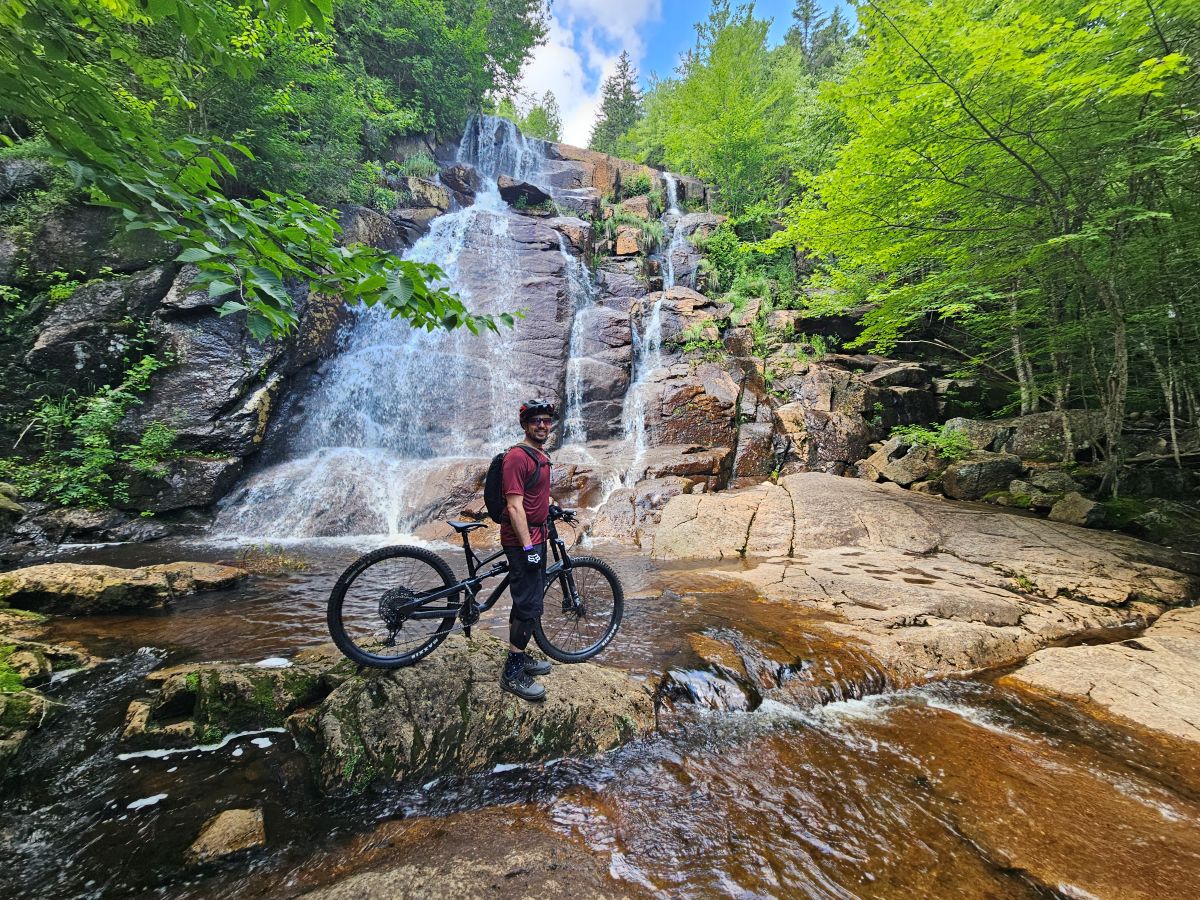
    <img src="/assets/images/posts/2025-09-01-quebec-itinerary/title.jpg" alt="author in front of waterfall" style="width: 100%; height: auto; border-radius: 8px;" />
  </div>
</div>
<p style="font-size: 0.9em; color: #666; text-align: center;">Waterfalls at Bras du Nord.</p>

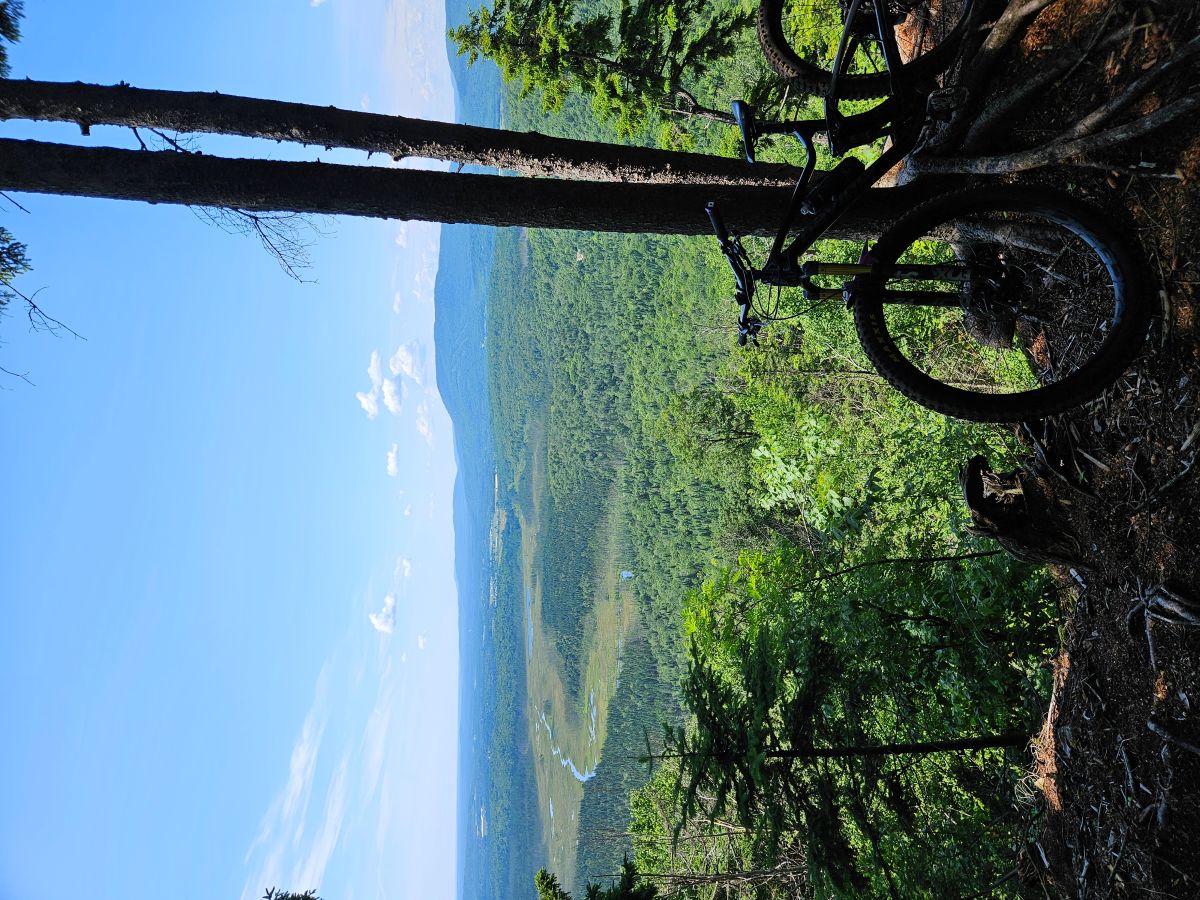
<p>This weeklong adventure through Quebec’s most iconic mountain biking destinations blends epic rides with good food and relaxed camp vibes. From the technical trails of Bromont to the flowing lines at Le Massif and the stunning singletrack of Vallée Bras-du-Nord, each day offers a different flavor of riding, balanced with hearty camp meals and evenings by the fire. Whether you’re looking for practical meal-planning inspiration, ideas for where to ride, or just a taste of what it’s like to spend a week chasing trails and cooking outdoors, this itinerary gives you a detailed yet down-to-earth look at how to make it all happen.</p>

<p>Our original plan was to stay the entire trip in Quebec at Jacques Cartier National Park, however, the weather was calling for terrible amounts of rain during the first two full days of the trip. We were thinking about canceling, but then noticed that Montreal wasn’t getting that storm during those days. So, we shortened our stay at Jacques Cartier and booked a campsite near Bromont, just outside of Montreal.</p>

<div style="display: flex; flex-wrap: wrap; gap: 1rem; justify-content: center;">
  <div style="flex: 1 1 30%; text-align: center;">
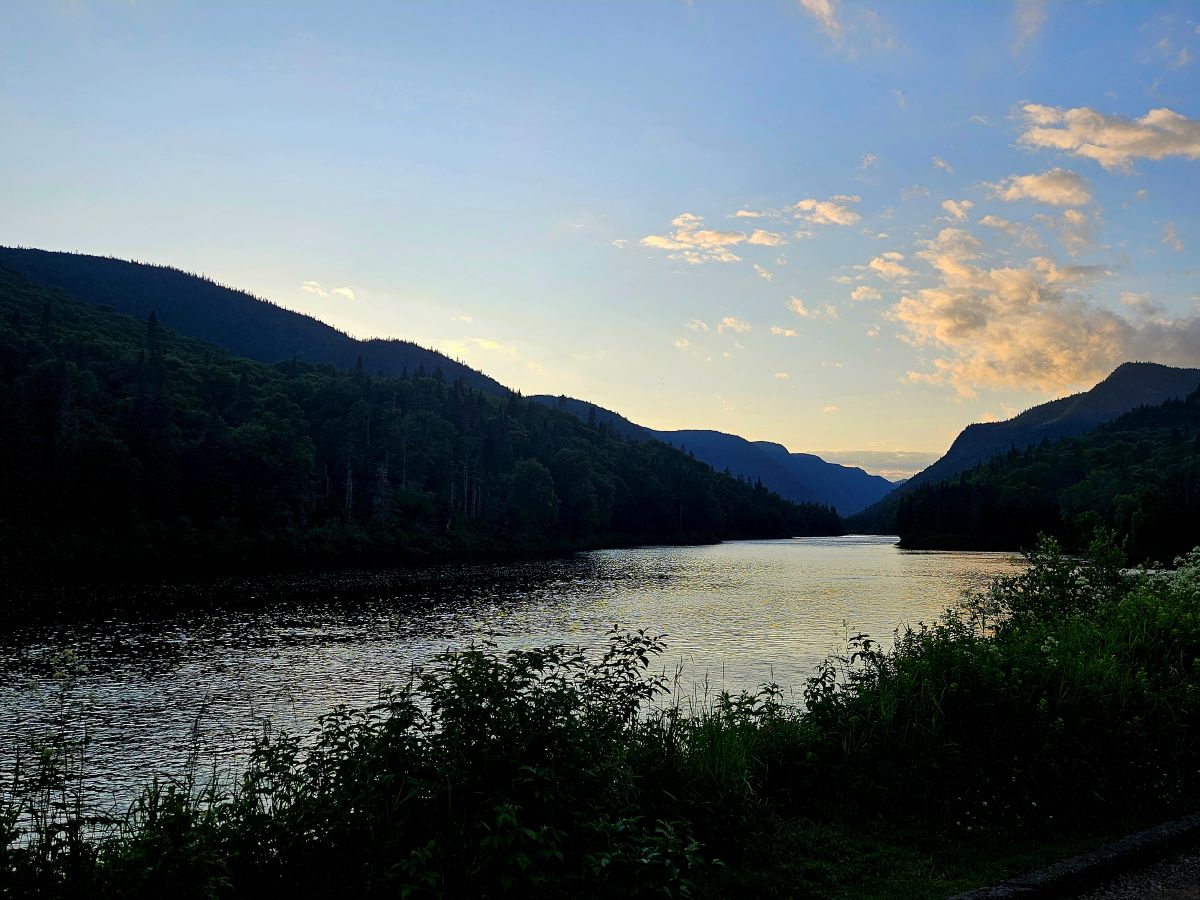
    <img src="/assets/images/posts/2025-09-01-quebec-itinerary/JC_1.jpg" alt="sunset over Jacques-Cartier river" style="width: 100%; height: auto; border-radius: 8px;" />
  </div>
</div>
<p style="font-size: 0.9em; color: #666; text-align: center;">An evening view down the Jacques-Cartier River from the visitor center at Jacques-Cartier National Park.</p>

<h1 id="trip-itinerary-with-addresses">Trip Itinerary with Addresses</h1>

<h3 id="saturday--hitting-the-road-from-ontario">Saturday – Hitting the Road from Ontario</h3>
<ul>
  <li><strong>Breakfast:</strong> On the road (coffee and snacks along the way)</li>
  <li><strong>Lunch:</strong> Burgers with all the fixings – buns, patties, cheese, pickles, lettuce, ketchup, mustard.</li>
  <li><strong>Dinner:</strong> Campfire steak night with grilled veggies and mushrooms.</li>
  <li><strong>Activities:</strong> Mostly travel day. Set up camp, get settled, and ease into trip mode with a relaxed evening around the fire.</li>
  <li><strong>Camping Location:</strong> Domaine Du Lac Libby, 426 1e Rang, Saint-Étienne-de-Bolton, QC J0E 2E0</li>
</ul>

<p><strong>Notes:</strong> Shout out to the great folks at Domaine Du Lac Libby who helped us book the last minute site the day before we would arrive! This campground was wonderful - the sites were clean, firewood and ice at the store, and a nice beach to cool off at after a sweaty day of riding.</p>

<div style="display: flex; flex-wrap: wrap; gap: 1rem; justify-content: center;">
  <div style="flex: 1 1 30%; text-align: center;">
    <img src="/assets/images/posts/2025-09-01-quebec-itinerary/LL_1.jpg" alt="Lac Libbey" style="width: 100%; height: auto; border-radius: 8px;" />
  </div>
</div>
<p><br /></p>

<hr />

<h3 id="sunday--first-ride--camping-night-2">Sunday – First Ride &amp; Camping Night 2</h3>
<ul>
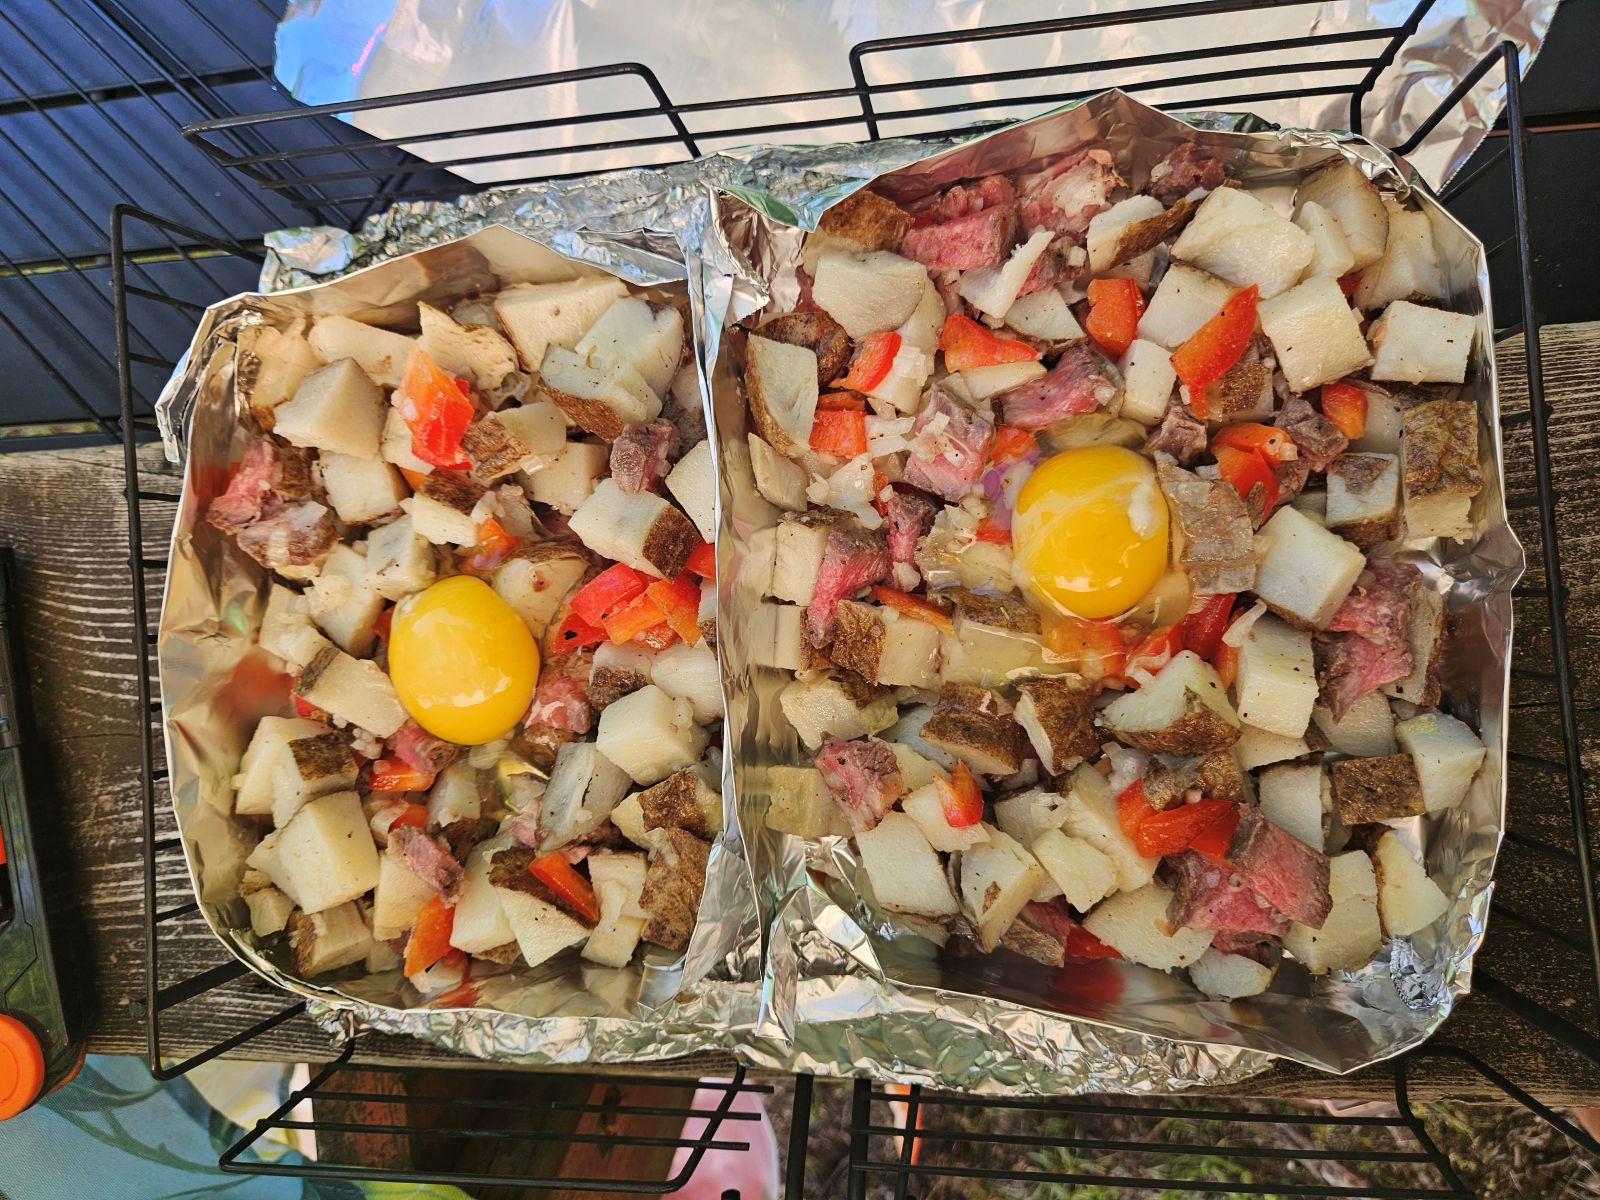
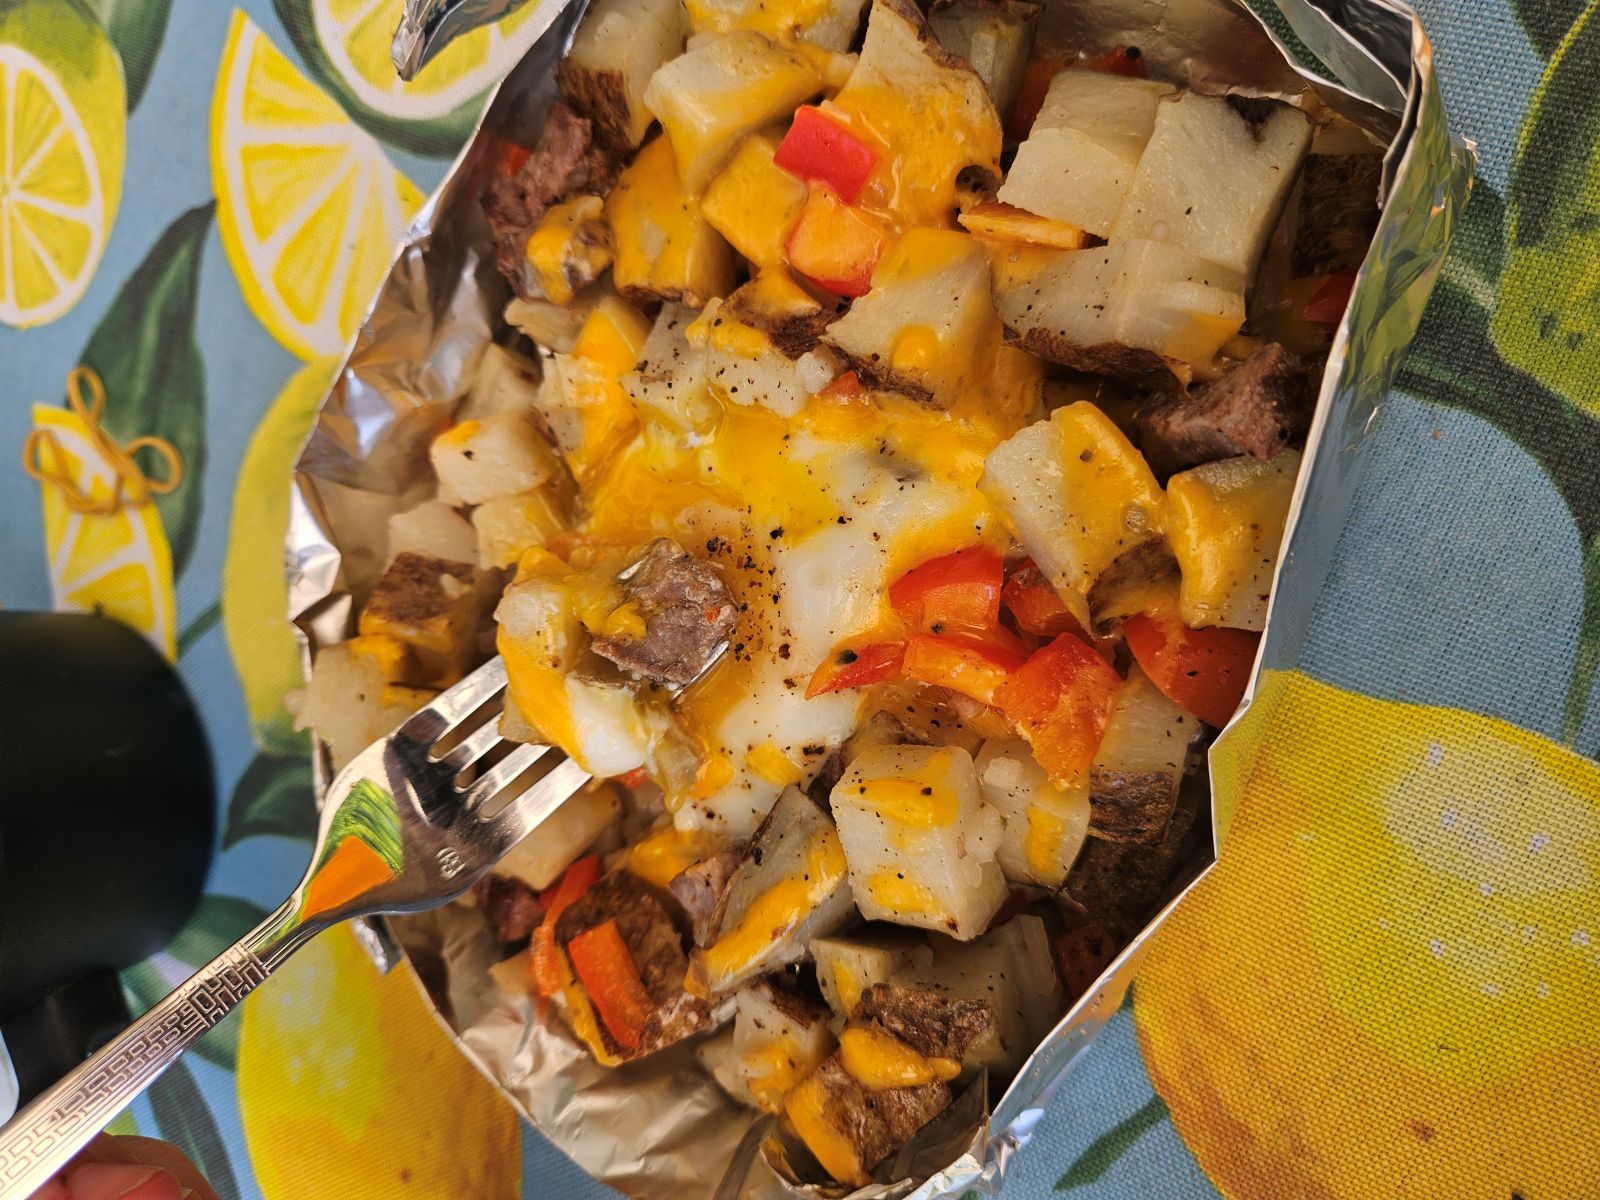
  <li><strong>Breakfast:</strong> Fire omelettes (eggs, bacon, peppers, onions, cheese, precooked potatoes) cooked over the flames.</li>
  <li><strong>Activity:</strong> Ride at Bromont Mountain Bike Park</li>
  <li><strong>Lunch:</strong> Wraps stuffed with cold cuts, cheese, cucumber, lettuce, Caesar dressing.</li>
  <li><strong>Dinner:</strong> Souvlaki skewers with grilled vegetables and orzo salad (souvlaki meat was pre-seasoned, orzo salad was pre-made at home).</li>
</ul>

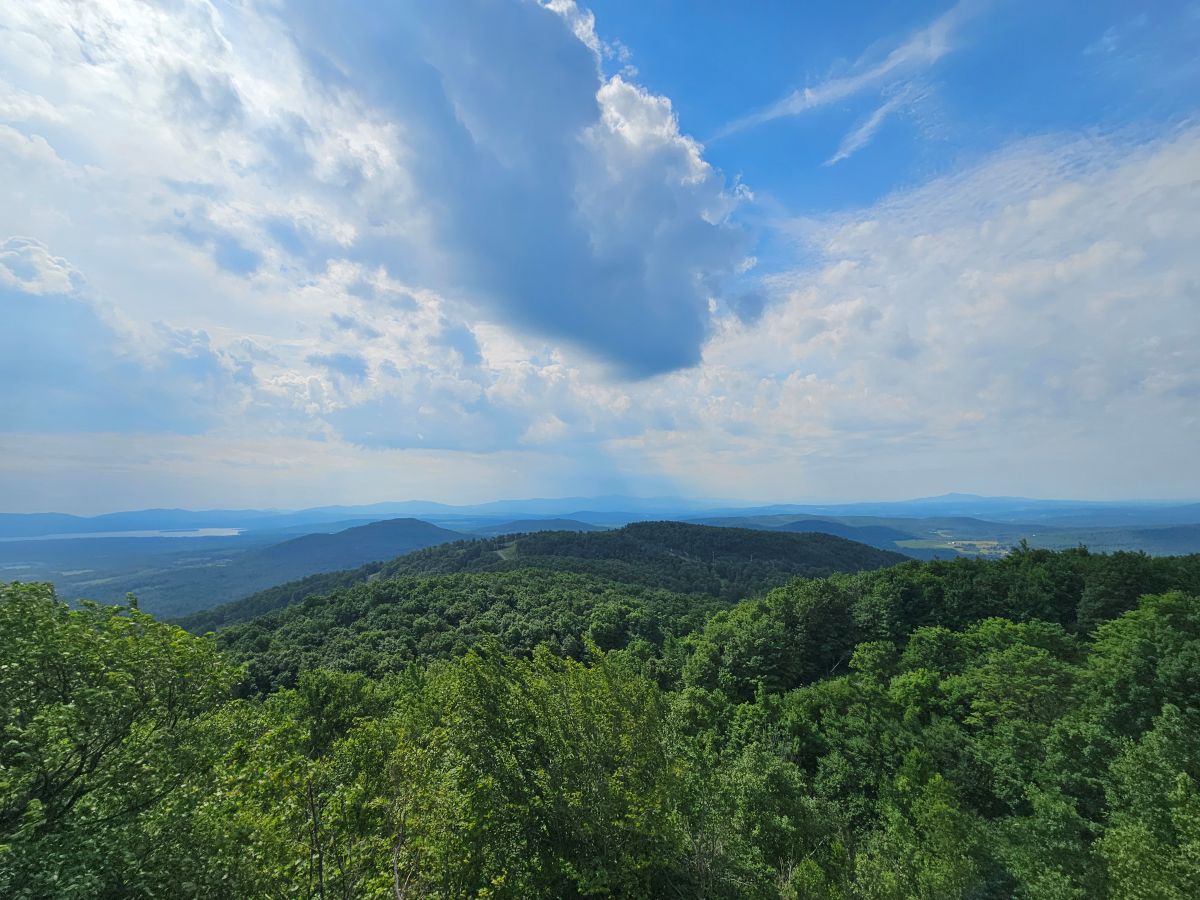
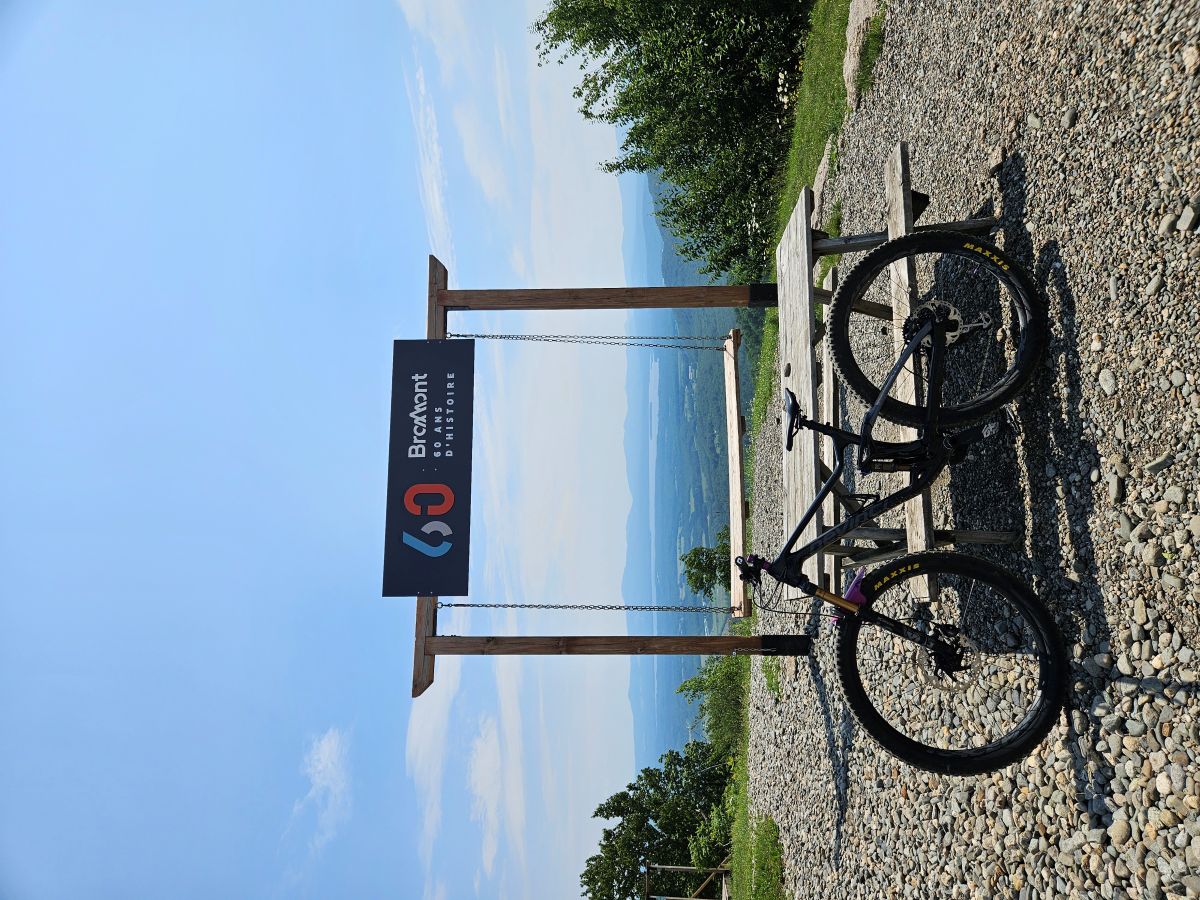
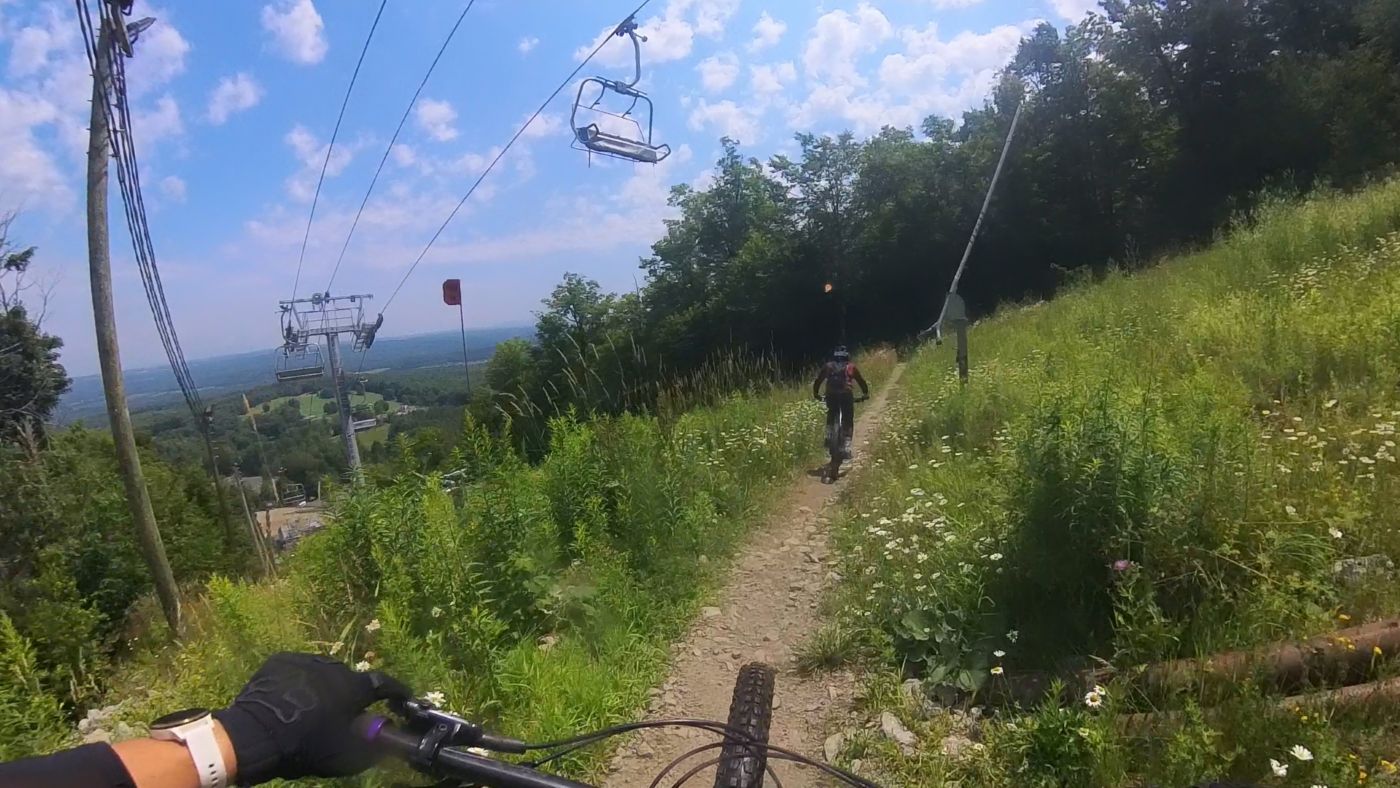
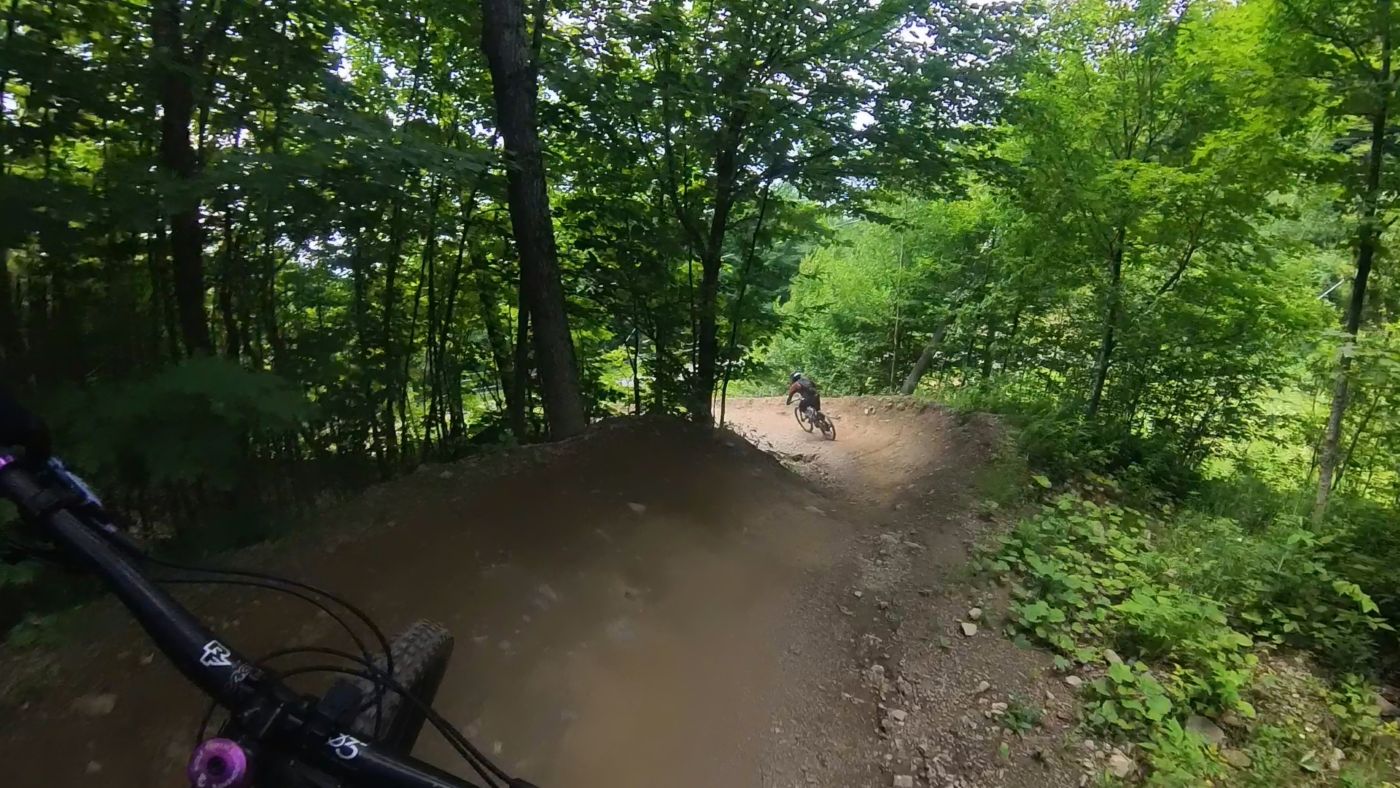
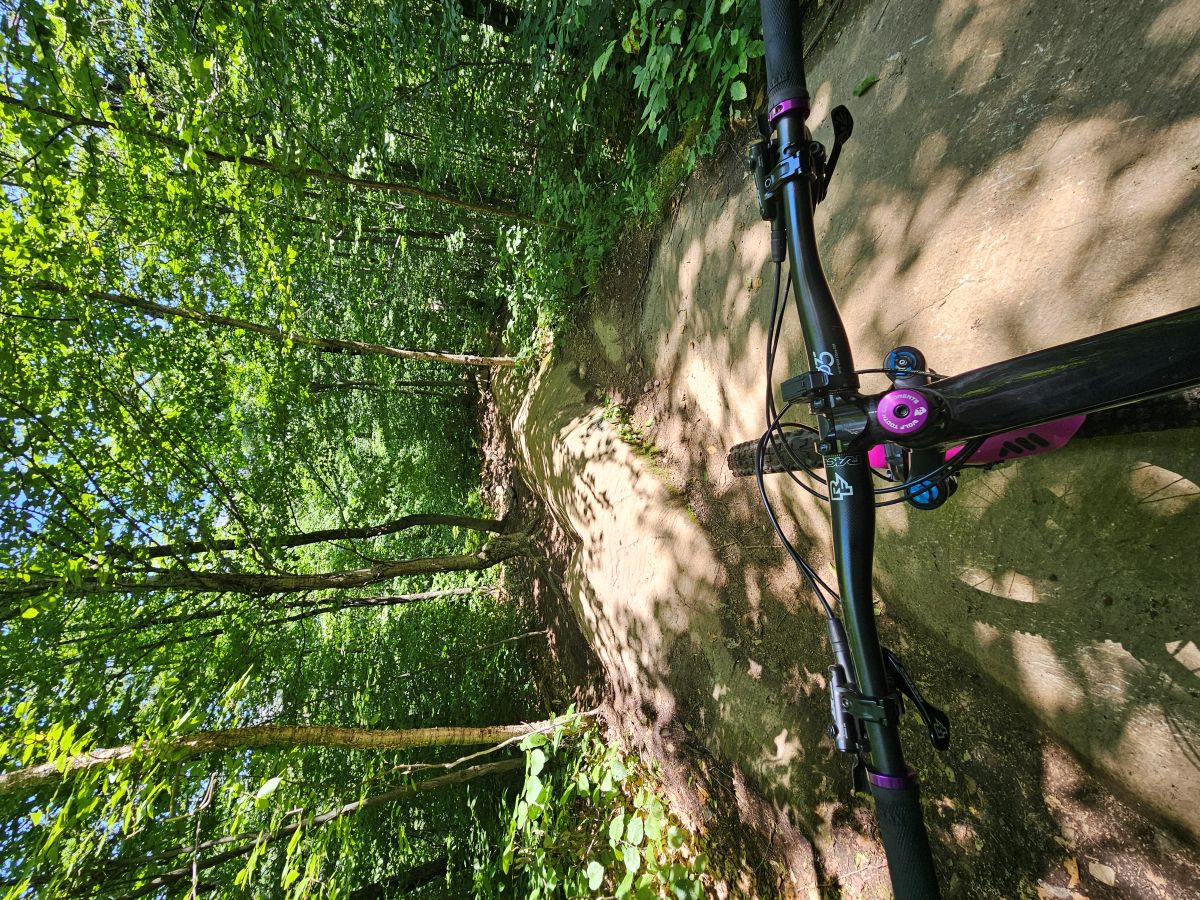
<p><strong>Notes:</strong> Bromont bike park was about a 20 minute drive from this campground. There are closer campgrounds, but due to our last minute change, this was the only place with a site available. There was a mountain bike race happening when we visited, which was fun to watch while riding the lift up the mountain. The Bromont bike trails are quite rugged compared to many of the other trails that we rode in Quebec. Most people were riding double crowns. We had a ton of fun, the views were beautiful and the trails were maintained decently. There are some fairly chunky areas, so be cautious. There is a skills park on the mountain as well, which is a really fun area to play around in and practice table tops, drops, and rolls.</p>

<div style="display: flex; flex-wrap: wrap; gap: 1rem; justify-content: center;">
  <div style="flex: 1 1 90%; text-align: center;">
    <img src="/assets/images/posts/2025-09-01-quebec-itinerary/BR_1.jpg" alt="Looking down from Bromont Mountain" style="width: 100%; height: auto; border-radius: 8px;" />
  </div>
  <div style="flex: 1 1 30%; text-align: center;">
    <img src="/assets/images/posts/2025-09-01-quebec-itinerary/BR_2.jpg" alt="Bromont swing and author's bike" style="width: 100%; height: auto; border-radius: 8px;" />
  </div>
</div>
<p style="font-size: 0.9em; color: #666; text-align: center;">Caption: View from the top of Bromont!</p>

<hr />

<h3 id="monday--trails--tacos">Monday – Trails &amp; Tacos</h3>
<ul>
  <li><strong>Breakfast:</strong> Scrambled eggs with peameal bacon and toast.</li>
  <li><strong>Activity:</strong> Ride at Bromont Mountain Bike Park (Victory Lap) &amp; cool off at the Bromont water park!</li>
  <li><strong>Lunch:</strong> We stopped at Brouemont - Microbrasserie &amp; Restaurant (107 Bd de Bromont, Bromont, QC J2L 2K7)</li>
  <li><strong>Dinner:</strong> Chicken tacos with tortillas, cilantro, onion, crema.</li>
</ul>

<p><strong>Notes:</strong> Brouemont had awesome beer and delicious food, it was so good after a hot morning on the trails. To cool off after lunch, we headed to Bromont Water Park, a destination that offers an epic array of water slides. Beyond the slides, the park is part of a larger mountain experience, meaning you can combine your aquatic fun with activities like alpine luge and scenic chairlift rides. It’s a great spot for families looking for a full day of adventure, offering a mix of relaxation and high-octane fun against a beautiful mountain backdrop.</p>

<div style="display: flex; flex-wrap: wrap; gap: 1rem; justify-content: center;">
  <div style="flex: 1 1 55%; text-align: center;">
    <img src="/assets/images/posts/2025-09-01-quebec-itinerary/BR_3.jpg" alt="passing under the chairlifts" style="width: 100%; height: auto; border-radius: 8px;" />
  </div>
  <div style="flex: 1 1 55%; text-align: center;">
    <img src="/assets/images/posts/2025-09-01-quebec-itinerary/BR_4.jpg" alt="authors riding down the trails" style="width: 100%; height: auto; border-radius: 8px;" />
  </div>
</div>
<p style="font-size: 0.9em; color: #666; text-align: center;">Some stills from video footage riding Bromont. There are some lovely meadows that you'll cross in certain areas. There are berms of all sizes, depending on the difficulty of trail you’re riding.</p>
<hr />

<h3 id="tuesday--driving-to-quebec--hike">Tuesday – Driving to Quebec &amp; Hike</h3>
<ul>
  <li><strong>Breakfast:</strong> Pancakes drizzled with maple syrup.</li>
  <li><strong>Activity:</strong> Hiking Les Loups at Jacques Cartier National Park</li>
  <li><strong>Lunch:</strong> Chicken thighs with prepacked salad.</li>
  <li><strong>Dinner:</strong> Sausages with pasta salad (or leftover orzo).</li>
  <li><strong>Camping Location:</strong> Jacques Cartier National Park, 103 Chem. du Parc National, Stoneham-et-Tewkesbury, QC G3C 2T5</li>
</ul>

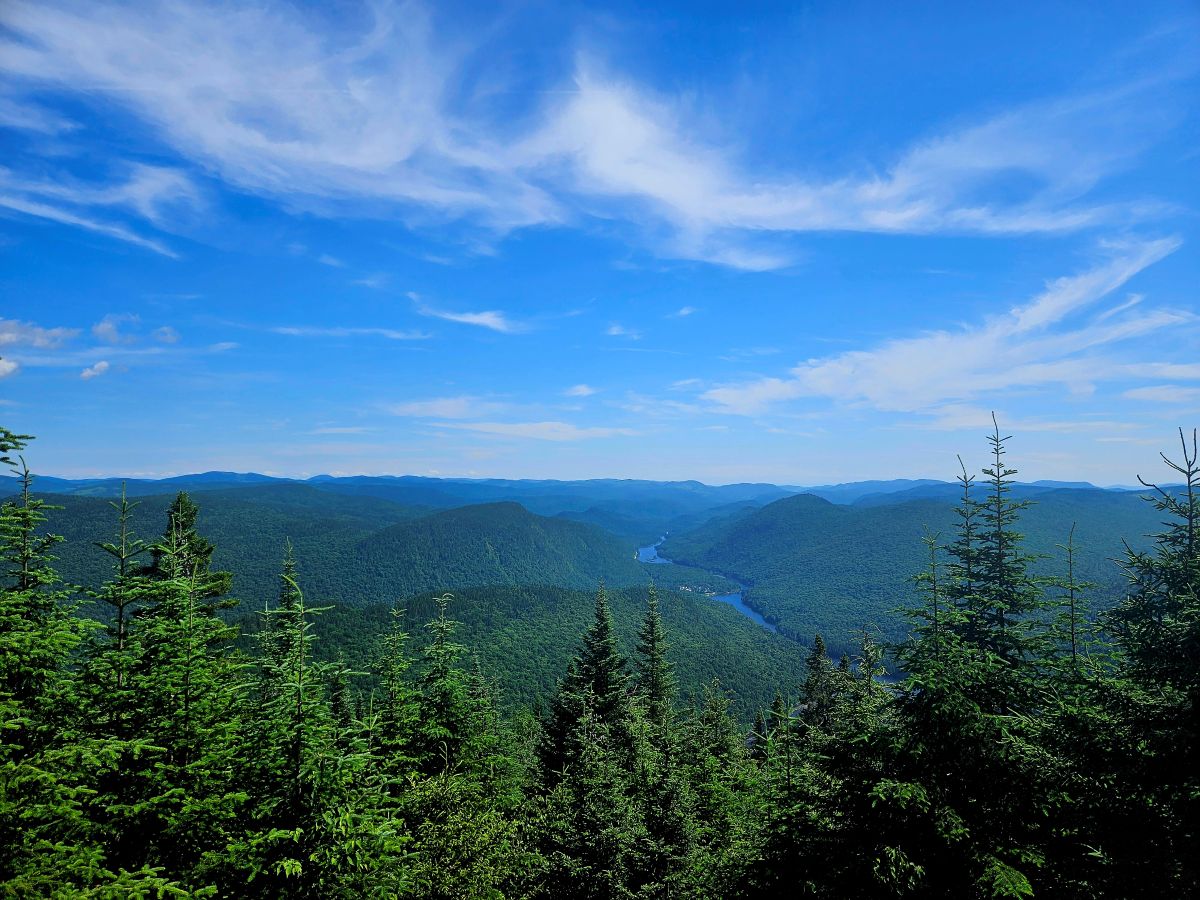
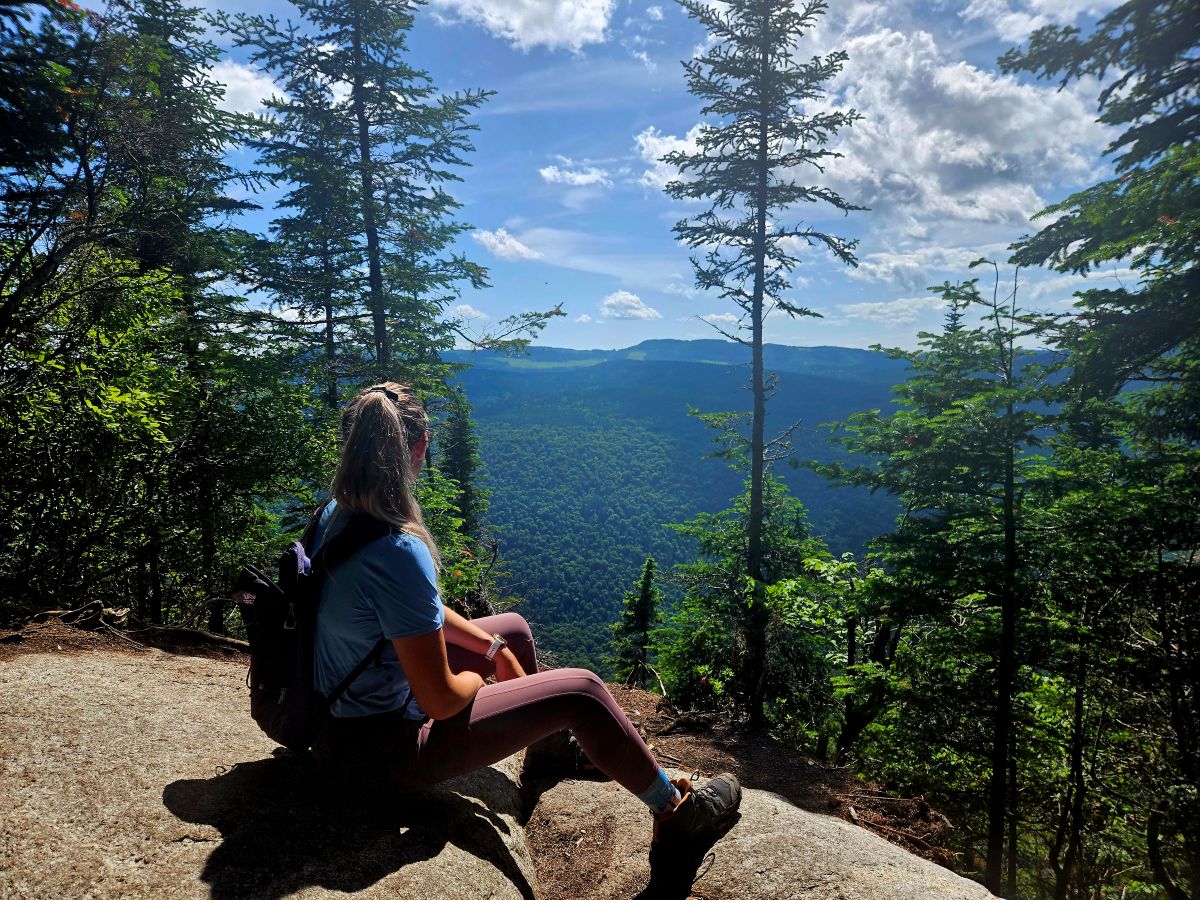
<p><strong>Notes:</strong> The Les Loups trail is 11km in and out, which it took us 2.5hrs at a fairly fast pace. It is a well traveled trail, but be sure to wear high quality hiking shoes if you are going to the final lookout. You will likely encounter wet boulders on the way up. We highly recommend hiking the full trail if you have time - the view at the end is amazing!</p>

<div style="display: flex; flex-wrap: wrap; gap: 1rem; justify-content: center;">
  <div style="flex: 1 1 55%; text-align: center;">
    <img src="/assets/images/posts/2025-09-01-quebec-itinerary/Loups1.jpg" alt="Jaques-Cartier river from a lookout on Les Loups" style="width: 100%; height: auto; border-radius: 8px;" />
  </div>
  <div style="flex: 1 1 55%; text-align: center;">
    <img src="/assets/images/posts/2025-09-01-quebec-itinerary/Loups2.jpg" alt="Another view from a lookout on Les Loups" style="width: 100%; height: auto; border-radius: 8px;" />
  </div>
</div>
<p style="font-size: 0.9em; color: #666; text-align: center;">The views from the second lookout on the Les Loups trail.</p>

<hr />

<h3 id="wednesday---empire47">Wednesday  – Empire47</h3>
<ul>
  <li><strong>Breakfast:</strong> Scrambled eggs with toast.</li>
  <li><strong>Activity:</strong>  Ride <em>Empire 47 (26, rue du Pied-des-Pentes, Lac-Delage, QC G3C 5A2)</em> — famous for smooth machine-built flow trails and great bike park feel.</li>
  <li><strong>Lunch:</strong> Burgers.</li>
  <li><strong>Dinner:</strong> Chicken thighs with prepacked salad.</li>
</ul>

<p><strong>Notes:</strong> Empire47 (or E47) has over 70km of extremely well maintained trails for all skill levels. The climbs were fun and interesting, with some step ups to power over. There was also some fantastic berms, flow, and rock rolls on the descents. We only had one day, but could definitely do a lot more there!</p>

<div style="display: flex; flex-wrap: wrap; gap: 1rem; justify-content: center;">
  <div style="flex: 1 1 45%; text-align: center;">
    <img src="/assets/images/posts/2025-09-01-quebec-itinerary/E47_1.jpg" alt="Climbing to Summit 2 at E47" style="width: 100%; height: auto; border-radius: 8px;" />
    <p style="font-size: 0.9em; color: #666;">Rocks you’ll encounter on the trail on the way up to Summit 2</p>
  </div>
  <div style="flex: 1 1 45%; text-align: center;">
    <img src="/assets/images/posts/2025-09-01-quebec-itinerary/E47_2.jpg" alt="View from Belzébrute" style="width: 100%; height: auto; border-radius: 8px;" />
    <p style="font-size: 0.9em; color: #666;">Beautiful view on the Belzébrute trail</p>
  </div>
</div>

<hr />

<h3 id="thursday---le-massif">Thursday - Le Massif</h3>
<ul>
  <li><strong>Breakfast:</strong> Peameal and eggs open-face on English muffins.</li>
  <li><strong>Activity:</strong>  Ride <em>Le Massif (185, chemin du Massif, Petite-Rivière-Saint-François, QC G0A 2L0)</em>. Big mountain terrain with scenic views of the St. Lawrence River</li>
  <li><strong>Lunch:</strong> Chicken burgers with lettuce and mayo.</li>
  <li><strong>Dinner:</strong> Pork tacos with cilantro, onion, crema.</li>
</ul>

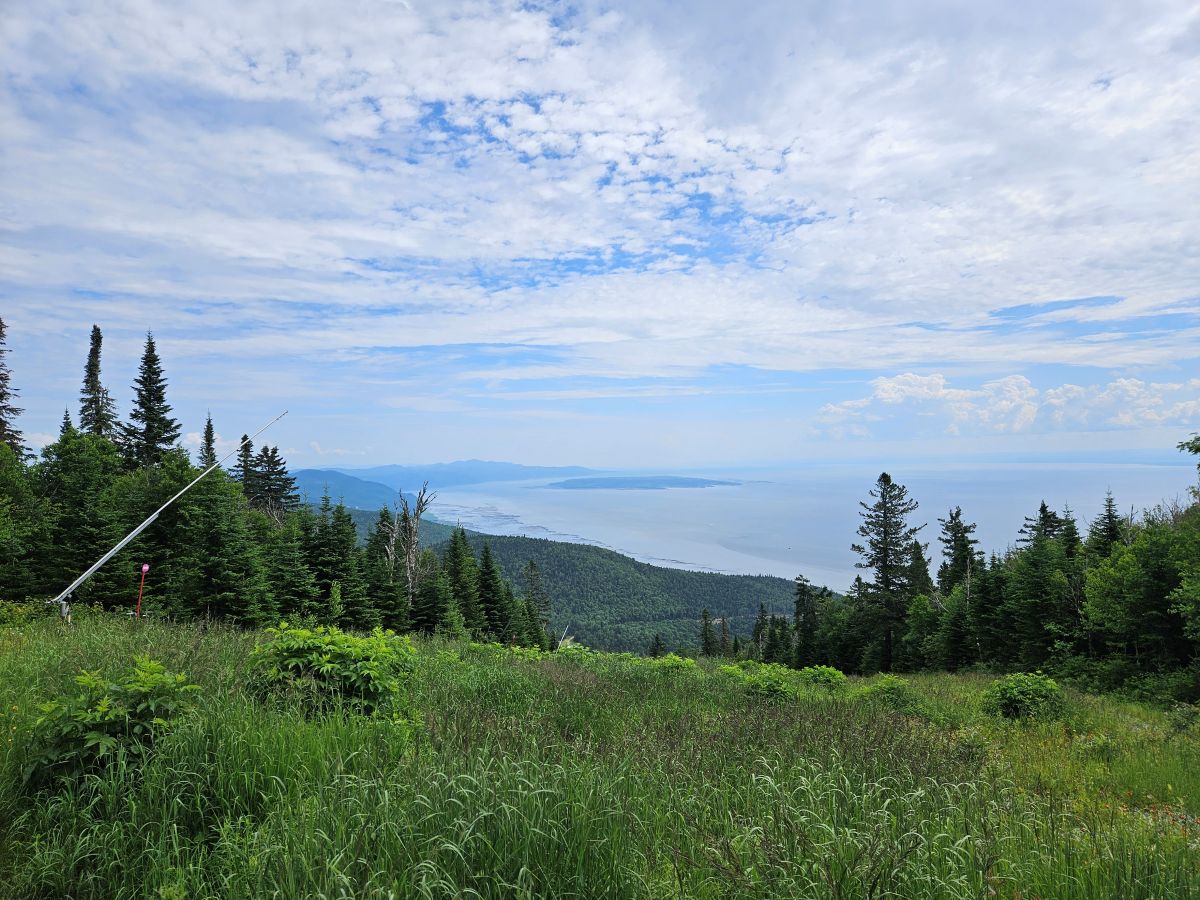
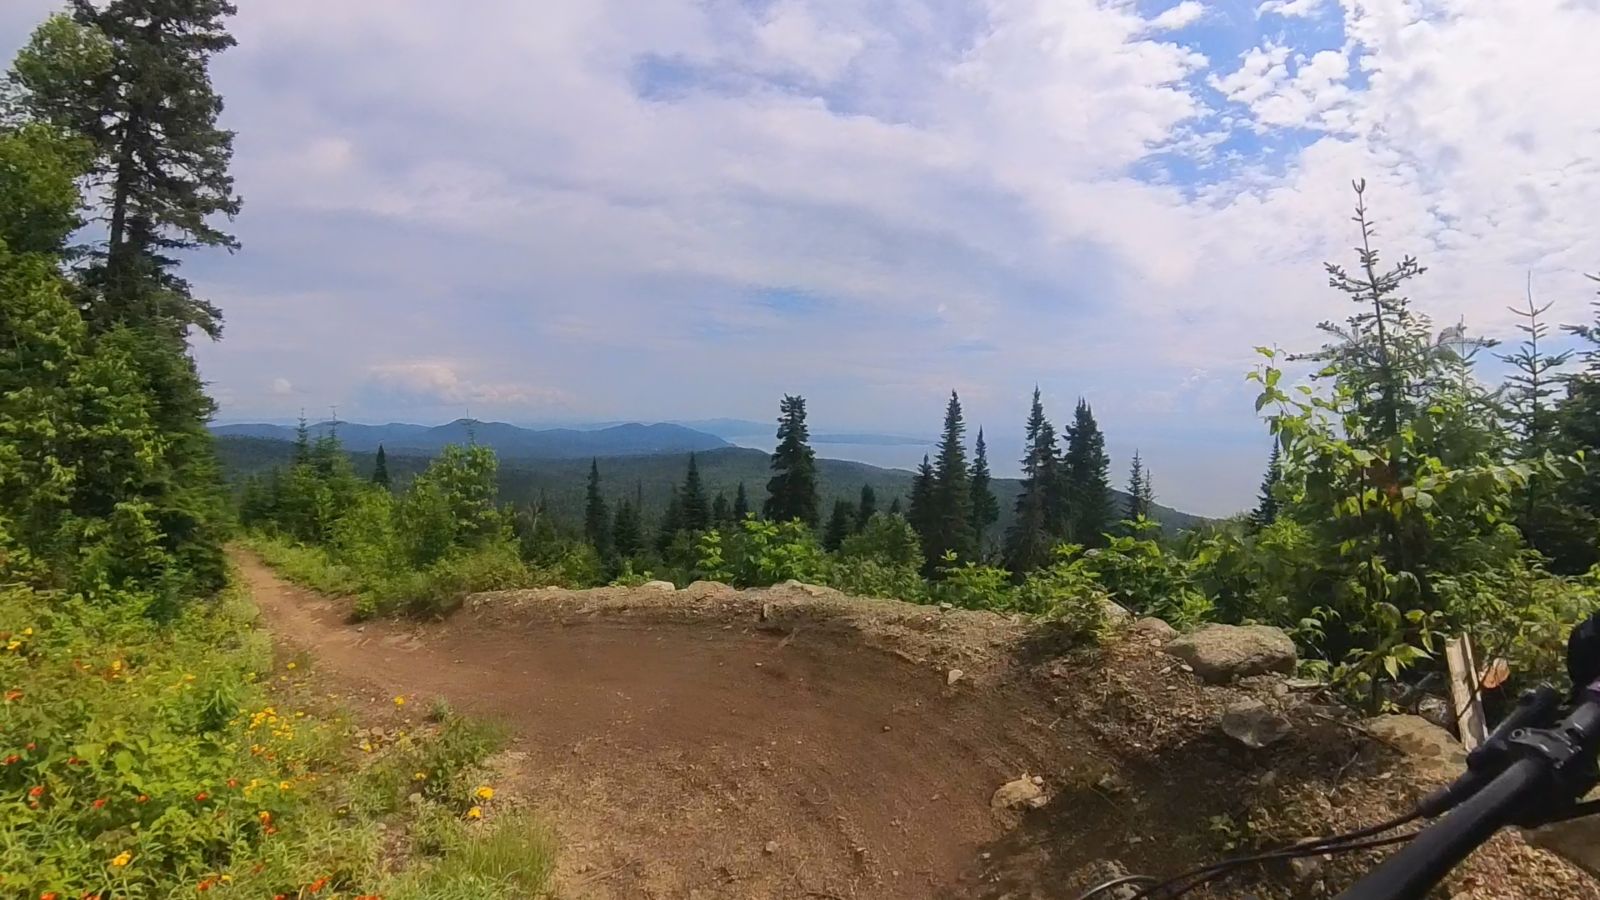
<p><strong>Notes:</strong> Le Massif was the most beautiful trail system we went to! The trails start at the top of the mountain, so you get to enjoy the amazing view as you’re getting ready and there are incredible views on the way down, particularly if you take Histoire sans fin. There’s some climbing that needs to be done up bus jaune, but afterwards, its SO worth it! The berms with incredible views of the St. Lawrence River, the flow, the berms (yes I’ll mention them again!)! This trail is a must do!</p>

<div style="display: flex; flex-wrap: wrap; gap: 1rem; justify-content: center;">
  <div style="flex: 1 1 55%; text-align: center;">
    <img src="/assets/images/posts/2025-09-01-quebec-itinerary/LM_1.jpg" alt="View from the top of Le Massif" style="width: 100%; height: auto; border-radius: 8px;" />
    <p style="font-size: 0.9em; color: #666; text-align: center;">Incredible views of the St. Lawrence River on the way down the trail Histoire sans fin.</p>
  </div>
  <div style="flex: 1 1 55%; text-align: center;">
    <img src="/assets/images/posts/2025-09-01-quebec-itinerary/LM_2.jpg" alt="Well maintained berms on the way down Le Massif" style="width: 100%; height: auto; border-radius: 8px;" />
    <p style="font-size: 0.9em; color: #666; text-align: center;">Smooth, well maintained berms with more incredible views.</p>
  </div>
</div>

<hr />

<h3 id="friday---bras-du-nord">Friday - Bras du Nord</h3>
<ul>
  <li><strong>Breakfast:</strong> Peameal and eggs on toast with hashbrowns.</li>
  <li><strong>Activity:</strong>   Ride <em>Vallée Bras-du-Nord (107 Grande Ligne, Saint-Raymond, QC G3L 2Y4)</em>. Endless singletrack and some of the most scenic trails in the region.</li>
  <li><strong>Lunch:</strong> Sausages on buns with cut veggies.</li>
  <li><strong>Dinner:</strong> Dehydrated chili mac &amp; cheese, easy and filling after a long day out.</li>
</ul>

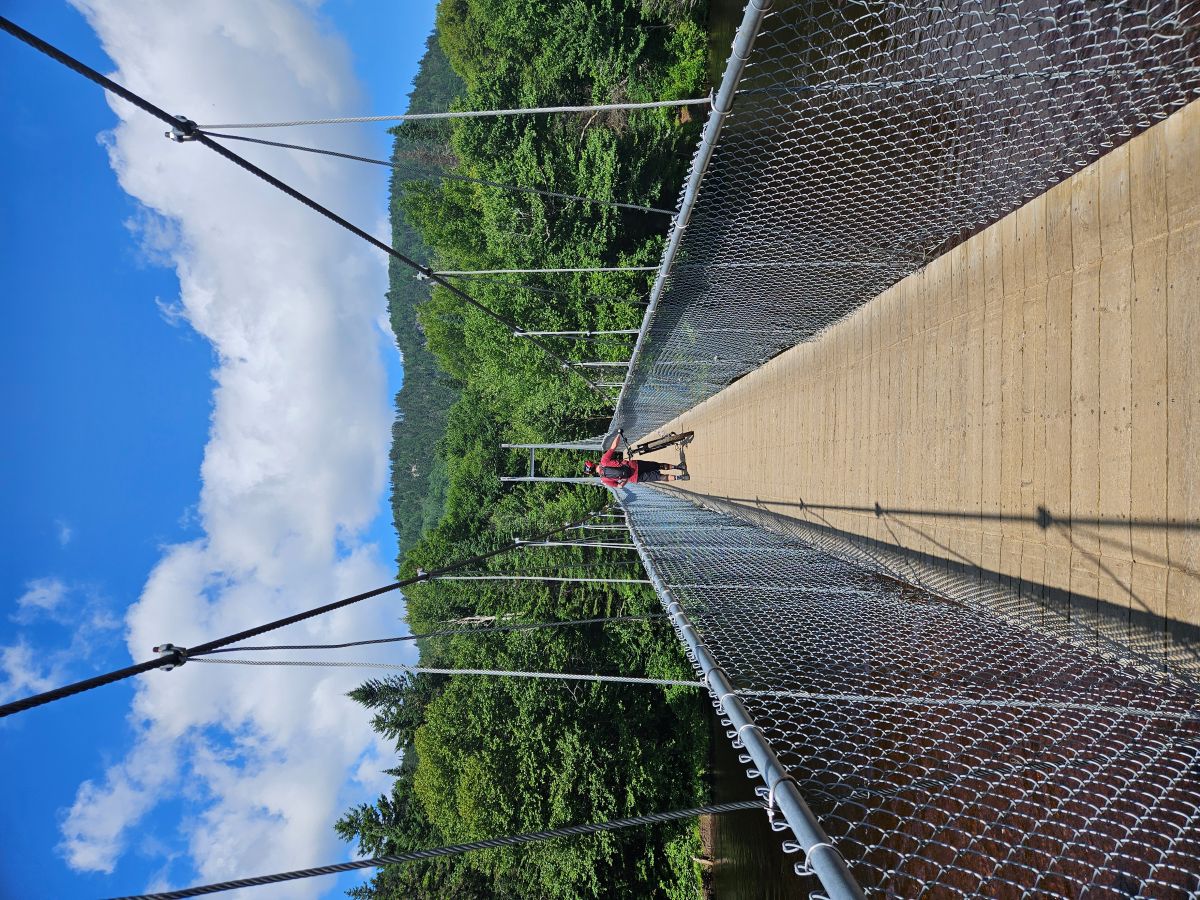
<p><strong>Notes:</strong> The trail system is divided into two distinct and complementary sectors: the Shannahan area and the Saint-Raymond area. Shannahan Sector: This is considered the “wild side” of the valley. It’s known for its long, epic singletracks, technical challenges, and stunning natural scenery, including glacial hills, cliffs, rivers, and waterfalls. This sector is a must-ride for experienced riders and is where you’ll find some of the most famous trails.
Saint-Raymond Sector: Located closer to the town of Saint-Raymond, this sector offers a different experience. The trails here are shorter, featuring flowy singletracks with a succession of quick climbs and fun descents. This area is more playful and is a great option for a quick ride or for riders looking to improve their skills.</p>

<div style="display: flex; flex-wrap: wrap; gap: 1rem; justify-content: center;">
  <div style="flex: 1 1 55%; text-align: center;">
    <img src="/assets/images/posts/2025-09-01-quebec-itinerary/BDN_1.jpg" alt="Author walking their bike across the bridge at Bras-du-Nord as instructed" style="width: 100%; height: auto; border-radius: 8px;" />
  </div>
  <div style="flex: 1 1 55%; text-align: center;">
    <img src="/assets/images/posts/2025-09-01-quebec-itinerary/BDN_2.jpg" alt="Waterfall at Bras-du-Nord" style="width: 100%; height: auto; border-radius: 8px;" />
  </div>
</div>
<p style="font-size: 0.9em; color: #666; text-align: center;">Tons of beauty at Brad du Nord: mountains, waterfalls, suspension bridges, what more could you ask for! This waterfall is Chute à Gilles, which can be ridden to by taking Grande Évaison.</p>

<hr />

<h3 id="saturday---sentiers-du-moulin">Saturday - Sentiers du Moulin</h3>
<ul>
  <li><strong>Breakfast:</strong> Scrambled eggs and toast</li>
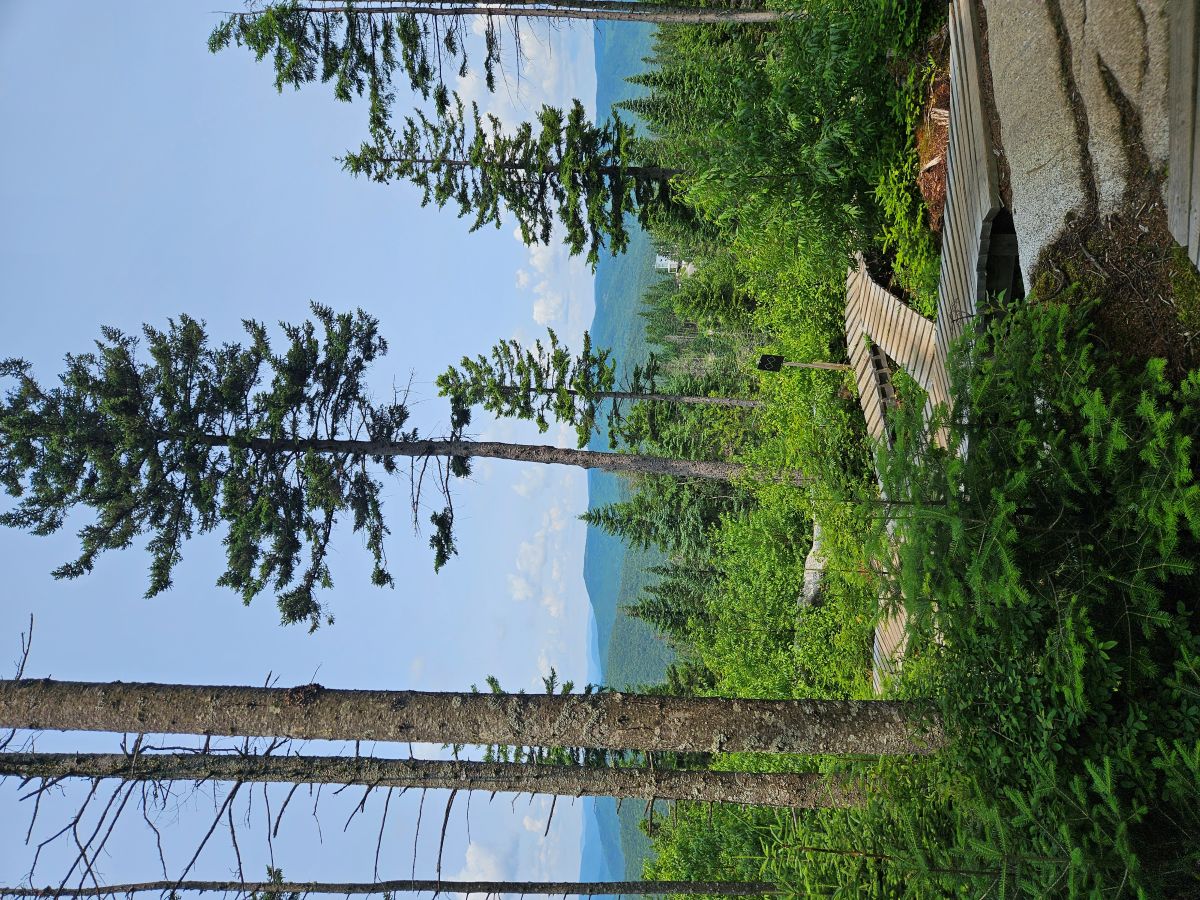
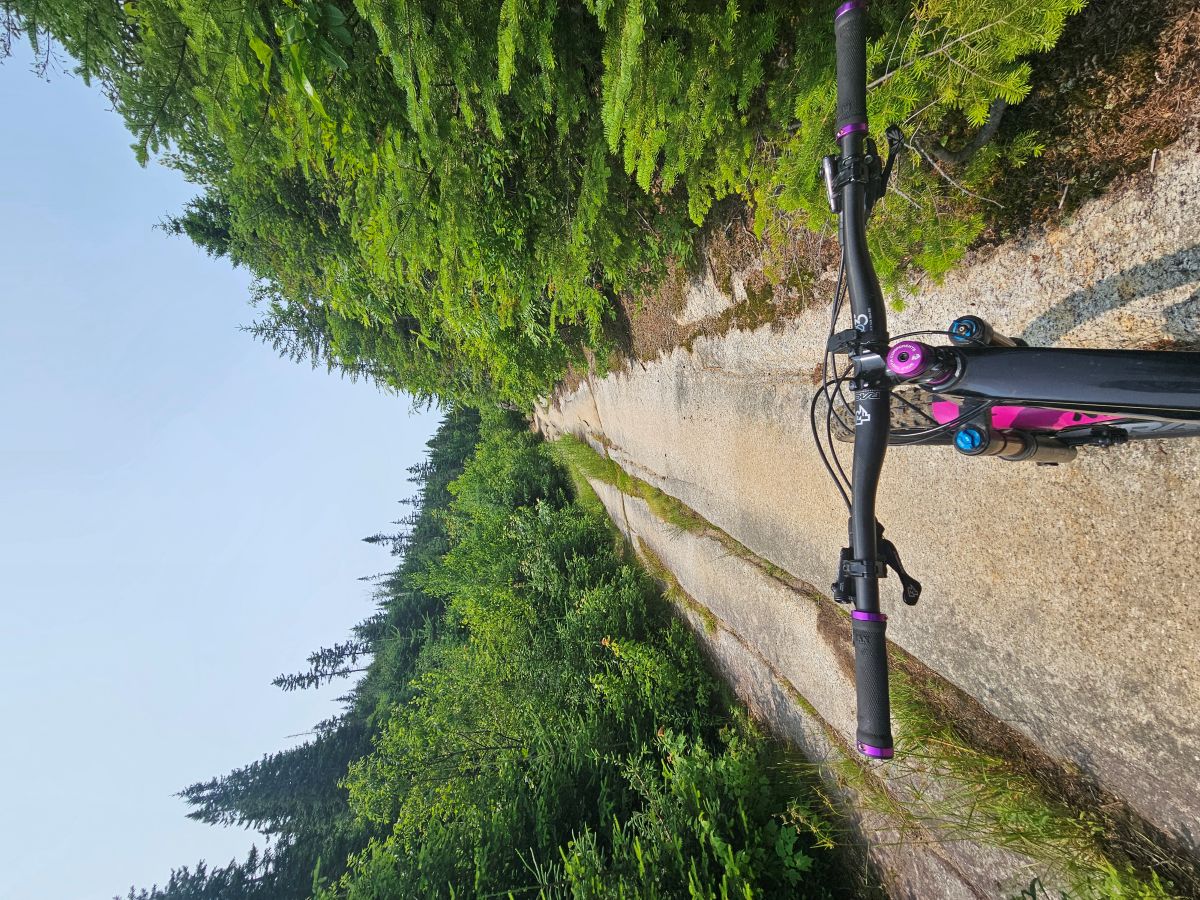
  <li><strong>Activity:</strong> Ride <em>Sentiers du Moulin  (99, chemin du Moulin, Lac-Beauport, QC G3B 0E1)</em>. Epic single track with big rock features and wooden bridges.</li>
  <li><strong>Lunch:</strong> Wraps, veggies, cut meat, hummus.</li>
  <li><strong>Dinner:</strong> Ate out this day!</li>
</ul>

<p><strong>Notes:</strong> Sentiers du Moulin  is a well-known mountain biking destination located just 20 minutes from Quebec City. It has gained a reputation for its high-quality, challenging trails and is considered a world-class trail network. It is primarily known for its technical and demanding singletrack. The trail network is built for riders who are looking for a challenge, with a focus on cross-country and all-mountain riding. The trails are characterized by natural terrain (massive granite slabs and exposed rock), and technical features (mix of technical climbs and descents, with plenty of roots, rocks, and man-made features like wooden structures).</p>

<div style="display: flex; flex-wrap: wrap; gap: 1rem; justify-content: center;">
  <div style="flex: 1 1 45%; text-align: center;">
    <img src="/assets/images/posts/2025-09-01-quebec-itinerary/SDM_1.jpg" alt="Woodwork at Sentiers du Moulin" style="width: 100%; height: auto; border-radius: 8px;" />
  </div>
  <div style="flex: 1 1 45%; text-align: center;">
    <img src="/assets/images/posts/2025-09-01-quebec-itinerary/SDM_2.jpg" alt="One of the longer continuous rock slabs at Sentiers du Moulin" style="width: 100%; height: auto; border-radius: 8px;" />
  </div>
</div>
<p style="font-size: 0.9em; color: #666; text-align: center;">Sentiers du Moulin is unique for the vast networks of rock slabs and networks of wooden features. These photos are on Crête du Lynx.</p>

<hr />

<h3 id="sunday-july-13--heading-home">Sunday, July 13 – Heading Home</h3>
<ul>
  <li><strong>Breakfast:</strong> Pancakes with maple syrup.</li>
  <li><strong>Activity:</strong> Pack up camp, hit the road, and ease back into reality.</li>
  <li><strong>Lunch:</strong> On the road.</li>
  <li><strong>Dinner:</strong> Home sweet home!</li>
</ul>

<hr />

<h2 id="locations-summary">Locations Summary</h2>

<table>
  <thead>
    <tr>
      <th>Location</th>
      <th>Address</th>
    </tr>
  </thead>
  <tbody>
    <tr>
      <td>Sentiers du Moulin</td>
      <td>99, chemin du Moulin, Lac-Beauport, QC G3B 0E1</td>
    </tr>
    <tr>
      <td>Mont-Sainte-Anne</td>
      <td>2000 Boulevard du Beau-Pré, Beaupré, QC G0A 1E0</td>
    </tr>
    <tr>
      <td>Empire 47</td>
      <td>26, rue du Pied-des-Pentes, Lac-Delage, QC G3C 5A2</td>
    </tr>
    <tr>
      <td>Le Massif</td>
      <td>185, chemin du Massif, Petite-Rivière-Saint-François, QC G0A 2L0</td>
    </tr>
    <tr>
      <td>Bras du Nord</td>
      <td>107 Grande Ligne, Saint-Raymond, QC G3L 2Y4</td>
    </tr>
  </tbody>
</table>

<hr />

<h2 id="meals-summary">Meals Summary</h2>

<table>
  <thead>
    <tr>
      <th>Date</th>
      <th>Breakfast</th>
      <th>Lunch</th>
      <th>Dinner</th>
    </tr>
  </thead>
  <tbody>
    <tr>
      <td>Sat, Jul 5</td>
      <td>On the road</td>
      <td>Burgers</td>
      <td>Steaks with grilled veg + mushrooms</td>
    </tr>
    <tr>
      <td>Sun, Jul 6</td>
      <td>Fire omelettes</td>
      <td>Wraps (meats, cheese, lettuce, cucumbers)</td>
      <td>Souvlaki + pre-made orzo salad</td>
    </tr>
    <tr>
      <td>Mon, Jul 7</td>
      <td>Scrambled eggs + peameal toast</td>
      <td>Meal out at Brouemont</td>
      <td>Chicken tacos</td>
    </tr>
    <tr>
      <td>Tue, Jul 8</td>
      <td>Pancakes with maple syrup</td>
      <td>Chicken thighs + salad</td>
      <td>Sausages + pasta salad</td>
    </tr>
    <tr>
      <td>Wed, Jul 9</td>
      <td>Scrambled eggs + toast</td>
      <td>Burgers</td>
      <td>Chicken thighs + packed salad</td>
    </tr>
    <tr>
      <td>Thu, Jul 10</td>
      <td>Peameal + eggs on English muffin</td>
      <td>Chicken burger</td>
      <td>Pork tacos</td>
    </tr>
    <tr>
      <td>Fri, Jul 11</td>
      <td>Peameal + eggs on toast + hashbrowns</td>
      <td>Sausages on a bun with veggies</td>
      <td>Chili mac &amp; cheese (dehydrated)</td>
    </tr>
    <tr>
      <td>Sat, Jul 12</td>
      <td>Scrambled eggs + toast</td>
      <td>Wraps, veggies, cut meat, hummus</td>
      <td>Ate out</td>
    </tr>
    <tr>
      <td>Sun, Jul 13</td>
      <td>Pancakes with maple syrup</td>
      <td>On the road</td>
      <td>Home</td>
    </tr>
  </tbody>
</table>]]></content><author><name></name></author><category term="travel" /><category term="itineraries" /><summary type="html"><![CDATA[Waterfalls at Bras du Nord.]]></summary></entry><entry><title type="html">Extra Tent Stakes</title><link href="https://packpedalplate.com/gear/backcountry/tent-stakes/" rel="alternate" type="text/html" title="Extra Tent Stakes" /><published>2025-08-19T17:00:00-04:00</published><updated>2025-08-19T17:00:00-04:00</updated><id>https://packpedalplate.com/gear/backcountry/tent-stakes</id><content type="html" xml:base="https://packpedalplate.com/gear/backcountry/tent-stakes/"><![CDATA[<p>When it comes to tent stakes, the ones that come with your tent often aren’t the ones you want to rely on in the backcountry, or even at a lot of car camping spots. Over the years, we’ve picked up a few extra sets to have on hand for different setups: tarps, shelters, or backup when original stakes bend or vanish into the void. This isn’t a flashy gear comparison—it’s just what we’ve been using, abusing, and packing along because they work.</p>

<div style="text-align: center; margin: 2rem 0;">
  <img src="/assets/images/posts/2025-08-19-tent-stakes/Stakes_1.jpg" alt="Assorted Y-beam stakes" style="max-width: 500px; width: 100%; height: auto; border-radius: 8px;" />
</div>

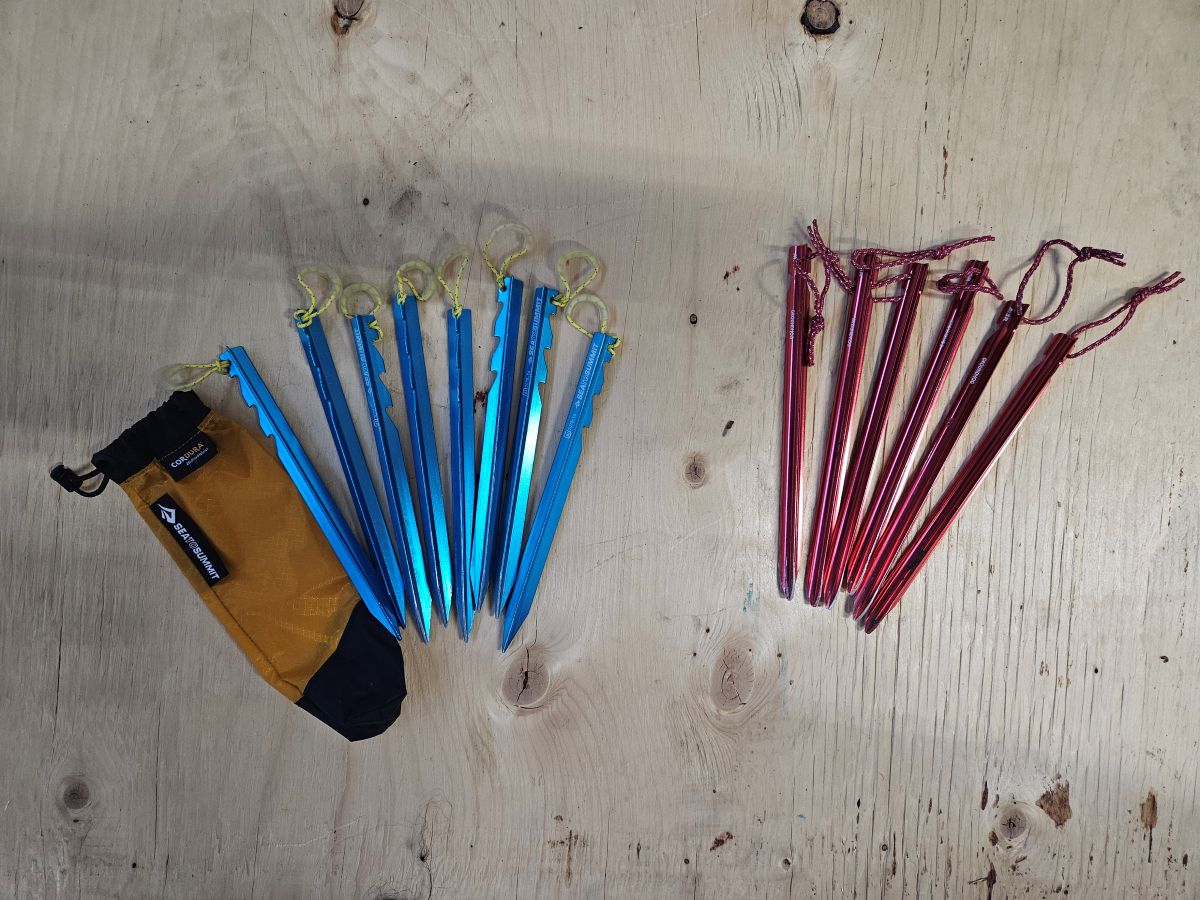
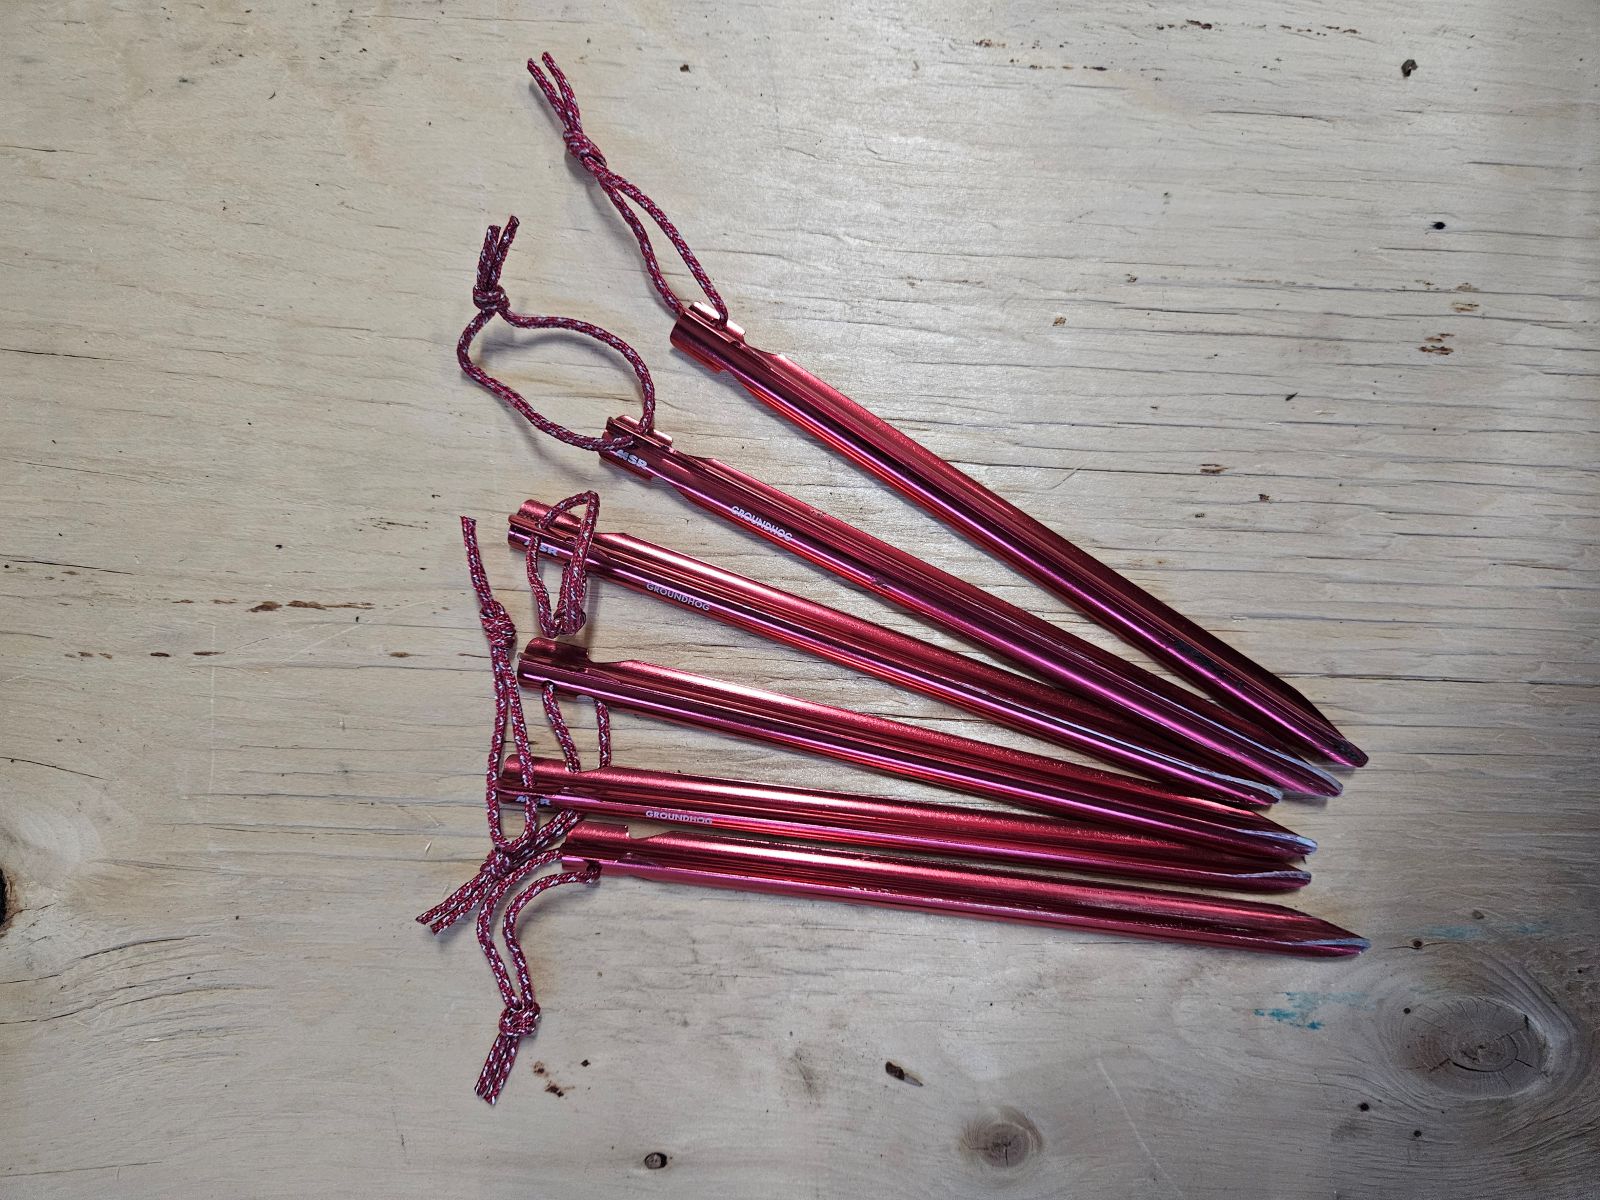
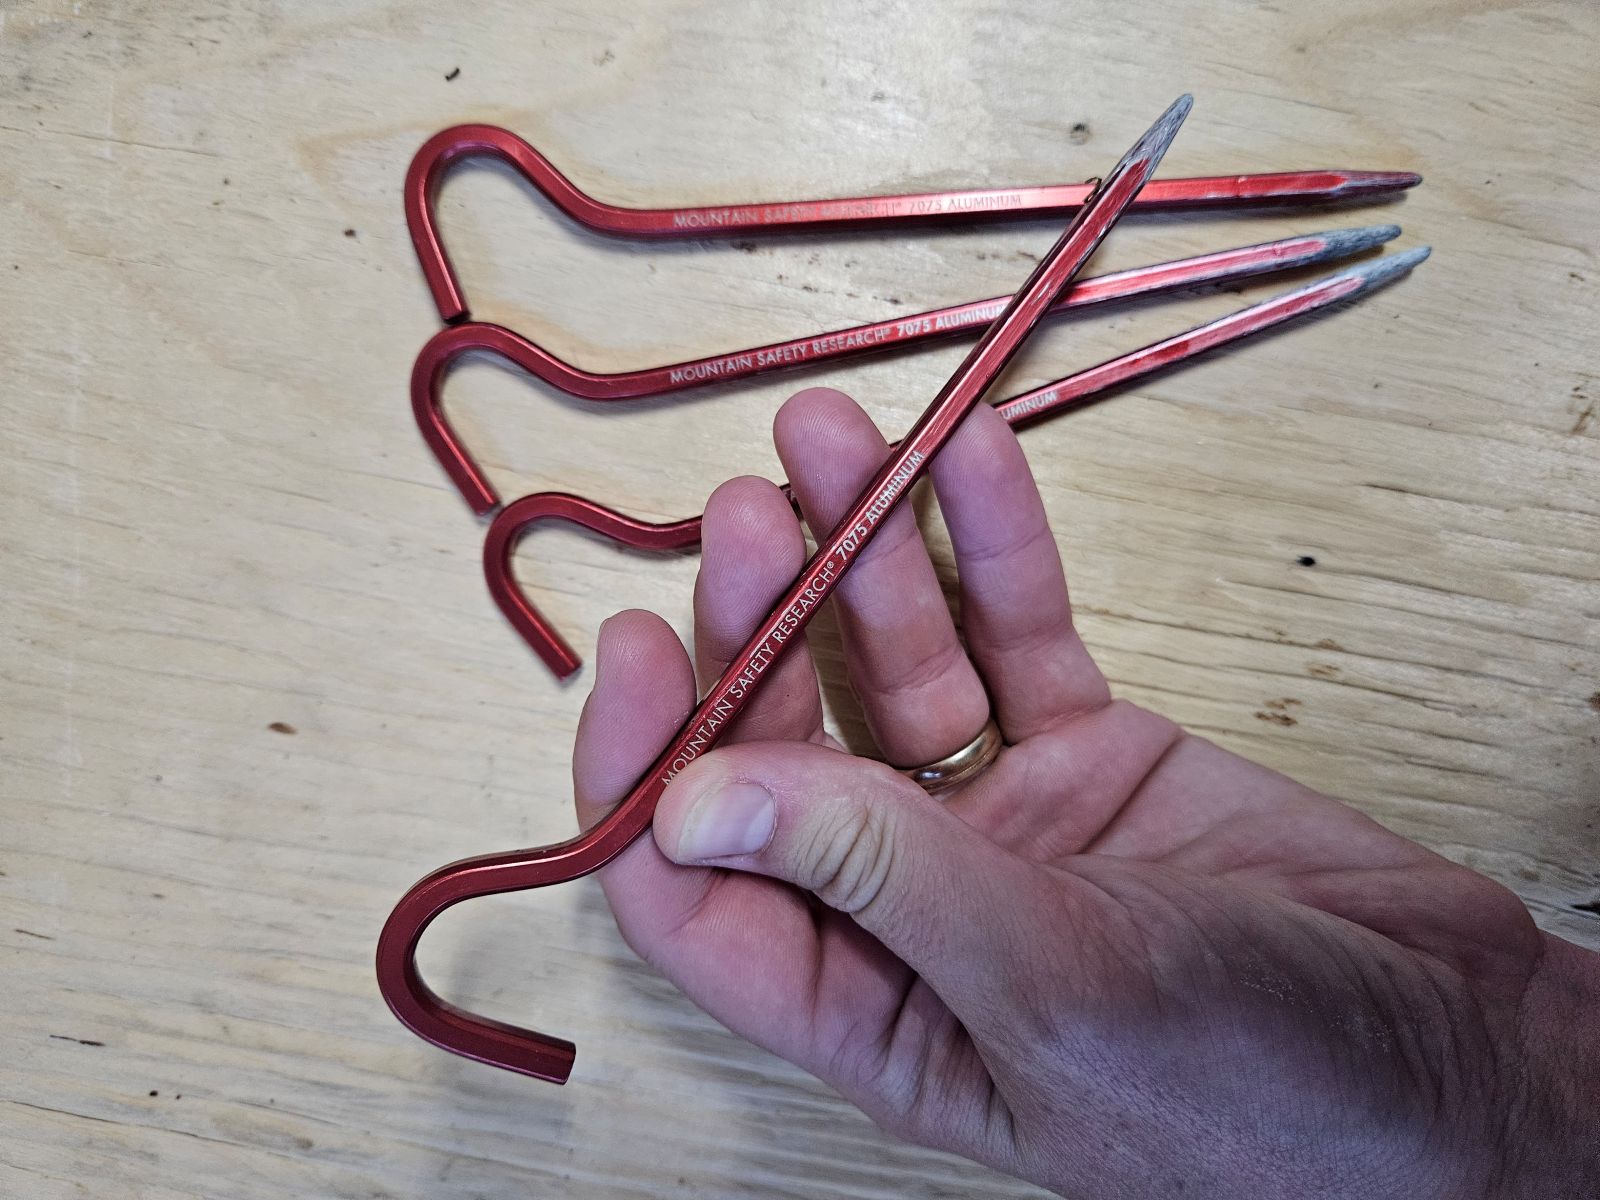
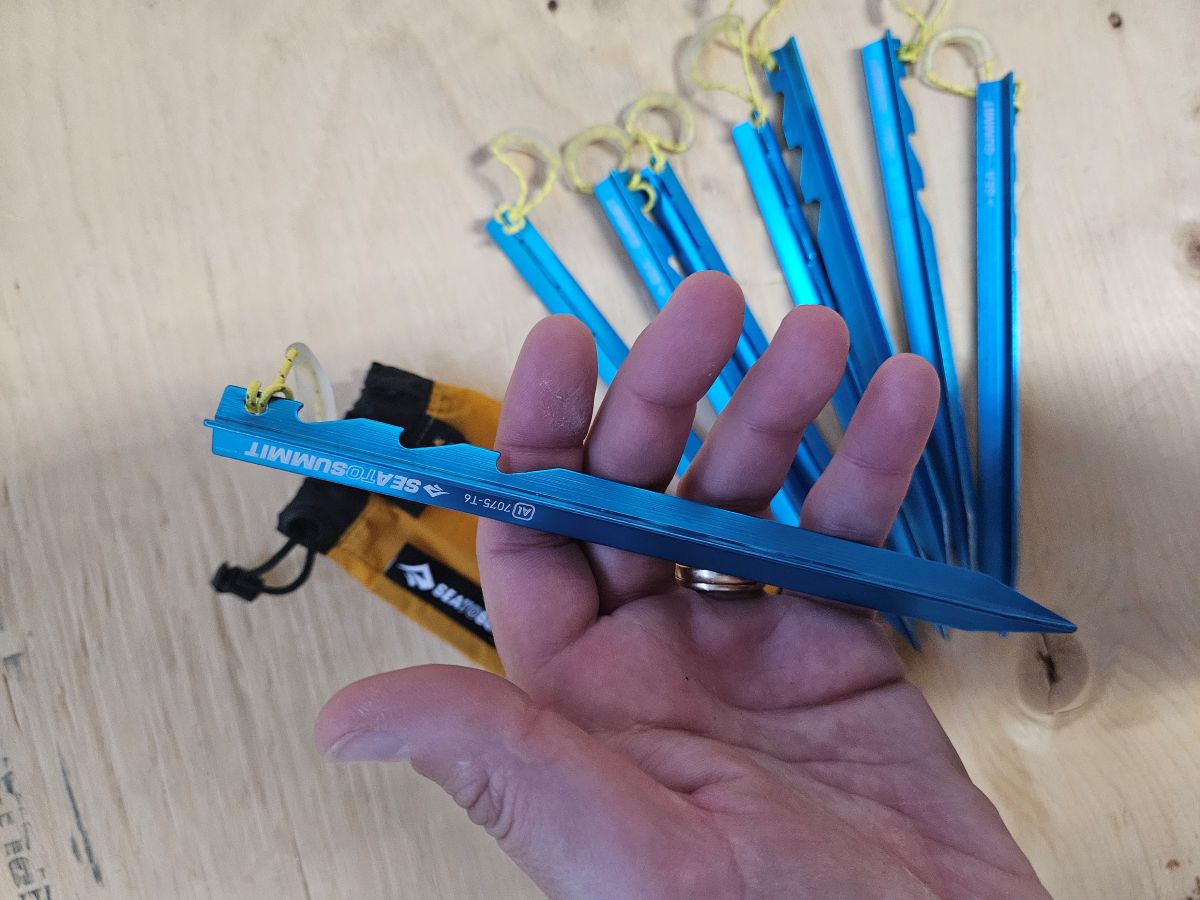
<p>In this post, we’ll share the three types of stakes we keep in our kit: the <strong>MSR Groundhog Stakes</strong>, <strong>MSR Hook Stakes</strong>, and most recently, the <strong>Sea to Summit Ground Control Tent Pegs</strong>. These weren’t included with any tents; they were all purchased separately because we needed better options. And spoiler: one of these has quietly become our new favourite.</p>

<hr />

<h2 id="technical-specs">Technical Specs</h2>

<table>
  <thead>
    <tr>
      <th>Stake Type</th>
      <th>Weight (each)</th>
      <th>Length</th>
      <th>Material</th>
      <th>Included Quantity</th>
      <th>Extras</th>
    </tr>
  </thead>
  <tbody>
    <tr>
      <td>MSR Groundhog</td>
      <td>16 g</td>
      <td>19 cm (7.5 in)</td>
      <td>7000-series aluminum</td>
      <td>6</td>
      <td>Reflective pull loop</td>
    </tr>
    <tr>
      <td>MSR Hook Stake</td>
      <td>10 g</td>
      <td>15 cm (6 in)</td>
      <td>Aluminum</td>
      <td>Varies</td>
      <td>Hook-style top</td>
    </tr>
    <tr>
      <td>Sea to Summit Ground Control Peg</td>
      <td>14 g</td>
      <td>20 cm (7.87 in)</td>
      <td>Hard anodized 7075-T6 aluminum</td>
      <td>8</td>
      <td>Glow-in-the-dark cord pull, storage bag</td>
    </tr>
  </tbody>
</table>

<p>For more information on the material between the MSR Groundhog and Sea to Summit pegs, see our <strong>Aluminum construction</strong> section near the bottom.</p>

<hr />

<h2 id="features">Features</h2>

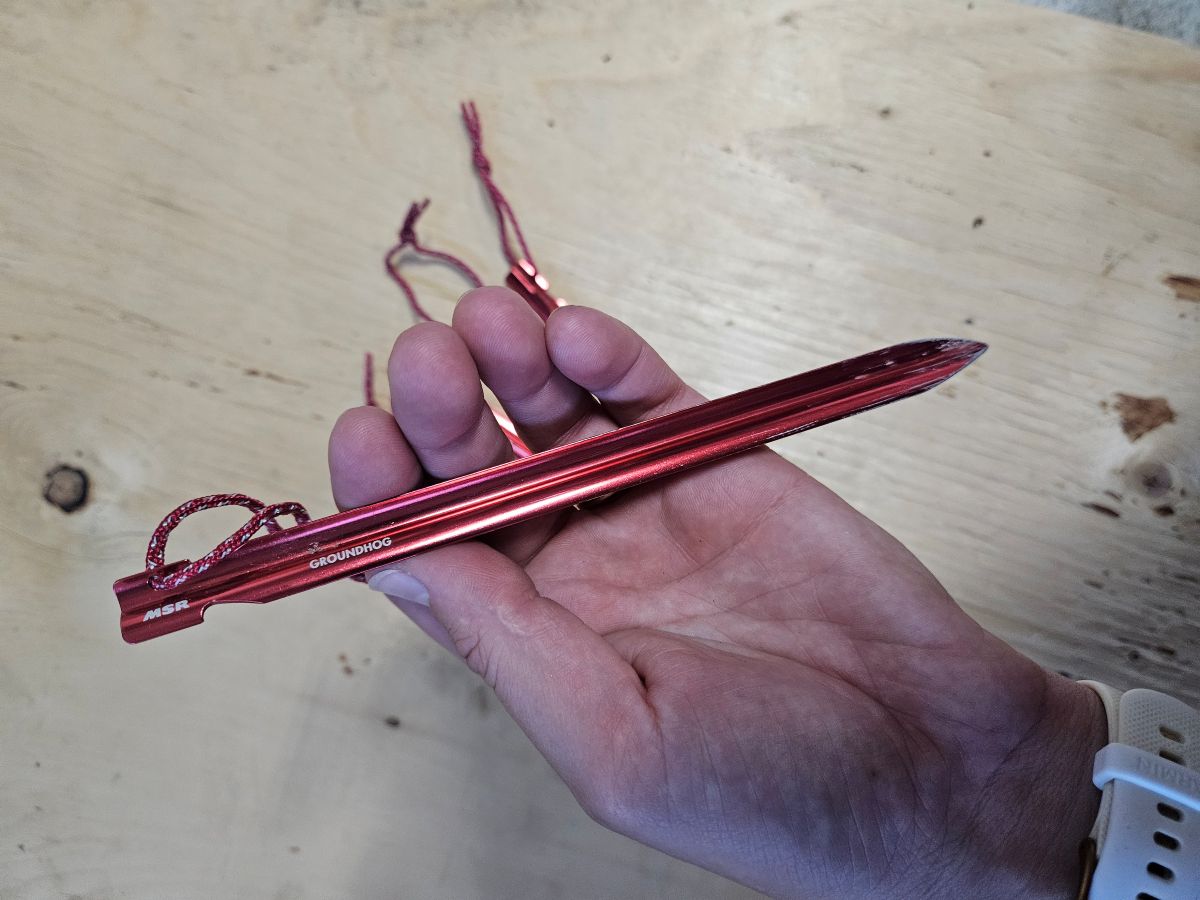
<p><strong>MSR Groundhog Stakes</strong><br />
The classic Y-beam design that bites into a variety of ground types. Reliable, lightweight, and includes a reflective pull loop to help you see them at night.</p>

<div style="text-align: center; margin: 2rem 0;">
  <img src="/assets/images/posts/2025-08-19-tent-stakes/Stakes_4.jpg" alt="A 6-pack of MSR Groundhog Stakes" style="max-width: 400px; width: 100%; height: auto; border-radius: 8px;" />
</div>

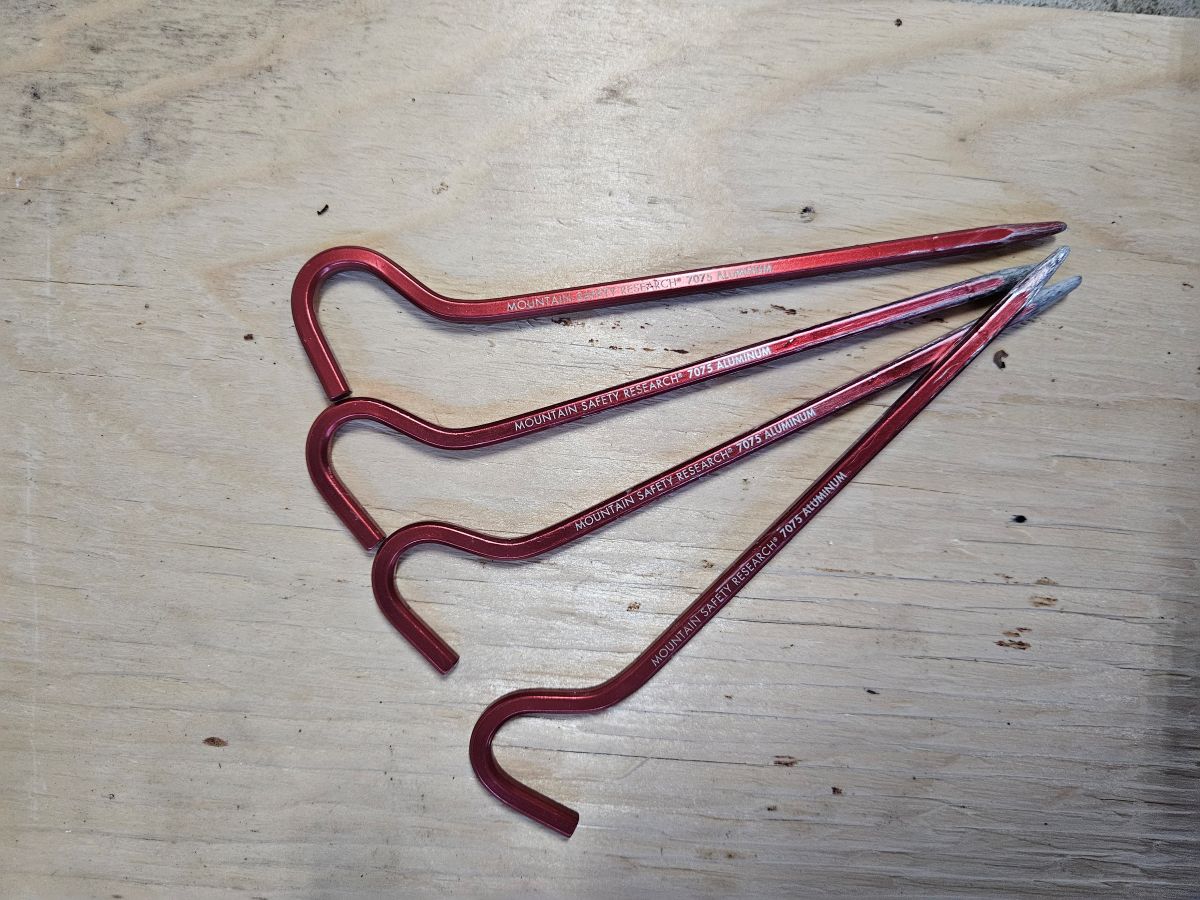
<p><strong>MSR Hook Stakes</strong>
Simple, straight, and better for harder ground. The small hook helps catch your guy lines but won’t hold as well in loose or soft soil. We use these mostly for basic shelter pitches or where hammering something beefier just won’t work.</p>

<div style="text-align: center; margin: 2rem 0;">
  <img src="/assets/images/posts/2025-08-19-tent-stakes/Stakes_2.jpg" alt="A 4-pack of MSR Hook Stakes" style="max-width: 400px; width: 100%; height: auto; border-radius: 8px;" />
</div>

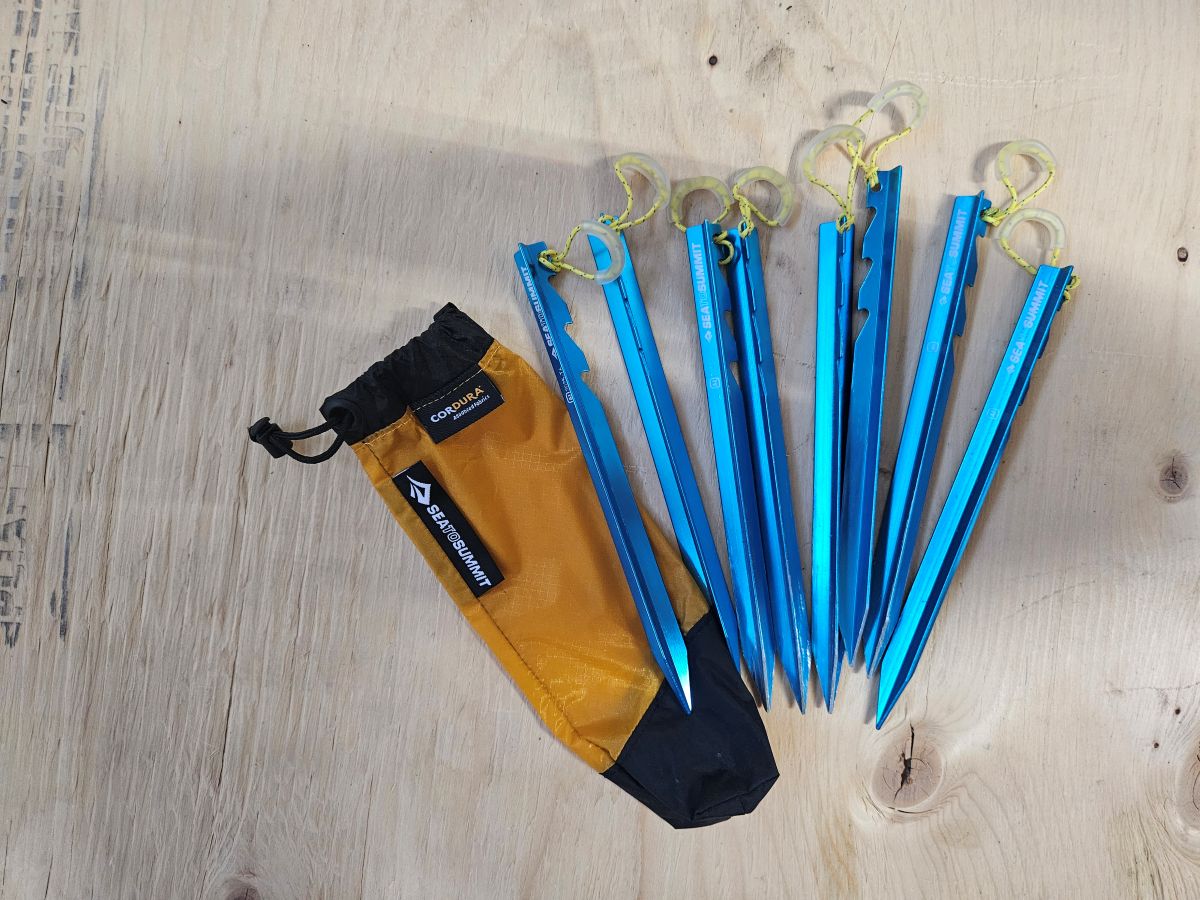
<p><strong>Sea to Summit Ground Control Tent Pegs</strong><br />
These surprised us. They’re also a Y-beam style like the MSR Groundhogs, but the details are dialed. The top features <strong>three guy line attachment points</strong> for better flexibility, plus a <strong>glow-in-the-dark cord pull</strong> that makes them easy to find in the dark. They also came in an <strong>8-pack with a little stake bag</strong>, which is more than the MSR set and a few dollars cheaper.</p>

<div style="text-align: center; margin: 2rem 0;">
  <img src="/assets/images/posts/2025-08-19-tent-stakes/Stakes_3.jpg" alt="An 8-pack of Sea to Summit Ground Control pegs with carry bag" style="max-width: 400px; width: 100%; height: auto; border-radius: 8px;" />
</div>

<hr />

<h2 id="durability--use">Durability &amp; Use</h2>

<p>We’ve put the <strong>MSR Groundhogs</strong> through the wringer. We’ve hammered them into all kinds of soil—clay, chip, sand, you name it. They’ve held strong and earned a permanent spot in our kits. That said, they can be tricky to get into rock-hard ground, so you might have to dig them in a bit. They have no signs of bends or breaks, so we’re confident in their longevity.</p>

<div style="text-align: center; margin: 2rem 0;">
  <img src="/assets/images/posts/2025-08-19-tent-stakes/Stakes_7.jpg" alt="MSR Groundhogs" style="max-width: 400px; width: 100%; height: auto; border-radius: 8px;" />
</div>

<p>The <strong>MSR Hook Stakes</strong> are our go-to for those exact conditions: hard, rocky soil where Y-pegs just won’t go. They’re less aggressive in grip but great for situations where getting anything into the ground is the win. It looks like these might be discontinued—we haven’t been able to find them anywhere recently.</p>

<div style="text-align: center; margin: 2rem 0;">
  <img src="/assets/images/posts/2025-08-19-tent-stakes/Stakes_5.jpg" alt="MSR Hooks" style="max-width: 400px; width: 100%; height: auto; border-radius: 8px;" />
</div>

<p>This year we picked up the <strong>Sea to Summit Ground Control Pegs</strong>, and they’ve instantly become our go-to for shelters and tents alike. They go in smooth, hold tight, and the usability upgrades (like the extra loops and padded pull cord) just make sense. We haven’t had them for years like the MSRs, but so far they’re holding up beautifully.</p>

<div style="text-align: center; margin: 2rem 0;">
  <img src="/assets/images/posts/2025-08-19-tent-stakes/Stakes_6.jpg" alt="Sea to Summit Ground Control Pegs" style="max-width: 400px; width: 100%; height: auto; border-radius: 8px;" />
</div>

<hr />

<h2 id="pros--cons">Pros &amp; Cons</h2>

<p><strong>MSR Groundhog Stakes</strong><br />
✅ Excellent grip<br />
✅ Lightweight &amp; durable<br />
✅ Long-term proven<br />
❌ Pricey for a 6-pack</p>

<p><strong>MSR Hook Stakes</strong><br />
✅ Easy to drive into tough soil<br />
✅ Lightweight and simple<br />
❌ Poor holding power in soft ground</p>

<p><strong>Sea to Summit Ground Control Pegs</strong><br />
✅ Great holding power<br />
✅ Thoughtful features (glow pull cord, multiple hooks)<br />
✅ 8-pack with bag = good value<br />
❌ Newer to us—still proving long-term durability</p>

<hr />

<h2 id="final-thoughts-who-are-these-for">Final Thoughts: Who Are These For?</h2>

<p>If you’re someone who camps in varied terrain, or just wants peace of mind having a few spare stakes on hand, any of these could be a great backup (or upgrade) to the ones your tent shipped with.</p>

<ul>
  <li>The <strong>MSR Groundhogs</strong> are tried-and-true workhorses for most conditions.</li>
  <li>The <strong>MSR Hooks</strong> are better for rocky soil or ultralight minimalist setups.</li>
  <li>The <strong>Sea to Summit Ground Control Pegs</strong> are a strong contender if you want clever design and a little more versatility, especially for shelter systems or variable guy line angles.</li>
</ul>

<p>We expected the Sea to Summit pegs to feel like just another version of the MSR ones—but the extra features genuinely impressed us, and they’ve definitely earned their spot in our pack. It’s worth keeping a few different types on hand—you’ll probably run into a situation where your tent’s default stakes just don’t cut it.</p>

<hr />

<h2 id="whats-the-difference-between-7000-series-aluminum-and-hard-anodized-7075-t6-aluminum">What’s the Difference Between 7000-Series Aluminum and Hard Anodized 7075-T6 Aluminum?</h2>

<p>When comparing tent stakes, or any gear where strength and weight matter, it’s useful to understand the materials behind the build. Both 7000-series aluminum and hard anodized 7075-T6 aluminum are strong, lightweight choices, but there are some key differences.</p>

<hr />

<h3 id="7000-series-aluminum-general-term">7000-Series Aluminum (General Term)</h3>

<ul>
  <li><strong>Definition:</strong> A family of aluminum alloys primarily alloyed with <strong>zinc</strong>.</li>
  <li><strong>Key Characteristics:</strong>
    <ul>
      <li>High strength-to-weight ratio</li>
      <li>Commonly used in aerospace, bike frames, and outdoor gear</li>
      <li>Can be more brittle than other series if not properly treated</li>
    </ul>
  </li>
  <li><strong>Note:</strong> This is a general category, it doesn’t specify which alloy or treatment is used (e.g., 7050, 7075, etc.).</li>
</ul>

<hr />

<h3 id="hard-anodized-7075-t6-aluminum-specific--treated">Hard Anodized 7075-T6 Aluminum (Specific + Treated)</h3>

<ul>
  <li><strong>7075-T6</strong> is a <strong>specific high-performance alloy and temper</strong>:
    <ul>
      <li><strong>7075</strong>: One of the strongest aluminum alloys available</li>
      <li><strong>T6</strong>: Heat-treated and artificially aged for maximum hardness and tensile strength</li>
    </ul>
  </li>
  <li><strong>Hard Anodized</strong>:
    <ul>
      <li>An electrochemical treatment that creates a <strong>hard, corrosion-resistant outer layer</strong></li>
      <li>Improves abrasion resistance and durability</li>
      <li>Helps prevent oxidation, scratches, and surface wear</li>
    </ul>
  </li>
</ul>

<h3 id="what-this-means-for-tent-stakes">What This Means for Tent Stakes</h3>

<ul>
  <li><strong>MSR Groundhog Stakes</strong>: Made from general <strong>7000-series aluminum</strong>—strong and reliable, but not specified to the same degree. Proven durable over many years of use.</li>
  <li><strong>Sea to Summit Ground Control Pegs</strong>: Use <strong>hard anodized 7075-T6 aluminum</strong>, which means:
    <ul>
      <li>Higher strength</li>
      <li>Better resistance to corrosion and wear</li>
      <li>More protective surface finish</li>
    </ul>
  </li>
</ul>

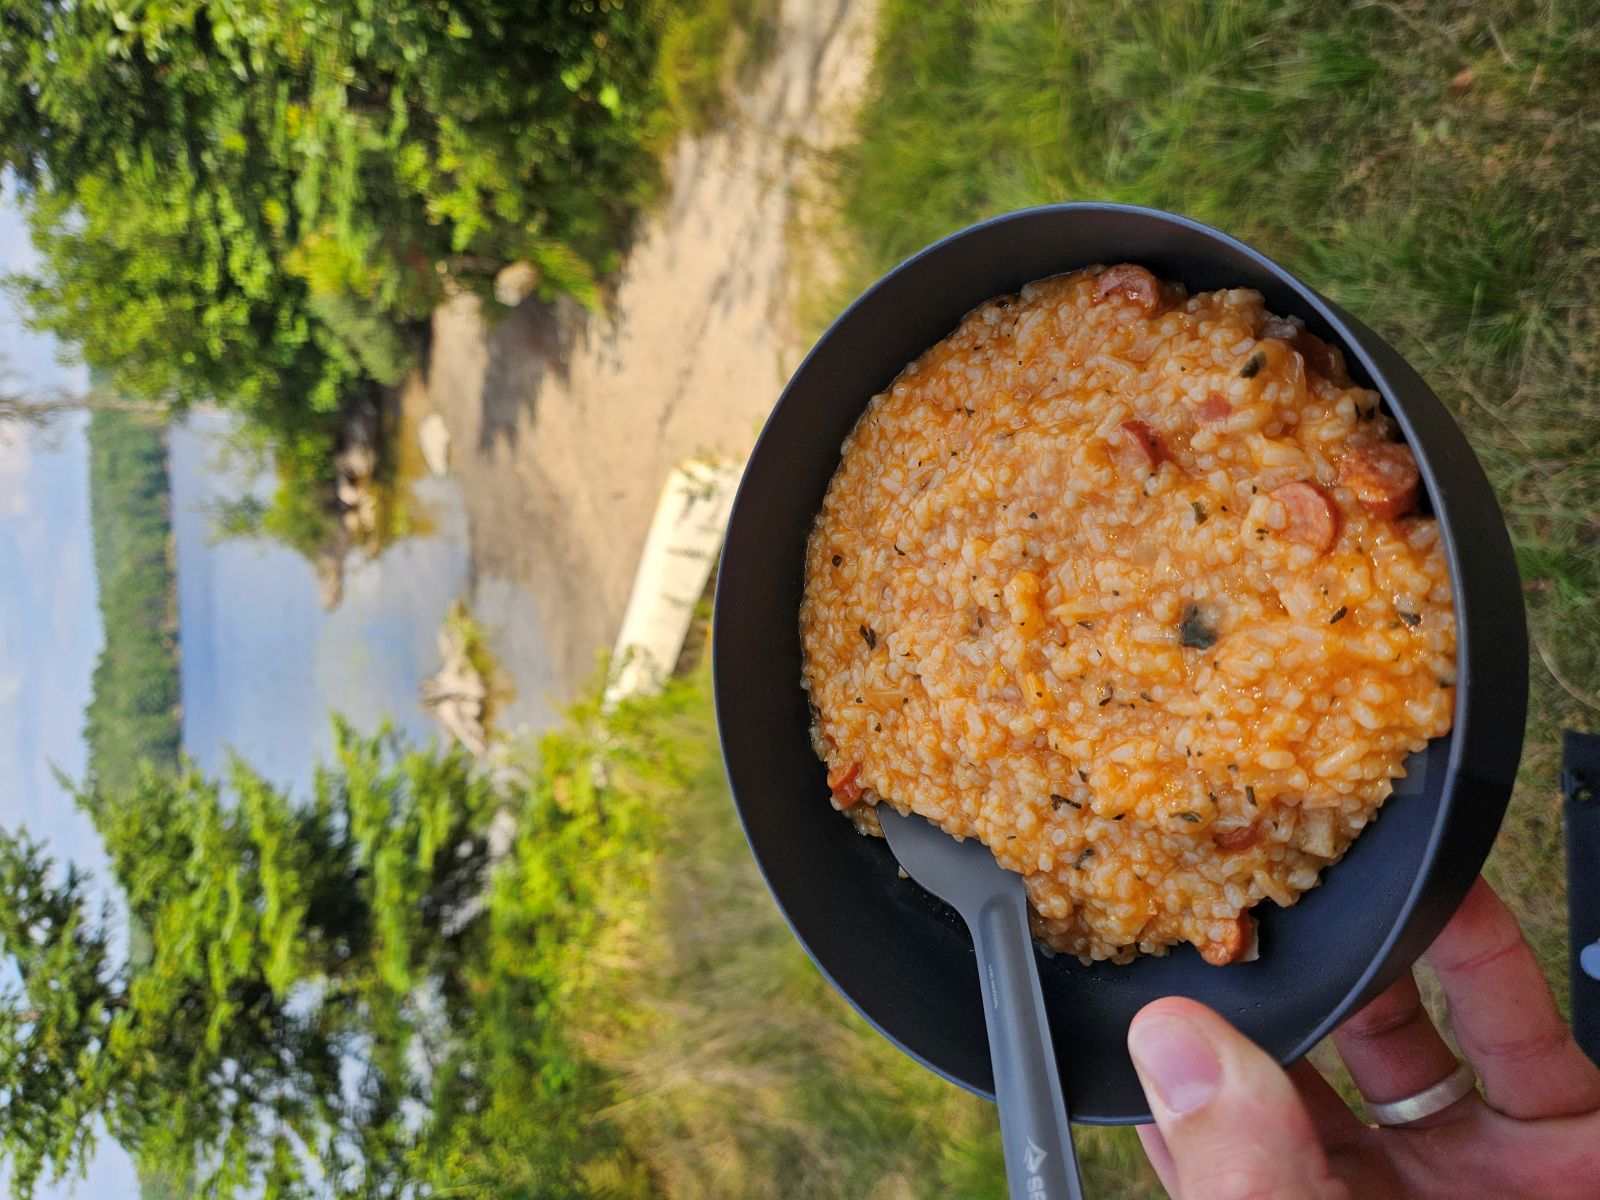
<p>While both are great, the Sea to Summit pegs offer a <strong>higher-spec build</strong> that might stand up better over time, especially in harsh or abrasive conditions.</p>]]></content><author><name></name></author><category term="gear" /><category term="backcountry" /><summary type="html"><![CDATA[When it comes to tent stakes, the ones that come with your tent often aren’t the ones you want to rely on in the backcountry, or even at a lot of car camping spots. Over the years, we’ve picked up a few extra sets to have on hand for different setups: tarps, shelters, or backup when original stakes bend or vanish into the void. This isn’t a flashy gear comparison—it’s just what we’ve been using, abusing, and packing along because they work.]]></summary></entry><entry><title type="html">Smoked Sausage Risotto</title><link href="https://packpedalplate.com/recipes/trail/sausage-risotto/" rel="alternate" type="text/html" title="Smoked Sausage Risotto" /><published>2025-08-13T17:00:00-04:00</published><updated>2025-08-13T17:00:00-04:00</updated><id>https://packpedalplate.com/recipes/trail/sausage-risotto</id><content type="html" xml:base="https://packpedalplate.com/recipes/trail/sausage-risotto/"><![CDATA[<p>This Dehydrated Smoked Sausage Risotto is a savory, satisfying one-pot meal that brings rich, smoky comfort to the backcountry. We use dehydrated passata and onion, cooked rice that’s partially ground, and our favorite smoked sausages (vacuum sealed) to keep the weight down and flavor high. Creamy, cheesy, and full of basil and umami, this risotto is the perfect trail dinner after a long day of pedaling or hiking.</p>

<hr />

<h2 id="quick-stats">Quick Stats</h2>

<ul>
  <li>Prep Time: 30 minutes</li>
  <li>Trail Time: 45 minutes</li>
  <li>Fuel Use: Medium (boil + simmer)</li>
  <li>Shelf Life: 1 month (with vacuum-sealed sausage)</li>
  <li>Water Requirements: 2 cups</li>
</ul>

<hr />

<h2 id="ingredients-2-servings">Ingredients (2 servings)</h2>

<ul>
  <li>½ cup cooked long grain white rice, dehydrated</li>
  <li>¼ cup passata, dehydrated</li>
  <li>4 small smoked sausages (~½ cup sliced, vacuum sealed)</li>
  <li>½ small white onion, diced and dehydrated</li>
  <li>2 tbsp parmesan cheese (grated, shelf-stable or powdered)</li>
  <li>½ tsp salt</li>
  <li>1 tsp dried basil</li>
</ul>

<hr />

<h2 id="instructions-for-at-home">Instructions for At Home</h2>

<ol>
  <li>
    <p><strong>Cook and Dehydrate the Rice:</strong><br />
Cook long grain white rice and spread it out thinly to dehydrate. Once fully dried, blitz it briefly in a blender to break some grains into powder (for creaminess) while keeping most whole.</p>
  </li>
  <li>
    <p><strong>Dehydrate the Vegetables &amp; Sauce:</strong><br />
Dehydrate diced onion and passata on lined trays until fully dry and brittle.</p>
  </li>
  <li>
    <p><strong>Package the Sausages:</strong><br />
Slice smoked sausages into coins and vacuum seal them in a separate small bag for better shelf life.</p>
  </li>
  <li>
    <p><strong>Assemble the Meal Kit:</strong><br />
In a medium bag, combine the rice powder, dried onion, passata leather (broken into pieces), parmesan, salt, and basil. Tuck in the vacuum-sealed sausage packet.</p>
  </li>
</ol>

<hr />

<h2 id="instructions-for-preparation-on-the-trail">Instructions for Preparation on the Trail</h2>

<ol>
  <li>
    <p><strong>Rehydrate Cold:</strong><br />
In your pot, combine the dried mix and vacuum-sealed sausages with 2 cups cold water. Let stand for 30 minutes, mashing and stirring occasionally to help the passata break down.</p>
  </li>
  <li>
    <p><strong>Cook the Risotto:</strong><br />
Uncover and bring to a boil. Once boiling, reduce heat, cover, and simmer for about 10 minutes, stirring occasionally.</p>
  </li>
  <li>
    <p><strong>Finish &amp; Serve:</strong><br />
Risotto is ready when water is absorbed, rice is tender, and the consistency is creamy. Adjust salt to taste and enjoy hot!</p>
  </li>
</ol>

<div style="text-align: center; margin: 2rem 0;">
  <img src="/assets/images/posts/2025-08-13-sausage-risotto/risotto.jpg" alt="smoked sausage risotto" style="max-width: 400px; width: 100%; height: auto; border-radius: 8px;" />
</div>

<hr />

<h2 id="substitution-tips">Substitution Tips</h2>

<ul>
  <li><strong>Sausage:</strong> Any shelf-stable smoked meat works — try salami, pepperoni, or turkey sticks.</li>
  <li><strong>Cheese:</strong> Swap parmesan for powdered cheddar or nutritional yeast.</li>
  <li><strong>Rice:</strong> Arborio or jasmine rice also work well if dehydrated after cooking.</li>
</ul>

<hr />

<h2 id="why-we-love-it">Why We Love It</h2>

<p>This Dehydrated Smoked Sausage Risotto brings rich flavor and creamy texture to camp without the bulk. It’s warm, filling, and easy to prep with basic ingredients and a dehydrator. The smoked sausage gives it a deep, meaty flavor that satisfies even on chilly nights in the backcountry.</p>]]></content><author><name></name></author><category term="recipes" /><category term="trail" /><summary type="html"><![CDATA[This Dehydrated Smoked Sausage Risotto is a savory, satisfying one-pot meal that brings rich, smoky comfort to the backcountry. We use dehydrated passata and onion, cooked rice that’s partially ground, and our favorite smoked sausages (vacuum sealed) to keep the weight down and flavor high. Creamy, cheesy, and full of basil and umami, this risotto is the perfect trail dinner after a long day of pedaling or hiking.]]></summary></entry><entry><title type="html">Breakfast Zucchini Frittatas</title><link href="https://packpedalplate.com/recipes/trail/zucchini-frittatas/" rel="alternate" type="text/html" title="Breakfast Zucchini Frittatas" /><published>2025-08-05T17:00:00-04:00</published><updated>2025-08-05T17:00:00-04:00</updated><id>https://packpedalplate.com/recipes/trail/zucchini-frittatas</id><content type="html" xml:base="https://packpedalplate.com/recipes/trail/zucchini-frittatas/"><![CDATA[<p>A hearty breakfast that packs in vegetables, protein, and carbs to energize your day. These frittatas are loaded with shredded hashbrowns, smoky bacon bits, and just enough zucchini to feel like you’re doing something good for your body. Lightweight, trail-tested, and surprisingly easy to throw together before that first big trek of the day.</p>

<hr />

<h3 id="quick-stats">Quick Stats</h3>

<ul>
  <li><strong>Prep Time:</strong> 20 minutes</li>
  <li><strong>Trail Time:</strong> 20 minutes</li>
  <li><strong>Fuel Use:</strong> Medium (boil and skillet cook)</li>
  <li><strong>Shelf Life:</strong> 6 months</li>
  <li><strong>Water Requirements</strong>: 1.5 cups</li>
</ul>

<hr />

<h3 id="ingredients-2-servings">Ingredients (2 servings)</h3>

<ul>
  <li>½ container (~60g) Golden Grill Dehydrated Hashbrowns</li>
  <li>20g dehydrated zucchini</li>
  <li>1 tsp dehydrated white onion</li>
  <li>40g shelf-stable bacon bits</li>
  <li>40g dehydrated egg powder</li>
</ul>

<hr />

<h3 id="instructions-for-at-home">Instructions for At Home</h3>

<ol>
  <li>
    <p><strong>Dehydrate the Ingredients:</strong> Dehydrate shredded zucchini and white onion. Use store bought, shelf stable bacon bits and dehydrated hashbrowns.</p>
  </li>
  <li>
    <p><strong>Packaging:</strong> In a large mylar bag (or reusable vacuum-seal bag), combine the dehydrated hashbrowns, zucchini, and onion. In a separate ziplock bag, combine the bacon bits and egg powder. Place the small ziplock back inside the mylar bag, press out any excess air, and heat seal.</p>
  </li>
</ol>

<hr />

<h3 id="instructions-for-preparation-on-the-trail">Instructions for Preparation on the Trail</h3>

<ol>
  <li>Remove the small bag with egg mixture from the mylar bag.</li>
  <li>To the large bag (hashbrowns and veggies), add <strong>1.5 cups of boiling water</strong>, stir, seal, and let sit for <strong>12 minutes</strong>.</li>
  <li>Once rehydrated, drain any excess water <strong>into a bowl</strong>, and <strong>reserve ¼ cup of hashbrown water</strong> for the egg mixture.</li>
  <li>In your cookpot, combine the bacon and egg powder with the reserved ¼ cup water. Stir well and let soak for <strong>5 minutes</strong>.</li>
  <li>Add the rehydrated hashbrown mixture into the eggs. Stir to combine.</li>
  <li>Cook over medium heat, stirring or flipping as needed until eggs are fully cooked and the hashbrowns are crisped to your liking. Enjoy it scrambled or pressed into a frittata-style patty.</li>
</ol>

<hr />

<h3 id="substitution-tips">Substitution Tips</h3>

<ul>
  <li><strong>Vegetarian?</strong> Skip the bacon bits and add a pinch of smoked paprika or chipotle powder for depth.</li>
  <li><strong>Add-ons:</strong> A pinch of shredded cheddar (vacuum-sealed) or a few sun-dried tomatoes add a savory punch.</li>
</ul>

<hr />

<h3 id="why-we-love-it">Why We Love It</h3>

<p>This one wins every time we want a real sit-down kind of breakfast: no sugar crash, no instant oatmeal fatigue. It’s filling without being too heavy, and the egg holds up well rehydrated when you treat it right. Plus, there’s something incredibly satisfying about a warm, eggy dish first thing on trail - it just feels civilized.</p>]]></content><author><name></name></author><category term="recipes" /><category term="trail" /><summary type="html"><![CDATA[A hearty breakfast that packs in vegetables, protein, and carbs to energize your day. These frittatas are loaded with shredded hashbrowns, smoky bacon bits, and just enough zucchini to feel like you’re doing something good for your body. Lightweight, trail-tested, and surprisingly easy to throw together before that first big trek of the day.]]></summary></entry><entry><title type="html">Nemo Puffin Blanket</title><link href="https://packpedalplate.com/gear/frontcountry/nemo-puffin/" rel="alternate" type="text/html" title="Nemo Puffin Blanket" /><published>2025-08-02T17:00:00-04:00</published><updated>2025-08-02T17:00:00-04:00</updated><id>https://packpedalplate.com/gear/frontcountry/nemo-puffin</id><content type="html" xml:base="https://packpedalplate.com/gear/frontcountry/nemo-puffin/"><![CDATA[<h1 id="ditch-the-sleeping-bags-our-go-to-camp-blanket-for-two">Ditch the Sleeping Bags: Our Go-To Camp Blanket for Two</h1>

<p>When it comes to car camping, we’re not out here trying to prove anything. We’re looking for comfort, space to stretch out, and gear that makes nights outside feel more like home. That’s why we swapped out our sleeping bags for the <strong>NEMO Puffin 2-Person Blanket</strong> and honestly, we’re not looking back.</p>

<p>Whether it’s early spring or a cool summer night, this blanket has been a game-changer for how we sleep in a tent. No more sliding off sleeping pads, no more fighting with zippers, and no more sweaty, zipped-up cocoons.</p>

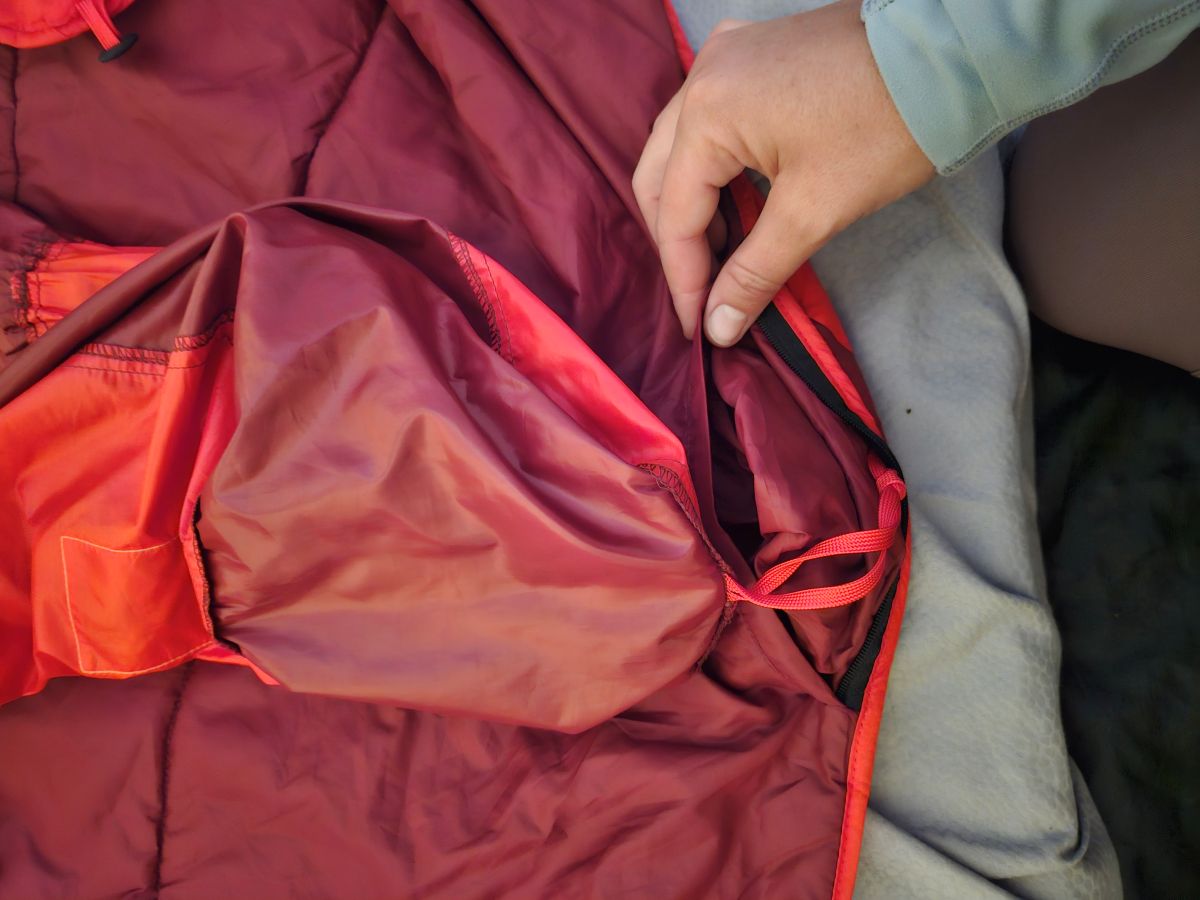
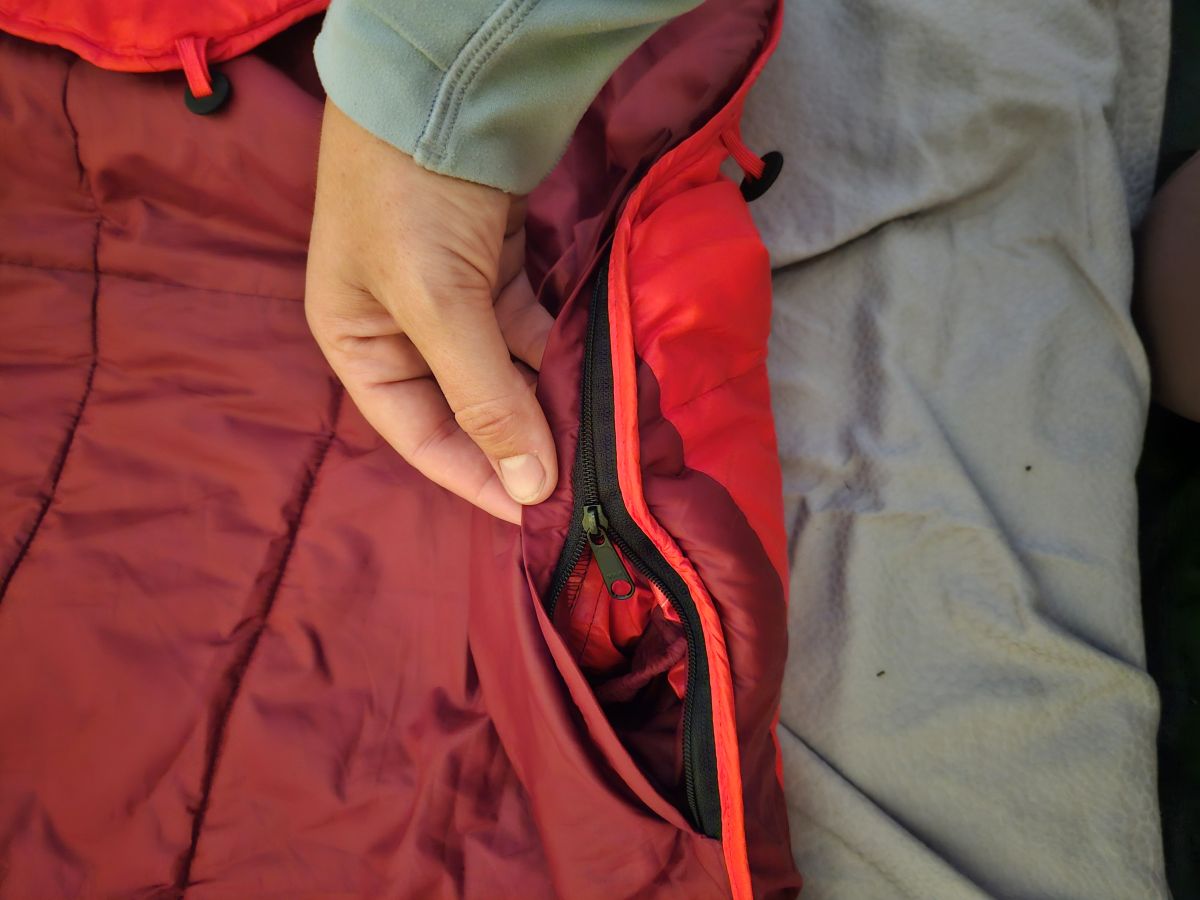
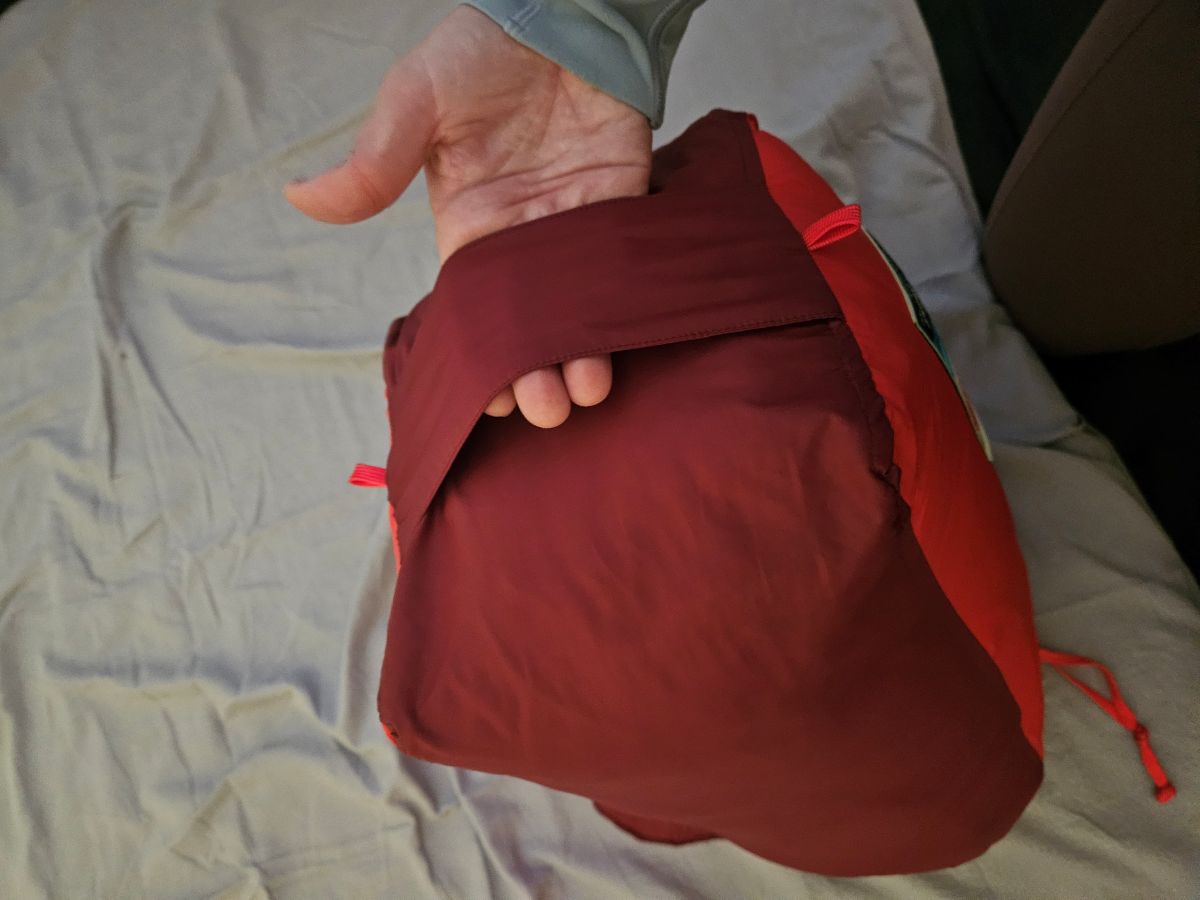
<p>This blanket is cozy, warm, and still breathable. Plus, it packs down easily into its own storage sack (sewn on, so you won’t lose it). We bought it for weekend car camping trips, and it’s quickly become a staple in our gear bin.</p>

<hr />

<h2 id="technical-specs">Technical Specs</h2>

<table>
  <thead>
    <tr>
      <th><strong>Spec</strong></th>
      <th><strong>Detail</strong></th>
    </tr>
  </thead>
  <tbody>
    <tr>
      <td>Dimensions</td>
      <td>85” x 86” (216 x 218 cm)</td>
    </tr>
    <tr>
      <td>Packed Size</td>
      <td>15” x 15” x 8” (38 x 38 x 20 cm)</td>
    </tr>
    <tr>
      <td>Weight</td>
      <td>3 lb 3 oz (1.45 kg)</td>
    </tr>
    <tr>
      <td>Insulation</td>
      <td>Stratofiber™ synthetic fill</td>
    </tr>
    <tr>
      <td>Shell Fabric</td>
      <td>40D Nylon Ripstop with DWR finish</td>
    </tr>
  </tbody>
</table>

<hr />

<h2 id="standout-features">Standout Features</h2>

<ul>
  <li>
    <p><strong>Stratofiber™ Insulation</strong> keeps warmth in on chilly nights without turning the tent into a sauna.<br />
We never really looked into what this insulation was before buying it, but here is what we learned afterwards:<br />
Stratofiber™ is a polyester-based synthetic fill engineered to mimic some of the insulating properties of down while remaining warm when wet, easy to clean, and affordable. It’s layered in a way that traps air for insulation while allowing some breathability to prevent overheating.</p>
  </li>
  <li>
    <p><strong>Nylon shell</strong> feels buttery soft and luxurious - <strong>not</strong> your usual crinkly camping material.</p>
  </li>
  <li>
    <p><strong>“Foot Nook” design</strong> lets you tuck the bottom around your feet - no drafts, no cold toes.</p>
  </li>
  <li>
    <p><strong>Integrated stuff sack</strong> means it packs up fast and the sack won’t go missing.</p>
  </li>
  <li>
    <p><strong>Machine washable</strong> let’s be real, dirt happens.</p>
  </li>
</ul>

<div style="display: flex; flex-wrap: wrap; gap: 1rem; justify-content: center;">
  <div style="flex: 1 1 45%; text-align: center;">
    <img src="/assets/images/posts/2025-08-03-nemo-puffin/pouch.jpg" alt="Integrated stuff sack" style="width: 100%; height: auto; border-radius: 8px;" />
    <p style="font-size: 0.9em; color: #666;">The Puffin’s integrated stuff sack at the bottom of the blanket.</p>
  </div>

  <div style="flex: 1 1 45%; text-align: center;">
    <img src="/assets/images/posts/2025-08-03-nemo-puffin/zipper.jpg" alt="Zipper to hide the bag when the blanket is in use" style="width: 100%; height: auto; border-radius: 8px;" />
    <p style="font-size: 0.9em; color: #666;">There is a small pocket that you zip the outer bag into and it is connected by a string. No missing bags here!</p>
  </div>
</div>

<hr />

<h2 id="durability--use">Durability &amp; Use</h2>

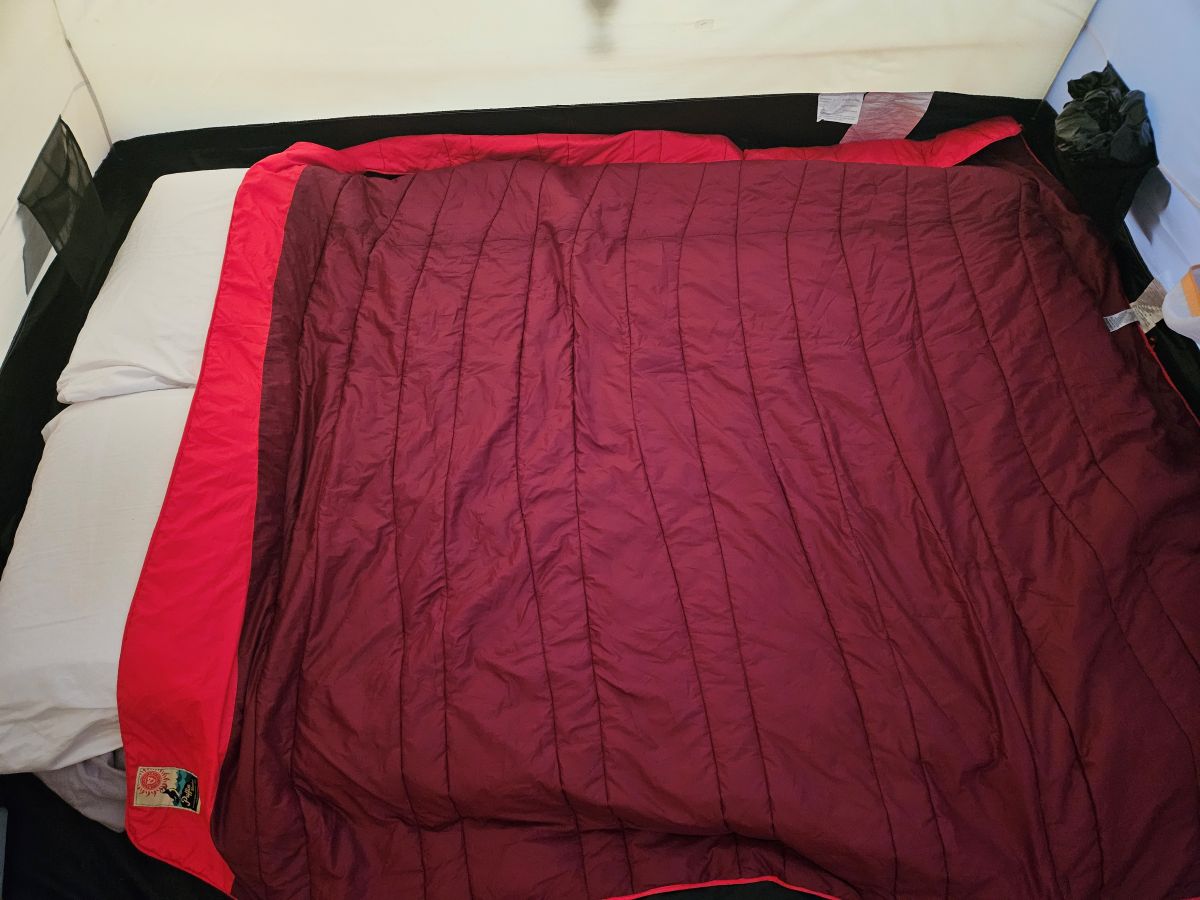
<p>We’ve used this blanket between June and September in Ontario and Quebec for many years. It has kept us warm in these seasons and we’ve been very satisfied. The shell fabric is tough enough to handle a bit of grit but still soft to the touch. After our years of use, it still looks and feels brand new.</p>

<p>It’s not something we’d take backpacking (it’s bulky for that), but for car camping, it’s perfect.</p>

<div style="display: flex; flex-wrap: wrap; gap: 1rem; justify-content: center;">
  <div style="flex: 1 1 45%; text-align: center;">
    <img src="/assets/images/posts/2025-08-03-nemo-puffin/open.jpg" alt="Puffin Blanket opened in the tent" style="width: 100%; height: auto; border-radius: 8px;" />
    <p style="font-size: 0.9em; color: #666;">The Puffin blanket in our Eureka tent and on the Exped Mega Mat.</p>
  </div>
</div>

<hr />

<h2 id="pros--cons">Pros &amp; Cons</h2>

<p><strong>Pros:</strong></p>
<ul>
  <li>So much room to move!</li>
  <li>Actually warm, even in shoulder season</li>
  <li>Packs into itself</li>
  <li>Easy to wash</li>
</ul>

<p><strong>Cons:</strong></p>
<ul>
  <li>Not ideal for cold-weather camping below ~5°C without extra layers</li>
</ul>

<div style="display: flex; flex-wrap: wrap; gap: 1rem; justify-content: center;">
  <div style="flex: 1 1 45%; text-align: center;">
    <img src="/assets/images/posts/2025-08-03-nemo-puffin/Puffin_5.jpg" alt="Carry handle on the Nemo Puffin" style="width: 100%; height: auto; border-radius: 8px;" />
  </div>

  <div style="flex: 1 1 45%; text-align: center;">
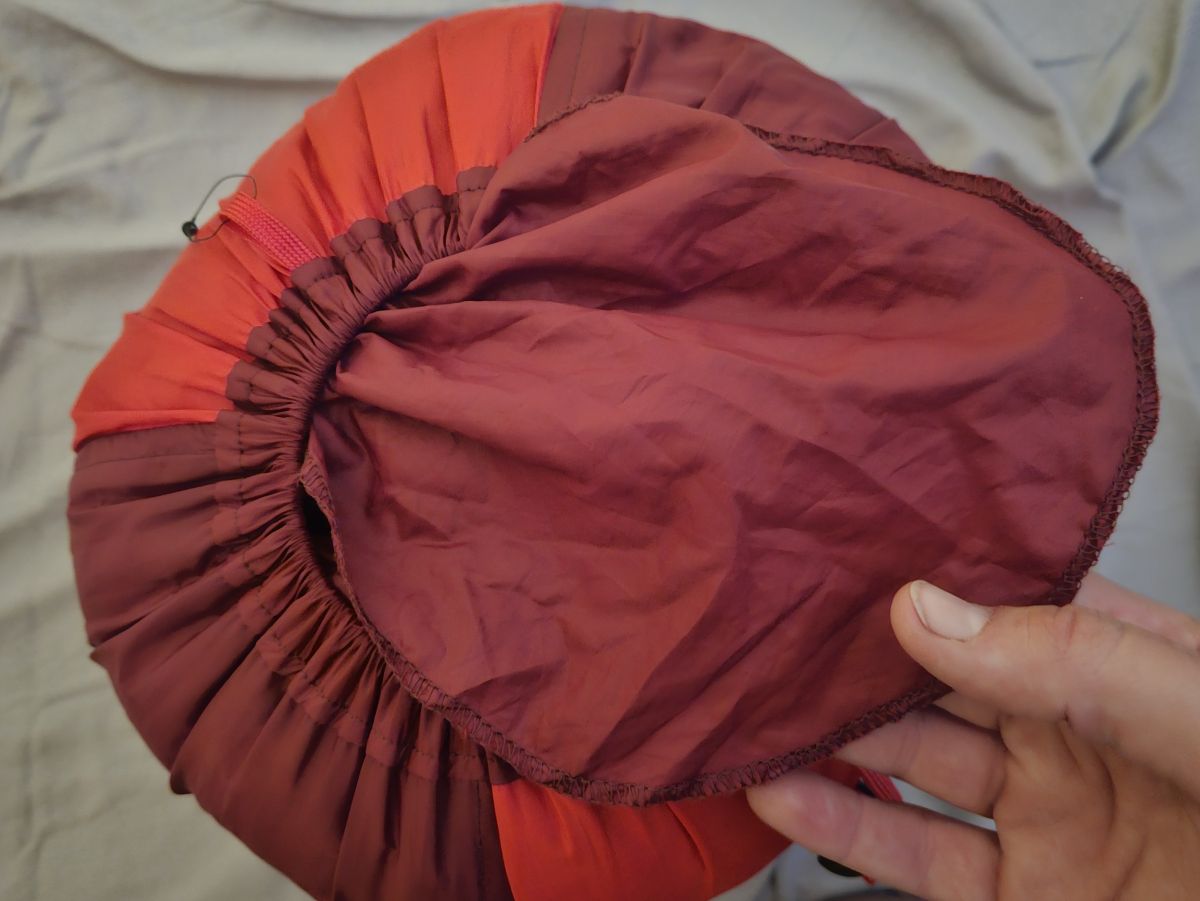
    <img src="/assets/images/posts/2025-08-03-nemo-puffin/Puffin_6.jpg" alt="Flap that protects top of bag" style="width: 100%; height: auto; border-radius: 8px;" />
  </div>
</div>
<p style="font-size: 0.9em; color: #666;">Additional features about this blanket that are small touches, but we greatly appreciate. There is a large handy carrying handle on the bottom of the bag, big enough to throw around your arm! Secondly, I appreciate the flap at the top of the bag that tucks in when you’re tying up the bag - another handy feature to keep dirt out!</p>

<hr />

<h2 id="final-thoughts-whos-this-for">Final Thoughts: Who’s This For?</h2>

<p>The <strong>NEMO Puffin 2-Person Blanket</strong> is ideal for couples or solo campers who like some breathing room at night and don’t want to deal with the constraints of sleeping bags. If you car camp regularly and value comfort just as much as function, this blanket is worth it.</p>

<p>It’s cozy, well-built, and has made our nights in the tent way more enjoyable. We’re not trying to go ultralight with this—just trying to sleep well and wake up warm (but not sweaty). This blanket nails it.</p>]]></content><author><name></name></author><category term="gear" /><category term="frontcountry" /><summary type="html"><![CDATA[Ditch the Sleeping Bags: Our Go-To Camp Blanket for Two]]></summary></entry><entry><title type="html">Air Travel with Mountain Bikes</title><link href="https://packpedalplate.com/travel/mtb/air-travel-mtb/" rel="alternate" type="text/html" title="Air Travel with Mountain Bikes" /><published>2025-07-25T17:00:00-04:00</published><updated>2025-07-25T17:00:00-04:00</updated><id>https://packpedalplate.com/travel/mtb/air-travel-mtb</id><content type="html" xml:base="https://packpedalplate.com/travel/mtb/air-travel-mtb/"><![CDATA[<p>Traveling with mountain bikes may sound daunting, but with a few tips and tricks, it is much easier than you may think. From packing your bike to finding the right transportation at your destination, this guide covers everything we’ve learned about flying with bikes.</p>

<hr />

<h2 id="packing-your-bike">Packing Your Bike</h2>

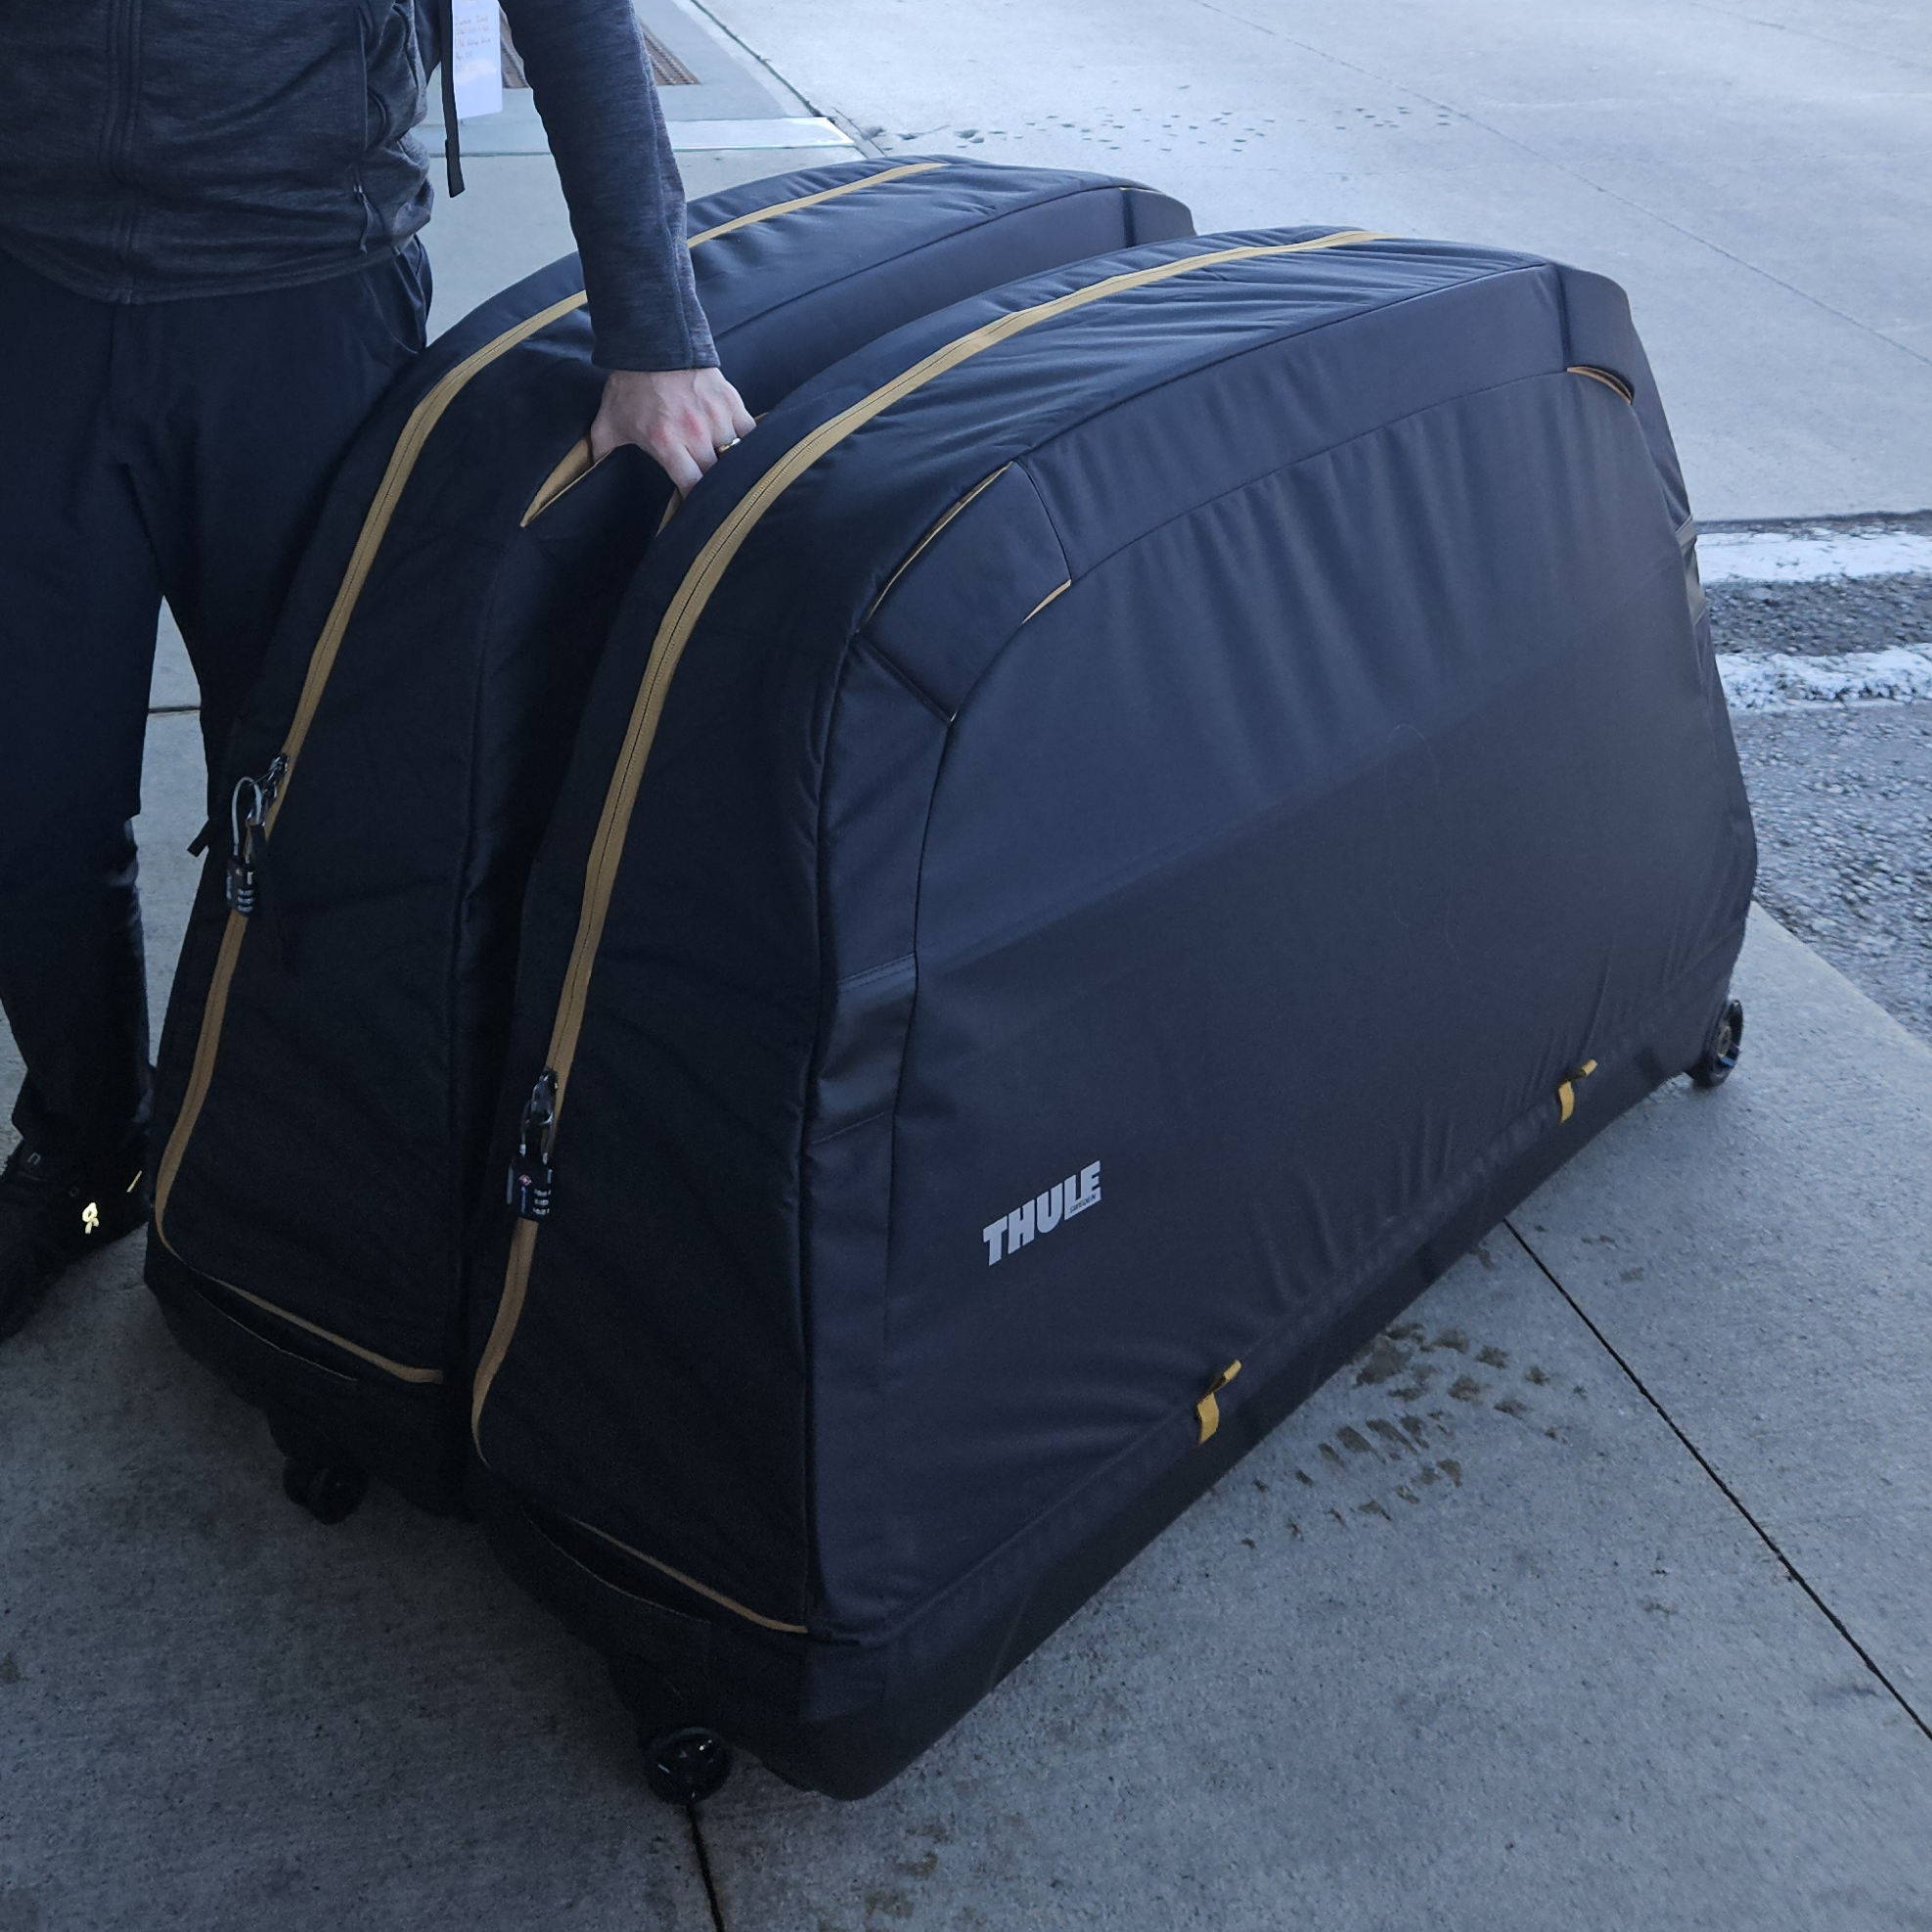
<p>After thorough research, we decided to transport our bikes with <strong>Thule Round Trip MTB Travel Bags</strong>. The integrated stand makes disassembly and assembly a breeze, and the case is built in a way to protect the most sensitive parts on your bike better than any others on the market. As a bonus, it packs up small when not in use.</p>

<p>The Round Trip is compatible with virtually any mountain bike. The base is long enough to accommodate slack, XL mountain bikes and wheel pouches can handle our 29” x 2.6” tires comfortably.</p>

<h3 id="packing">Packing</h3>

<p>Using the Round Trip is pretty straight forward. There are good videos online, but here’s a quick summary of the steps required:</p>

<ol>
  <li><strong>Compress dropper post</strong>, or lower your seat if you don’t have a dropper.</li>
  <li><strong>Air down the suspension and tires</strong> to about 50% of normal pressures. (Airlines dislike high-pressure items, and it’s safer for your gear.)</li>
  <li><strong>Remove the wheels</strong> and set aside</li>
  <li><strong>Secure bike in bike stand</strong></li>
  <li><strong>Unhang derailleur</strong> if your bike is longer</li>
  <li>Remove bike from rack and <strong>install in base</strong></li>
  <li><strong>Wrap bike</strong> with the included padding.</li>
  <li><strong>Undo the stem bolts</strong> and remove handlebars, hanging them in the secure position</li>
  <li><strong>Secure wheels</strong> in dedicated positions on the padding.</li>
</ol>

<p>Assembly is essentially the same, in reverse order, but be sure to torque all bolts to the correct spec!</p>

<hr />

<h2 id="tools-to-bring">Tools to Bring</h2>

<p>When flying with bikes, a basic tool kit is required for assembly, disassembly, and maintenance. Here’s what we pack:</p>
<ul>
  <li><strong>High pressure hand pump</strong>: For your shock and fork, it should have an integrated gauge.</li>
  <li><strong>Low pressure hand pump</strong>: For your tires and for the trailside. An option that fits in your pack or on your bike frame is best.</li>
  <li><strong>A ratcheting multitool</strong>: To disassemble your bike. We use a <a href="https://amzn.to/4f3FBoL">Topeak set with chain tool</a>.</li>
  <li><strong>A torque wrench</strong>: To reassemble your bike. We use a <a href="https://amzn.to/46W5mp3">Topeak model</a> that comes with a case.</li>
</ul>

<p>You will also want to remember to pack your typical emergency kit:</p>
<ul>
  <li>Spare tube</li>
  <li>Standalone pressure gauge</li>
  <li>Multitool</li>
  <li>Tire levers</li>
  <li>Tire boots</li>
  <li>Tire sealant (1oz bottles only)</li>
  <li>Basic first aid kit</li>
</ul>

<p><strong>Remember</strong> that not all gear is safe for air travel. You’ll want to leave your CO2 cartridges and bear spray at home, lest it be confiscated prior to boarding.</p>

<hr />

<h2 id="choosing-the-right-airline">Choosing the Right Airline</h2>

<p>Choosing the lowest price airline is rarely the best plan when flying with bikes. It’s important to consider equipment handling policies and prices when you’re selecting flights.</p>

<p>Verify that your packed bike meets the airline’s weight and size dimensions. Some airlines only allow enough weight for road bikes in leaner cases, while others are more accommodating. Also note that the prices vary wildly between airlines, with premium airlines typically charging less.</p>

<hr />

<h2 id="transportation-at-your-destination">Transportation at Your Destination</h2>

<p>When we arrive, we usually rent a truck to transport our bikes and gear. Bike cases are large enough that they will not fit in a car, and rarely fit in midsize SUVs. Large SUVs, trucks, or vans are your only option when transporting your bikes packed in their luggage.</p>

<p>Keep in mind that when renting a vehicle, models are not normally guaranteed and are subject to availability. If available in the area, <strong>Enterprise’s truck-specific rental site</strong> is a service that you can use to guarantee a truck rental at the time of arrival. If that fails, Turo is a good option for selecting a vehicle that meets your needs.</p>

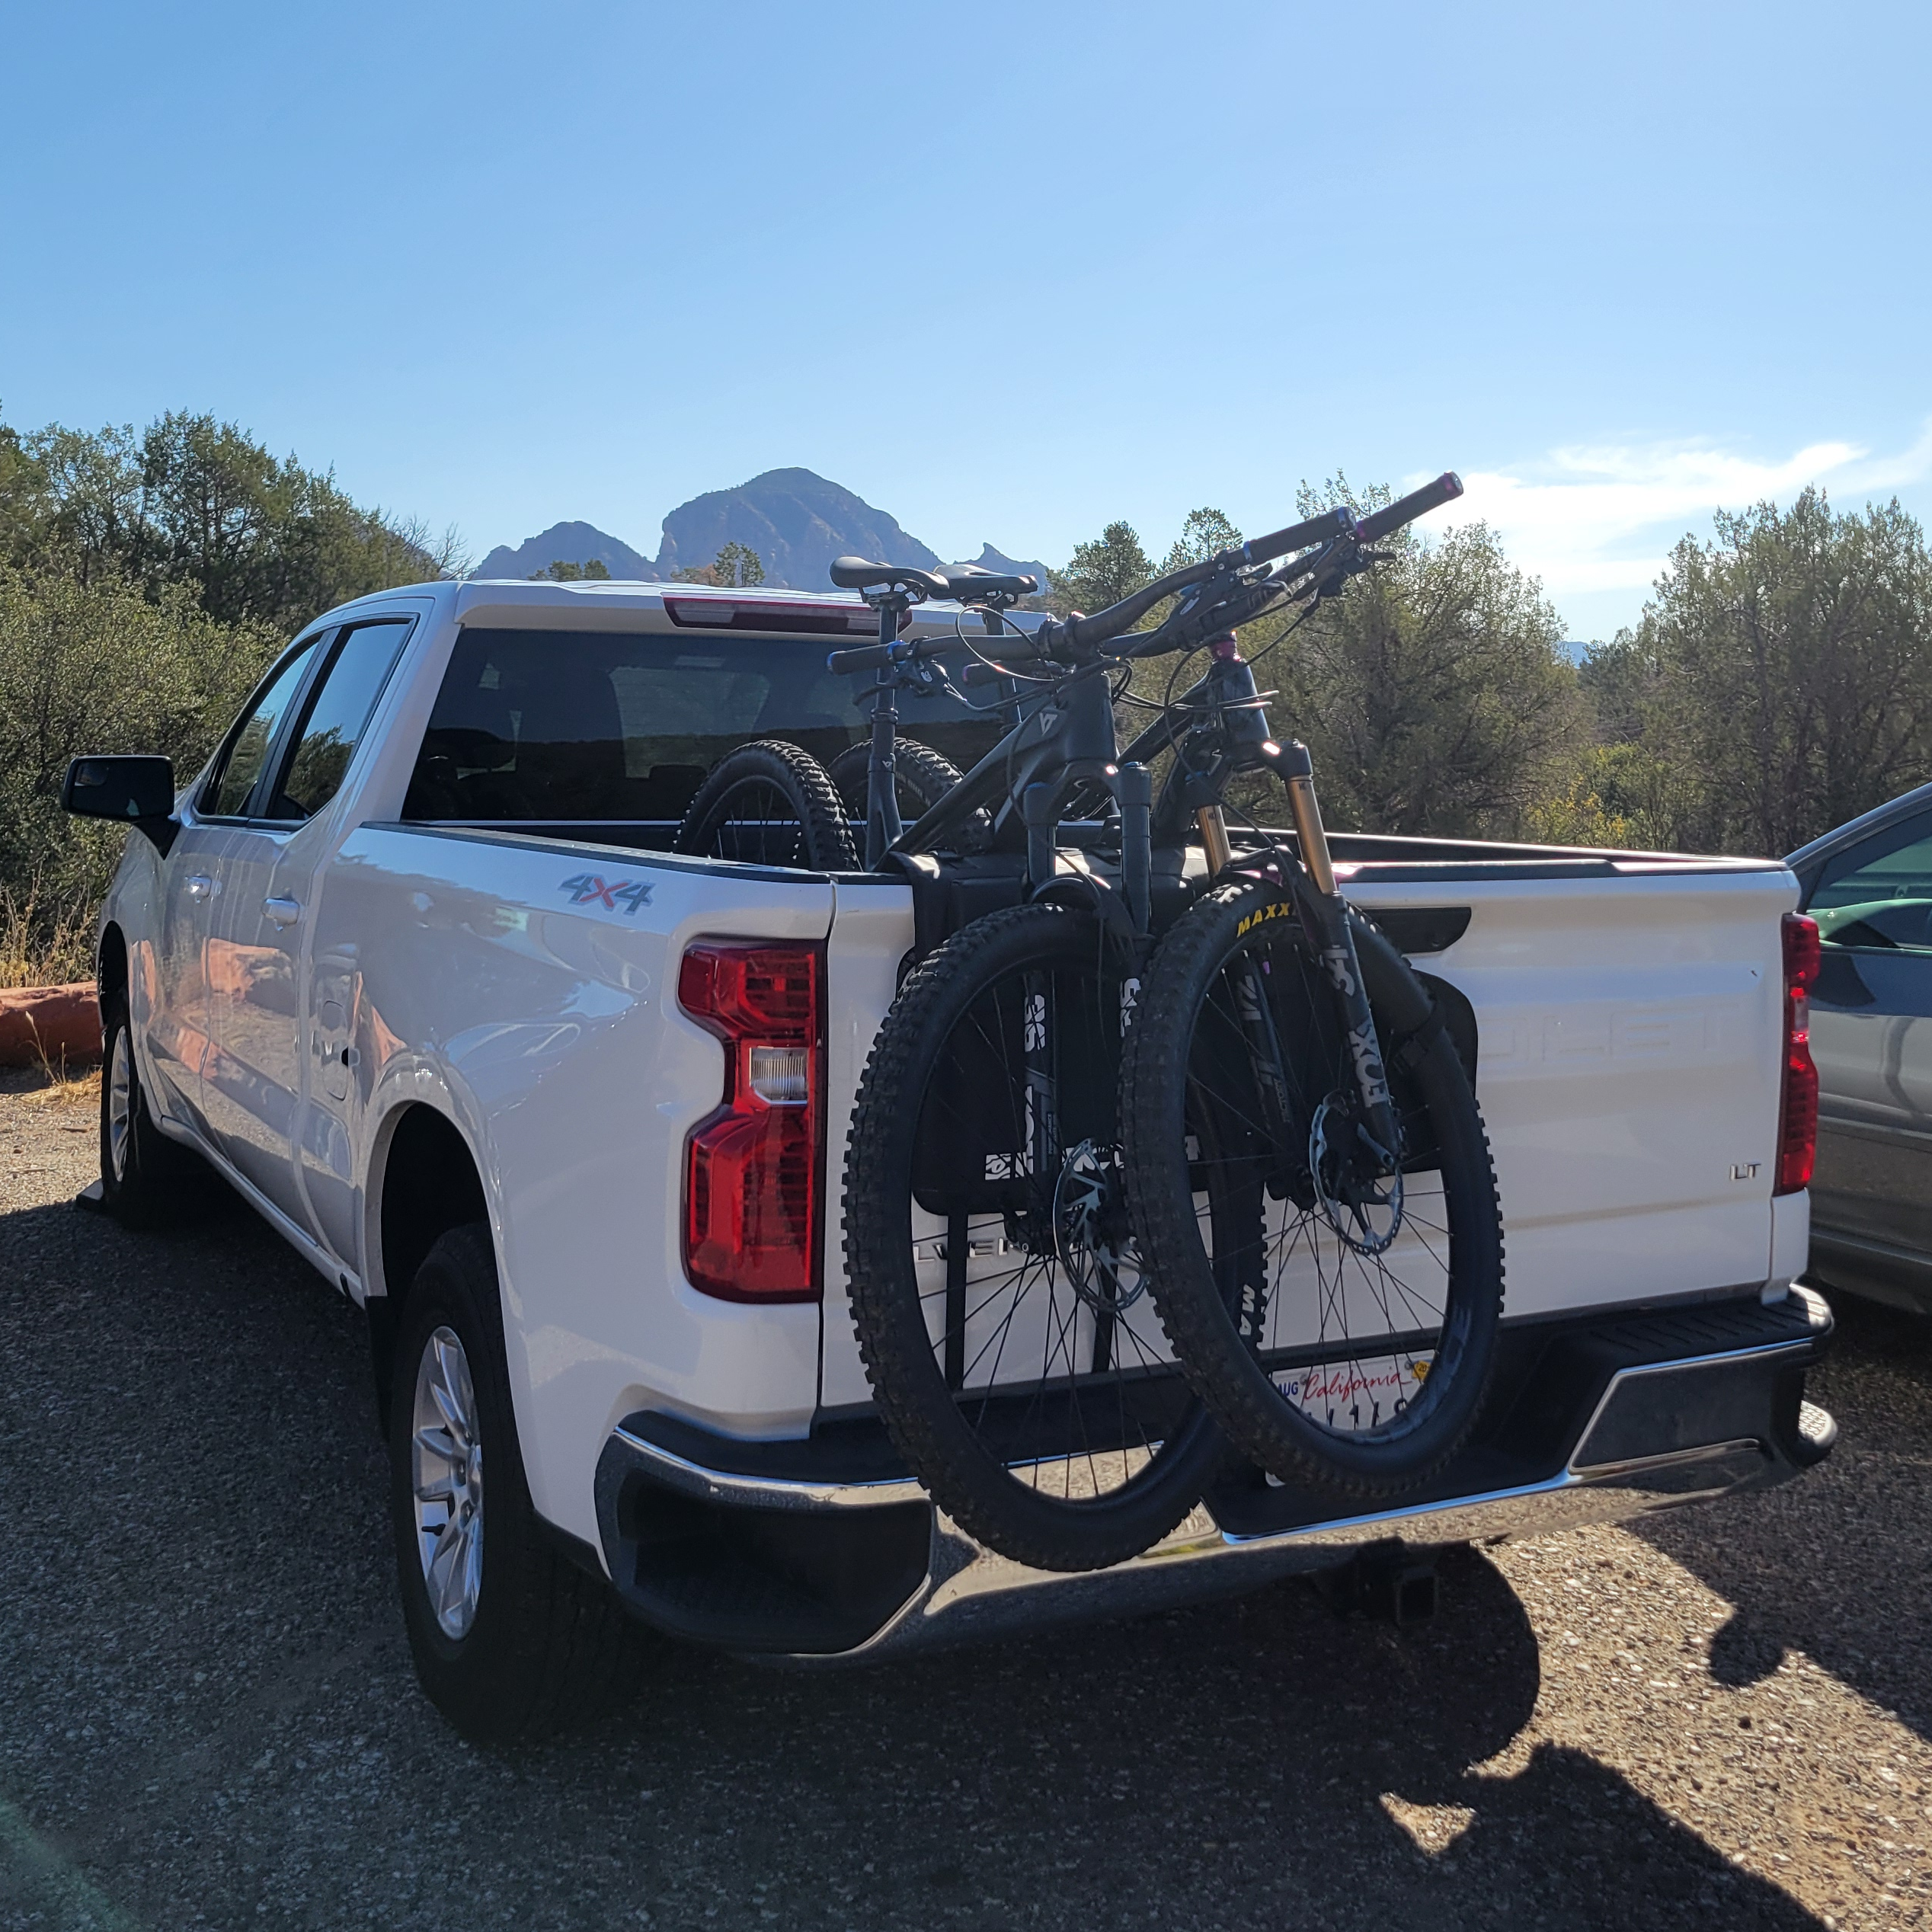
<p>Once the bikes are reassembled after the flight, we use a <strong>Race Face 2-bike tailgate pad</strong> that we packed in our general luggage. It’s small, lightweight, and makes it easy to transport bikes without rack rentals and constant disassembly and reassembly.</p>

<div style="display: flex; flex-wrap: wrap; gap: 1rem; justify-content: center;">
  <div style="flex: 1 1 45%; text-align: center;">
    <img src="/assets/images/posts/2025-07-25-air-travel-mtb/bike-cases.png" alt="bikes stored in Thule Round Trip cases" style="width: 100%; height: auto; border-radius: 8px;" />
    <p style="font-size: 0.9em; color: #666;">Bikes packed in the Thule Round Trip case</p>
  </div>

  <div style="flex: 1 1 45%; text-align: center;">
    <img src="/assets/images/posts/2025-07-25-air-travel-mtb/bikes-pad.png" alt="bikes on Race Face 2 bike tailgate pad with truck" style="width: 100%; height: auto; border-radius: 8px;" />
    <p style="font-size: 0.9em; color: #666;">Bikes assembled and on the Race Face tailgate pad</p>
  </div>
</div>

<p>If you are travelling to a country that has better transit and less availability of larger vehicles for rent, then you will likely find yourself travelling by train. Note that trains transport bikes <strong>significantly better</strong> when packed in their case, packing them as they would any other luggage. Many trains have dedicated space for assembled bikes, but the burdon of walking with your luggage, assembled bike, and packed-down bike case makes this option unfeasible. We have yet to do this ourselves, and will update this with more details when we have the chance to!</p>

<hr />

<h2 id="gear-storage">Gear Storage</h2>

<p>For our helmets, tools, and protective gear, we rely on the <a href="https://amzn.to/3Ujg5m2"><strong>Nanuk 965 Protective Case</strong></a>. It’s large enough to fit two full-face helmets, an additional pair of half-shell helmets, hydration packs, body armor, and more, all while staying under airline weight limits.</p>

<p>We opted for the foam option and installed custom cut ½” foam siding to prevent helmets from contacting the sides of the case.</p>

<p>It’s an expensive option, but we feel the ability to pack more than just a pair of full head helmets as a piece of your limited checked luggage is well worth the cost. Do note that like the bike bags, this case is considered oversize luggage and may take longer to check at some airports.</p>

<hr />

<h2 id="planning-your-trip">Planning Your Trip</h2>

<p>When it comes to planning, we focus on <strong>activities, not rigid itineraries</strong>. Weather, trail conditions, and even how you’re feeling after a big ride can be unpredictable.</p>

<p>Here’s how we approach it:</p>
<ul>
  <li>Research all the activities you’d like to do in advance.</li>
  <li>Each morning, decide what works best based on the weather and how you’re feeling.</li>
  <li>Plan for more activities than you have time for and prioritize your must-dos.</li>
</ul>

<p>This flexible approach allows us to get the most out of our trips without feeling stressed or overcommitted.</p>

<hr />

<h2 id="recovery-time">Recovery Time</h2>

<p>After a long day on the trails, there’s one thing we always prioritize: <strong>hot tubs</strong>. A good soak helps with recovery, eases sore muscles, and lets you relax after the ride. If you can find accommodations with a hot tub, it’s a worthwhile addition to your trip.</p>

<p>Always bring plenty of electrolytes with you. Pick up bottles of Gatorade once you’ve settled in, or bring some powdered options (LMNT, Gatorade) from home.</p>

<hr />

<h2 id="final-thoughts">Final Thoughts</h2>

<p>Traveling with bikes might seem complicated, but with the right gear and preparation, it becomes second nature. Whether you’re flying across the country or internationally, these guidelines will help ensure your trip starts and ends on a high note.</p>]]></content><author><name></name></author><category term="travel" /><category term="mtb" /><summary type="html"><![CDATA[Traveling with mountain bikes may sound daunting, but with a few tips and tricks, it is much easier than you may think. From packing your bike to finding the right transportation at your destination, this guide covers everything we’ve learned about flying with bikes.]]></summary></entry><entry><title type="html">Tortilla Soup</title><link href="https://packpedalplate.com/recipes/trail/tortilla-soup/" rel="alternate" type="text/html" title="Tortilla Soup" /><published>2025-07-22T17:00:00-04:00</published><updated>2025-07-22T17:00:00-04:00</updated><id>https://packpedalplate.com/recipes/trail/tortilla-soup</id><content type="html" xml:base="https://packpedalplate.com/recipes/trail/tortilla-soup/"><![CDATA[<p>After a long day on the trail, there’s nothing better than sitting down to a hot, hearty meal that feels like it took hours, but doesn’t take much effort at all. This Taco Soup is one of our favourites for cool nights at camp. It’s smoky, zesty, and packed with that Southwest flavour we never get tired of.</p>

<p>Made with dehydrated ingredients and pantry staples, it all comes together in one pot with just boiling water. Easy to prep at home, simple to make on trail, and seriously satisfying at the end of the day.</p>

<hr />

<h2 id="quick-stats">Quick Stats</h2>

<ul>
  <li>Prep Time: 10 minutes</li>
  <li>Trail Time: 15 minutes</li>
  <li>Fuel Use: Medium (simmer)</li>
  <li>Shelf Life: 6 months</li>
  <li>Water Requirements: 3 cups</li>
</ul>

<hr />

<h2 id="ingredients-2-servings">Ingredients (2 servings)</h2>

<p><strong>To Dehydrate:</strong></p>
<ul>
  <li>1 can chicken</li>
  <li>1 (15oz) can black beans</li>
  <li>1 (15oz) can fire-roasted tomatoes with green chiles</li>
  <li>1 small onion, sliced</li>
  <li>2 tbsp fresh cilantro</li>
  <li>1 jalapeno, sliced</li>
  <li><em>not recommended</em>: 1 cup frozen corn<sup id="fnref:1"><a href="#fn:1" class="footnote" rel="footnote" role="doc-noteref">1</a></sup></li>
</ul>

<p><strong>Store bought:</strong></p>
<ul>
  <li>1 cup <a href="https://amzn.to/46UILJq">freeze dried corn</a><sup id="fnref:1:1"><a href="#fn:1" class="footnote" rel="footnote" role="doc-noteref">1</a></sup></li>
</ul>

<p><strong>Seasoning:</strong></p>
<ul>
  <li>2 chicken bouillion cubes<sup id="fnref:2"><a href="#fn:2" class="footnote" rel="footnote" role="doc-noteref">2</a></sup></li>
  <li>1 tsp chili powder</li>
  <li>1/2 tsp garlic powder</li>
  <li>1/2 tsp ground cumin</li>
  <li>2 packets True Lime</li>
</ul>

<p><strong>Toppings:</strong></p>
<ul>
  <li>Tortilla strips, or lightly crushed chips</li>
</ul>

<hr />

<h2 id="instructions-for-at-home">Instructions for At Home</h2>

<ol>
  <li>
    <p><strong>Dehydrate the ingredients:</strong>
 Dehydrate the chicken, beans, and tomatoes, onion, cilantro, jalapeño, and optionally corn, until completely dry and brittle. Temperatures and time will vary per ingredient.</p>
  </li>
  <li>
    <p><strong>Make your spice kit:</strong>
 Combine bouillion cubes, chili powder, garlic powder, cumin, and True Lime in a small ziplock bag.</p>
  </li>
  <li>
    <p><strong>Pack your crunch:</strong>
 Pack tortilla chips or strips in a small ziplock bag.</p>
  </li>
  <li>
    <p><strong>Assemble the meal:</strong>
 Combine all dehydrated and freeze dried ingredients into a <a href="https://amzn.to/3GZIUki">medium sized mylar bag</a>. Nestle the spices and toppings bags inside. Optionally, add an oxygen absorbing packet. Press as much air out as possible, then seal the bag with a heat sealer.</p>
  </li>
</ol>

<hr />

<h2 id="instructions-for-preparation-on-the-trail">Instructions for Preparation on the Trail</h2>

<ol>
  <li>
    <p><strong>Add to pot:</strong>
 Add the dehydrated mix and spice packet into your camp pot. Add <strong>3 cups</strong> of water.</p>
  </li>
  <li>
    <p><strong>Cook:</strong>
 Bring to a boil, then lower heat and simmer, stirring occasionally. Cook until everything is tender, 10-15 minutes.</p>
  </li>
  <li>
    <p><strong>Serve:</strong>
Pour into bowls and top with crushed tortilla chips.</p>
  </li>
</ol>

<hr />

<h2 id="trail-tips">Trail Tips</h2>
<ul>
  <li>Skip the jalapeño if you’re sensitive to spice, or add a few dehydrated chili flakes for extra heat.</li>
  <li>Pack some shredded cheese or cotija on cooler days for a delicious topping.</li>
</ul>

<hr />

<h2 id="why-we-love-it">Why We Love It</h2>

<p>This Tortilla Soup brings bold, homey flavors to the backcountry without taking up much space or prep time. It’s protein-rich, packed with fiber, and the perfect way to warm up by the fire. Whether you’re deep in the backcountry or just out for an overnight, this meal is a morale booster you’ll look forward to all day.</p>

<hr />

<h2 id="notes">Notes</h2>

<div class="footnotes" role="doc-endnotes">
  <ol>
    <li id="fn:1">
      <p>We don’t recommend that you dehydrate corn at home. It doesn’t fully rehydrate, even after long (1hr+) soak times, and remains crunchy. Instead, we recommend it is one of the few items you buy freeze dried. <a href="#fnref:1" class="reversefootnote" role="doc-backlink">&#8617;</a> <a href="#fnref:1:1" class="reversefootnote" role="doc-backlink">&#8617;<sup>2</sup></a></p>
    </li>
    <li id="fn:2">
      <p>Vegetable bouillion cubes can be substituted for the chicken bouillion. <a href="#fnref:2" class="reversefootnote" role="doc-backlink">&#8617;</a></p>
    </li>
  </ol>
</div>]]></content><author><name></name></author><category term="recipes" /><category term="trail" /><summary type="html"><![CDATA[After a long day on the trail, there’s nothing better than sitting down to a hot, hearty meal that feels like it took hours, but doesn’t take much effort at all. This Taco Soup is one of our favourites for cool nights at camp. It’s smoky, zesty, and packed with that Southwest flavour we never get tired of.]]></summary></entry><entry><title type="html">Lumberjack Omlettes</title><link href="https://packpedalplate.com/recipes/camp/lumberjack-omlettes/" rel="alternate" type="text/html" title="Lumberjack Omlettes" /><published>2025-07-14T17:00:00-04:00</published><updated>2025-07-14T17:00:00-04:00</updated><id>https://packpedalplate.com/recipes/camp/lumberjack-omlettes</id><content type="html" xml:base="https://packpedalplate.com/recipes/camp/lumberjack-omlettes/"><![CDATA[<p>We have a habit of making steaks on the first night at a front country campsite. Its the perfect way to kick off the trip and enjoy the relaxation of the outdoors.</p>

<p>We always bring large enough steaks that we’ll have leftovers. Why? Because the second best meal of the trip is the following morning: lumberjack omelettes!</p>

<p>In this recipe, we use cooked steak from the previous night, precooked potatoes, peppers, onions, eggs, and cheese. We love this because you can be creative and add a huge variety of ingredients to this meal.</p>

<hr />

<h2 id="quick-stats">Quick Stats</h2>

<ul>
  <li>Prep Time: 20 minutes</li>
  <li>Cook Time: 30 minutes</li>
</ul>

<hr />

<h2 id="ingredients-2-servings">Ingredients (2 servings)</h2>

<ul>
  <li>Neutral Oil</li>
  <li>Steak leftovers</li>
  <li>2 Russet potatoes</li>
  <li>½ Bell pepper</li>
  <li>½ White onion</li>
  <li>2 eggs</li>
  <li>¼ cup Shredded cheese</li>
</ul>

<h2 id="equipment">Equipment</h2>
<ul>
  <li>Aluminum Foil</li>
  <li>Roasting Basket</li>
</ul>

<hr />

<h2 id="instructions-for-at-home">Instructions for At Home</h2>

<ol>
  <li>
    <p><strong>Precook the potatoes:</strong>
Cook the potatoes with your preferred cooking method. Baking and microwaving are both great options.</p>
  </li>
  <li>
    <p><strong>Cool and pack the potatoes:</strong>
Let the potatoes cool, then pack them in your cooler whole.</p>
  </li>
  <li>
    <p><strong>Pack your cheese:</strong>
Shred some cheese and pack it for topping</p>
  </li>
</ol>

<hr />

<h2 id="instructions-for-preparation-on-the-site">Instructions for Preparation on the Site</h2>

<ol>
  <li>
    <p><strong>Mise en place:</strong>
Dice your leftover steak, potatoes, and bell pepper. Finely chop your white onion.</p>
  </li>
  <li>
    <p><strong>Prepare tinfoil boats:</strong>
Take a long sheet of tinfoil and fold about 1 inch of each length towards the center. Raise each edge and pinch the corners together to make the walls of your boat. Place Prepare a second sheet to cover your boats.</p>
  </li>
  <li>
    <p><strong>Season and mix your meal:</strong>
Mix all diced ingredients with your oil, and season generously with salt and pepper to taste. This can be done in a bowl or in the tinfoil boats made in the previous step.</p>
  </li>
  <li>
    <p><strong>Fill your boats:</strong>
Generously oil the bottom of each boat. Add diced ingredients to the boats. Make a well in the center of each and crack an egg in.</p>
  </li>
  <li>
    <p><strong>Cover and cook:</strong>
Cover your boats with the extra sheet of tinfoil. Secure the boats with the top grate of your basket if it has one. Begin cooking over the fire, getting moderate heat. It should gently sizzle as it cooks. Continue until whites are nearly set.</p>
  </li>
  <li>
    <p><strong>Top with cheese:</strong>
When whites are nearly set, open and top with shredded cheese. Cover and return to fire, and cook until cheese is melted and egg is to your liking.</p>
  </li>
</ol>

<div style="display: flex; flex-wrap: wrap; gap: 1rem; justify-content: center;">
  <div style="flex: 1 1 45%; text-align: center;">
    <img src="/assets/images/posts/2025-07-14-lumberjack-omlettes/raw.jpg" alt="lumberjack omlette before cooking" style="width: 100%; height: auto; border-radius: 8px;" />
    <p style="font-size: 0.9em; color: #666;">Before cooking</p>
  </div>

  <div style="flex: 1 1 45%; text-align: center;">
    <img src="/assets/images/posts/2025-07-14-lumberjack-omlettes/cooked.jpg" alt="lumberjack omlette after cooking" style="width: 100%; height: auto; border-radius: 8px;" />
    <p style="font-size: 0.9em; color: #666;">After cooking</p>
  </div>
</div>

<hr />

<h2 id="substitution-tips">Substitution Tips</h2>

<ul>
  <li><strong>Steak Leftovers:</strong> Swap with sausage, bacon, or other leftover meat.</li>
  <li><strong>Bell Pepper:</strong> Use any color you like, and try zucchini or corn also for other good add-ins.</li>
  <li><strong>White Onion:</strong> Yellow or red onions work just as well.</li>
  <li><strong>Shredded Cheese:</strong> Any meltable cheese works: cheddar, Monterey Jack, or pepper jack.</li>
</ul>

<hr />

<h2 id="why-we-love-it">Why We Love It</h2>

<p>This is a fantastic way to use up leftovers and start your day with some great fuel. It is so much fun to enjoy a morning campfire and cook breakfast while you get ready for your busy day. We highly recommend trying this out!</p>]]></content><author><name></name></author><category term="recipes" /><category term="camp" /><summary type="html"><![CDATA[We have a habit of making steaks on the first night at a front country campsite. Its the perfect way to kick off the trip and enjoy the relaxation of the outdoors.]]></summary></entry><entry><title type="html">Peach Cobbler</title><link href="https://packpedalplate.com/recipes/trail/peach-cobbler/" rel="alternate" type="text/html" title="Peach Cobbler" /><published>2025-07-12T17:00:00-04:00</published><updated>2025-07-12T17:00:00-04:00</updated><id>https://packpedalplate.com/recipes/trail/peach-cobbler</id><content type="html" xml:base="https://packpedalplate.com/recipes/trail/peach-cobbler/"><![CDATA[<p>This peach cobbler is Jenny’s <em>#1 favorite backpacking dessert</em> — and for good reason. We buy fresh, in-season peaches locally and dehydrate them ourselves, which locks in all that sweet, summery flavor. After a long day of hiking, there’s nothing better than settling in by the fire and digging into a warm bowl of this cobbler. It’s kind of like apple crisp, but honestly, way better. Lightweight, easy to prep, and packed with nostalgic comfort, this recipe is a must-have for your backcountry meal rotation.</p>

<hr />

<h2 id="quick-stats">Quick Stats</h2>

<ul>
  <li>Prep Time: 15 minutes</li>
  <li>Trail Time: 10 minutes</li>
  <li>Fuel Use: Medium (simmer)</li>
  <li>Shelf Life: 6 months</li>
  <li>Water Requirements: 1 cup</li>
</ul>

<hr />

<h2 id="ingredients-2-servings">Ingredients (2 servings)</h2>

<p><strong>Filling:</strong></p>

<ul>
  <li>1 cup dried peach slices</li>
  <li>1/4 tsp citric acid</li>
  <li>3 tsp sugar</li>
  <li>½ tsp lemon zest</li>
</ul>

<p><strong>Topping:</strong></p>

<ul>
  <li>5 tbsp oats</li>
  <li>4 tbsp pancake mix</li>
  <li>¼ tsp cinnamon</li>
  <li>2 tbsp brown sugar</li>
</ul>

<p><strong>Extras:</strong></p>

<ul>
  <li>2 tbsp ghee</li>
</ul>

<hr />

<h2 id="instructions-for-at-home">Instructions for At Home</h2>

<ol>
  <li>
    <p><strong>Prepare the Filling:</strong><br />
In a small plastic bag, combine the dried peach slices, sugar, and lemon zest, and citric acid. Vacuum seal this in a small bag.</p>
  </li>
  <li>
    <p><strong>Prepare the Dry Topping Mix:</strong><br />
In a separate medium sized bag, mix oats, pancake mix, cinnamon, and brown sugar.</p>
  </li>
  <li>
    <p><strong>Package:</strong> 
Place the peach mixture bag inside the medium bag containing the dry topping mixture.</p>
  </li>
</ol>

<hr />

<h2 id="instructions-for-preparation-on-the-trail">Instructions for Preparation on the Trail</h2>

<ol>
  <li>
    <p><strong>Rehydrate the Filling:</strong><br />
In a pot, combine the filling (dried peaches mixture) with about 1 cup of water. Warm over low heat for 10 minutes, stirring occasionally. Avoid boiling, just let the peaches soften and absorb the water.</p>
  </li>
  <li>
    <p><strong>Prepare the Topping:</strong><br />
While the filling warms, remove from the pot into a bowl and cover. In the pot that you rehydrated the peaches in, melt the butter and mix the in the dry topping (oat mixture) until crumbly. This should be quick since the pot will still be hot from rehydrating the peaches.</p>
  </li>
  <li>
    <p><strong>Assemble &amp; Warm:</strong><br />
Pour the peach mixture back into the pot with the oat mixture. Gently stir a few times to saturate the oat mixture. Cover and let it saturate for a few minutes until everything is softened.</p>
  </li>
  <li>
    <p><strong>Enjoy:</strong><br />
Serve warm for a delicious, comforting trail dessert!</p>
  </li>
</ol>

<div style="display: flex; flex-wrap: wrap; gap: 1rem; justify-content: center;">

  <div style="flex: 1 1 45%; text-align: center;">
    <img src="/assets/images/posts/2025-07-12-peach-cobbler/peach-cobbler.jpg" alt="peach cobbler" style="width: 50%; height: auto; border-radius: 8px;" />
  </div>

</div>

<hr />

<h2 id="substitution-tips">Substitution Tips</h2>

<ul>
  <li><strong>Fruit:</strong> Swap dried peaches for dried apples, pears, or mixed berries for variety.</li>
  <li><strong>Topping:</strong> Use gluten-free pancake mix and oats if you need a gluten-free option.</li>
  <li><strong>Sweetener:</strong> Substitute brown sugar with coconut sugar or maple sugar for a different flavor profile.</li>
</ul>

<hr />

<h2 id="why-we-love-it">Why We Love It</h2>

<p>This Dehydrated Peach Cobbler is a dessert favorite because it’s easy to prepare and brings a taste of home to the wilderness. The combination of sweet, tangy peaches and a buttery cinnamon oat topping is the perfect finish to any outdoor adventure. Plus, the use of dehydrated ingredients means minimal packing space with maximum flavor.</p>]]></content><author><name></name></author><category term="recipes" /><category term="trail" /><summary type="html"><![CDATA[This peach cobbler is Jenny’s #1 favorite backpacking dessert — and for good reason. We buy fresh, in-season peaches locally and dehydrate them ourselves, which locks in all that sweet, summery flavor. After a long day of hiking, there’s nothing better than settling in by the fire and digging into a warm bowl of this cobbler. It’s kind of like apple crisp, but honestly, way better. Lightweight, easy to prep, and packed with nostalgic comfort, this recipe is a must-have for your backcountry meal rotation.]]></summary></entry></feed>